This peach butter cake is what happens when peak-season peaches meet a little too much impatience. There’s a particular kind of joy that only ripe peaches can bring — the kind where you bite into one over the sink because you simply can’t wait to reach a plate. I had a bowlful sitting on my counter, slightly too ripe to save for another day, and instead of turning them into jam or eating them one by one, I decided they deserved a cake of their own.
There’s a particular kind of heartbreak that only a baker understands — you spend an entire evening in the kitchen, the whole house smells like butter and vanilla, and two days later, the same cake that made everyone go quiet with the first bite has turned dry at the edges. Or the cookies that were crisp and buttery on day one go soft and sad by day three. Or worse — the bread you were so proud of has a spot of mould before the week is even out.
This Red Velvet Marble Cake doesn’t ask to be the centre of attention, and then quietly becomes exactly that. There’s something about it that makes people pause before cutting in — maybe it’s the swirl, maybe it’s the simplicity of it sitting there in its bundt shape, waiting.
I baked this for the first time on a Valentine’s Day — not because I’m someone who plans elaborate things for the fourteenth of February, but because I wanted something on the table that looked like effort without actually demanding a whole day in the kitchen. Red velvet has always felt a little indulgent to me, a little dressed-up, and pairing it with a simple vanilla pound cake batter felt like the right kind of balance — rich, but not over the top.
This was supposed to be a simple, big vanilla bundt cake — one cake, enough for everyone.
And when I turned it out of the pan, a few patches of the top stuck and came away. Not a disaster, not broken — just not picture-perfect. And I think that’s the exact moment a lot of us decide a bake has “gone wrong.”
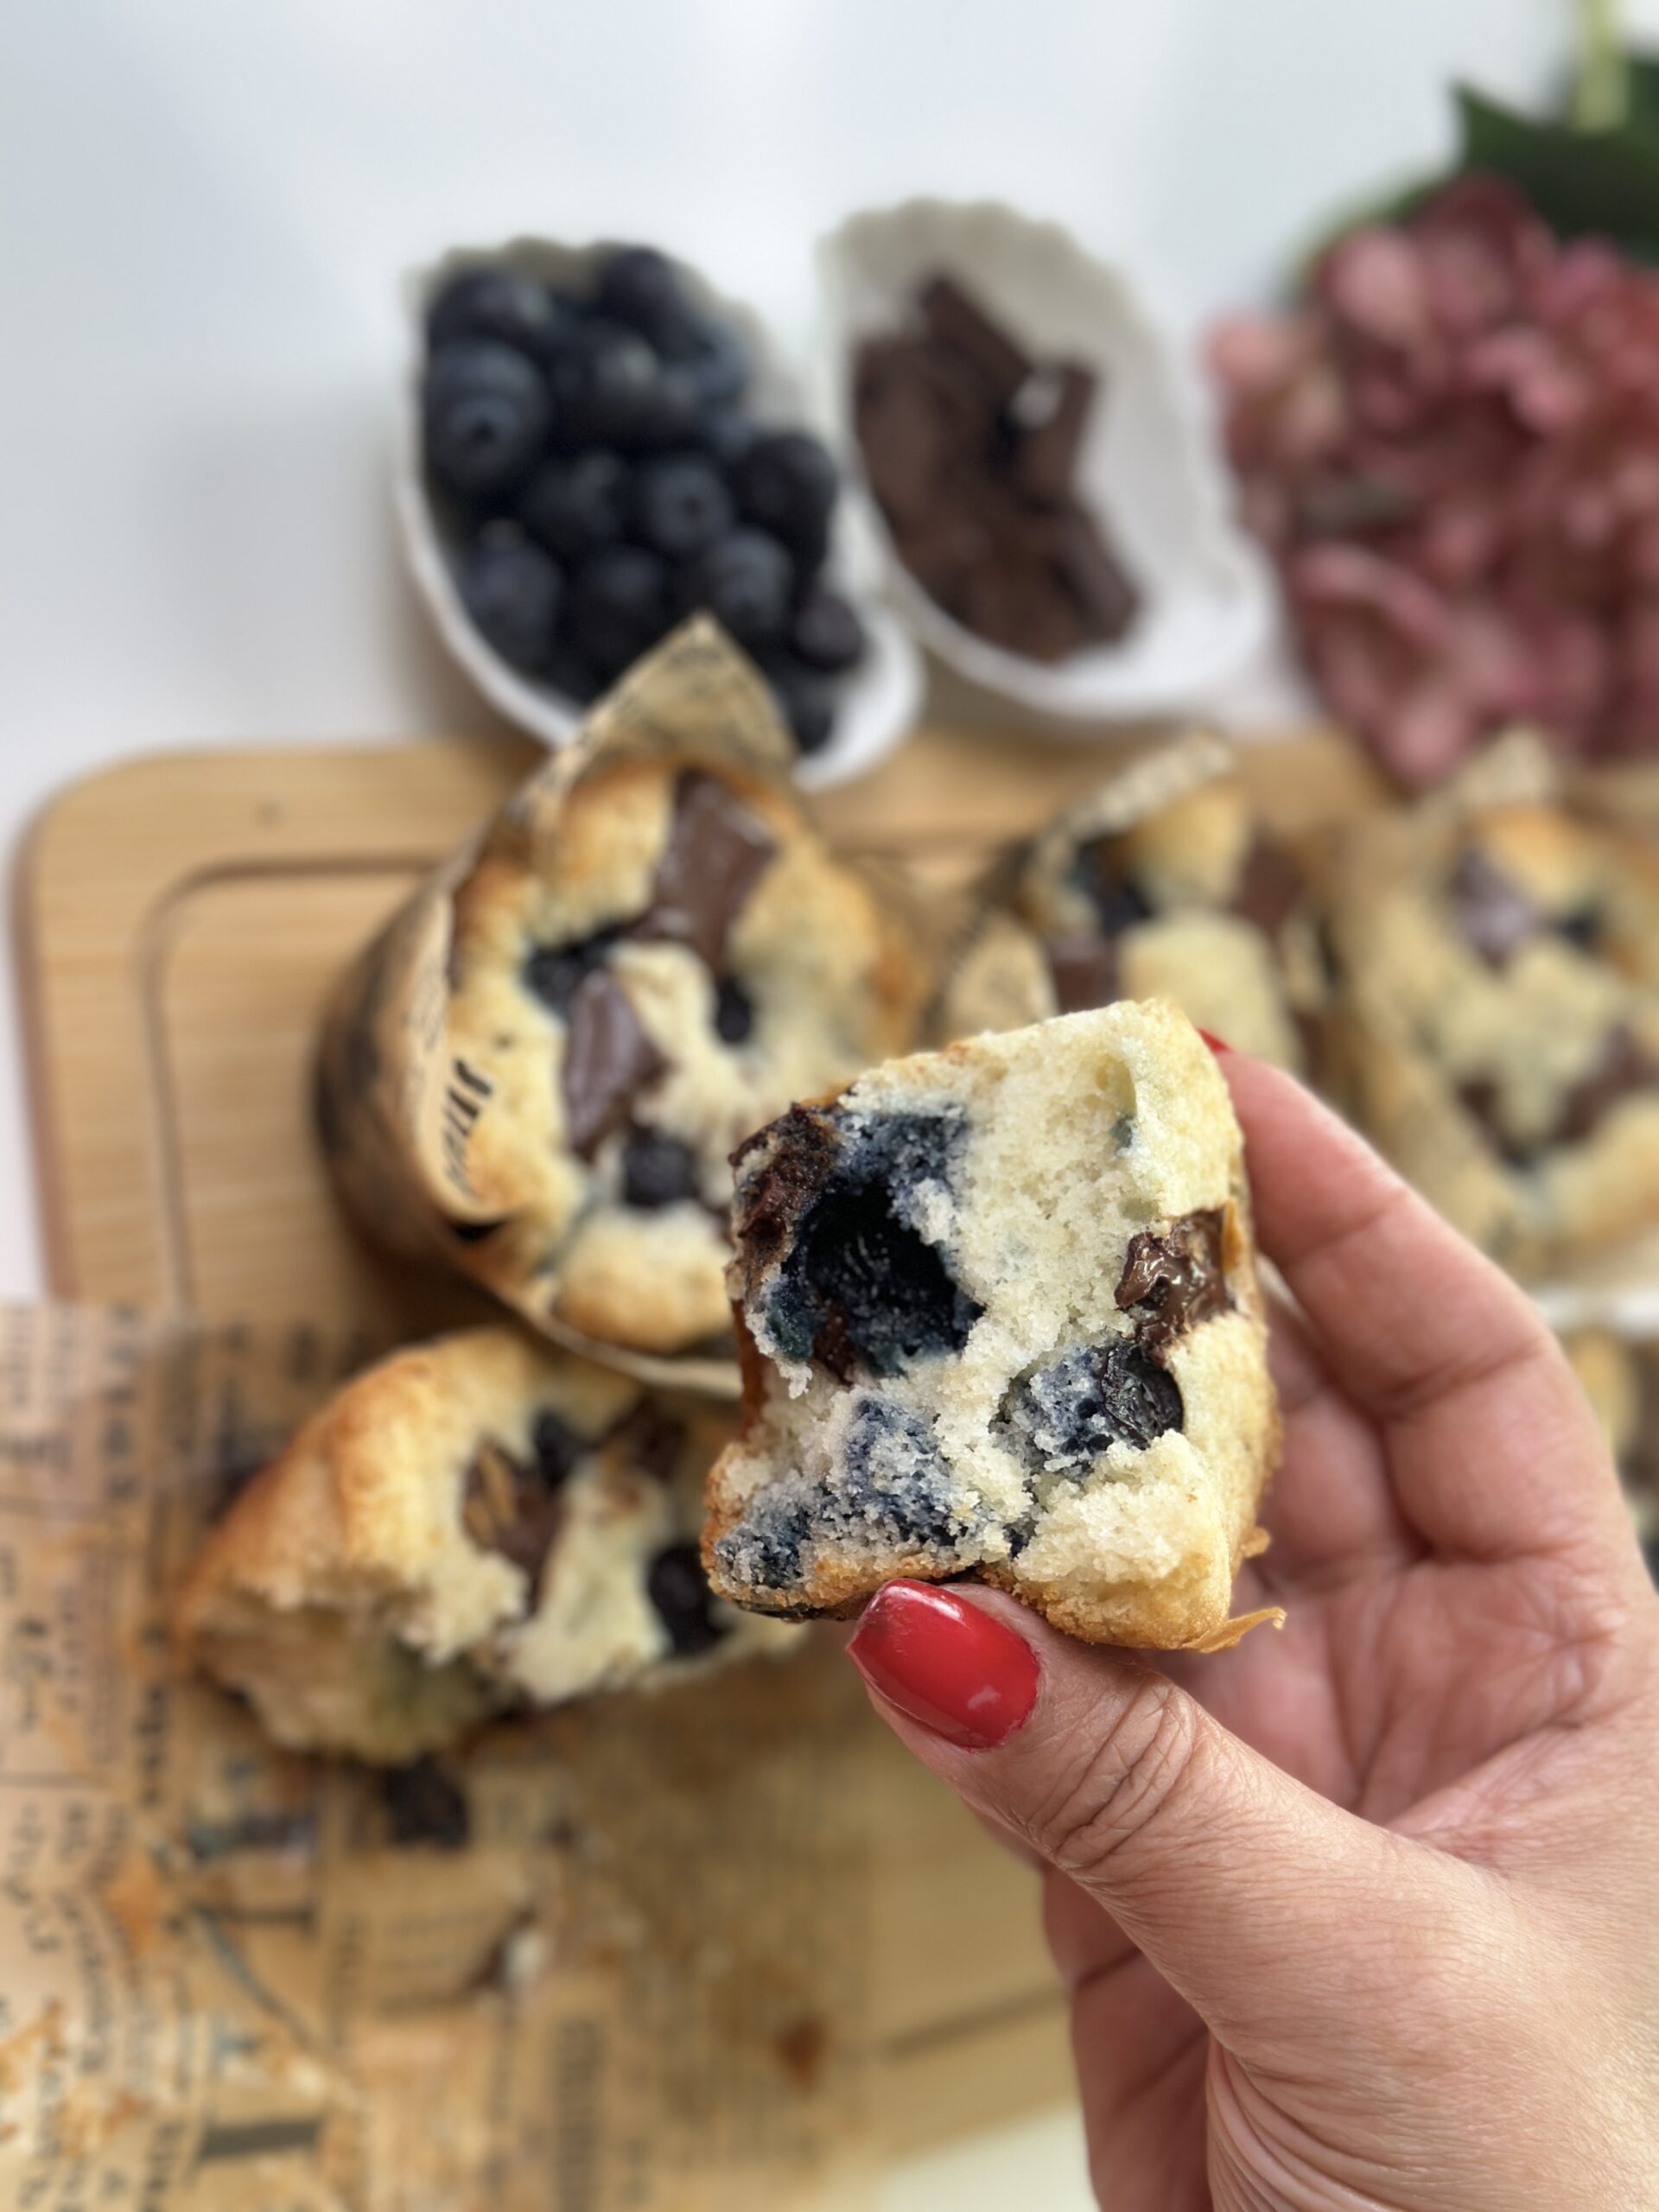
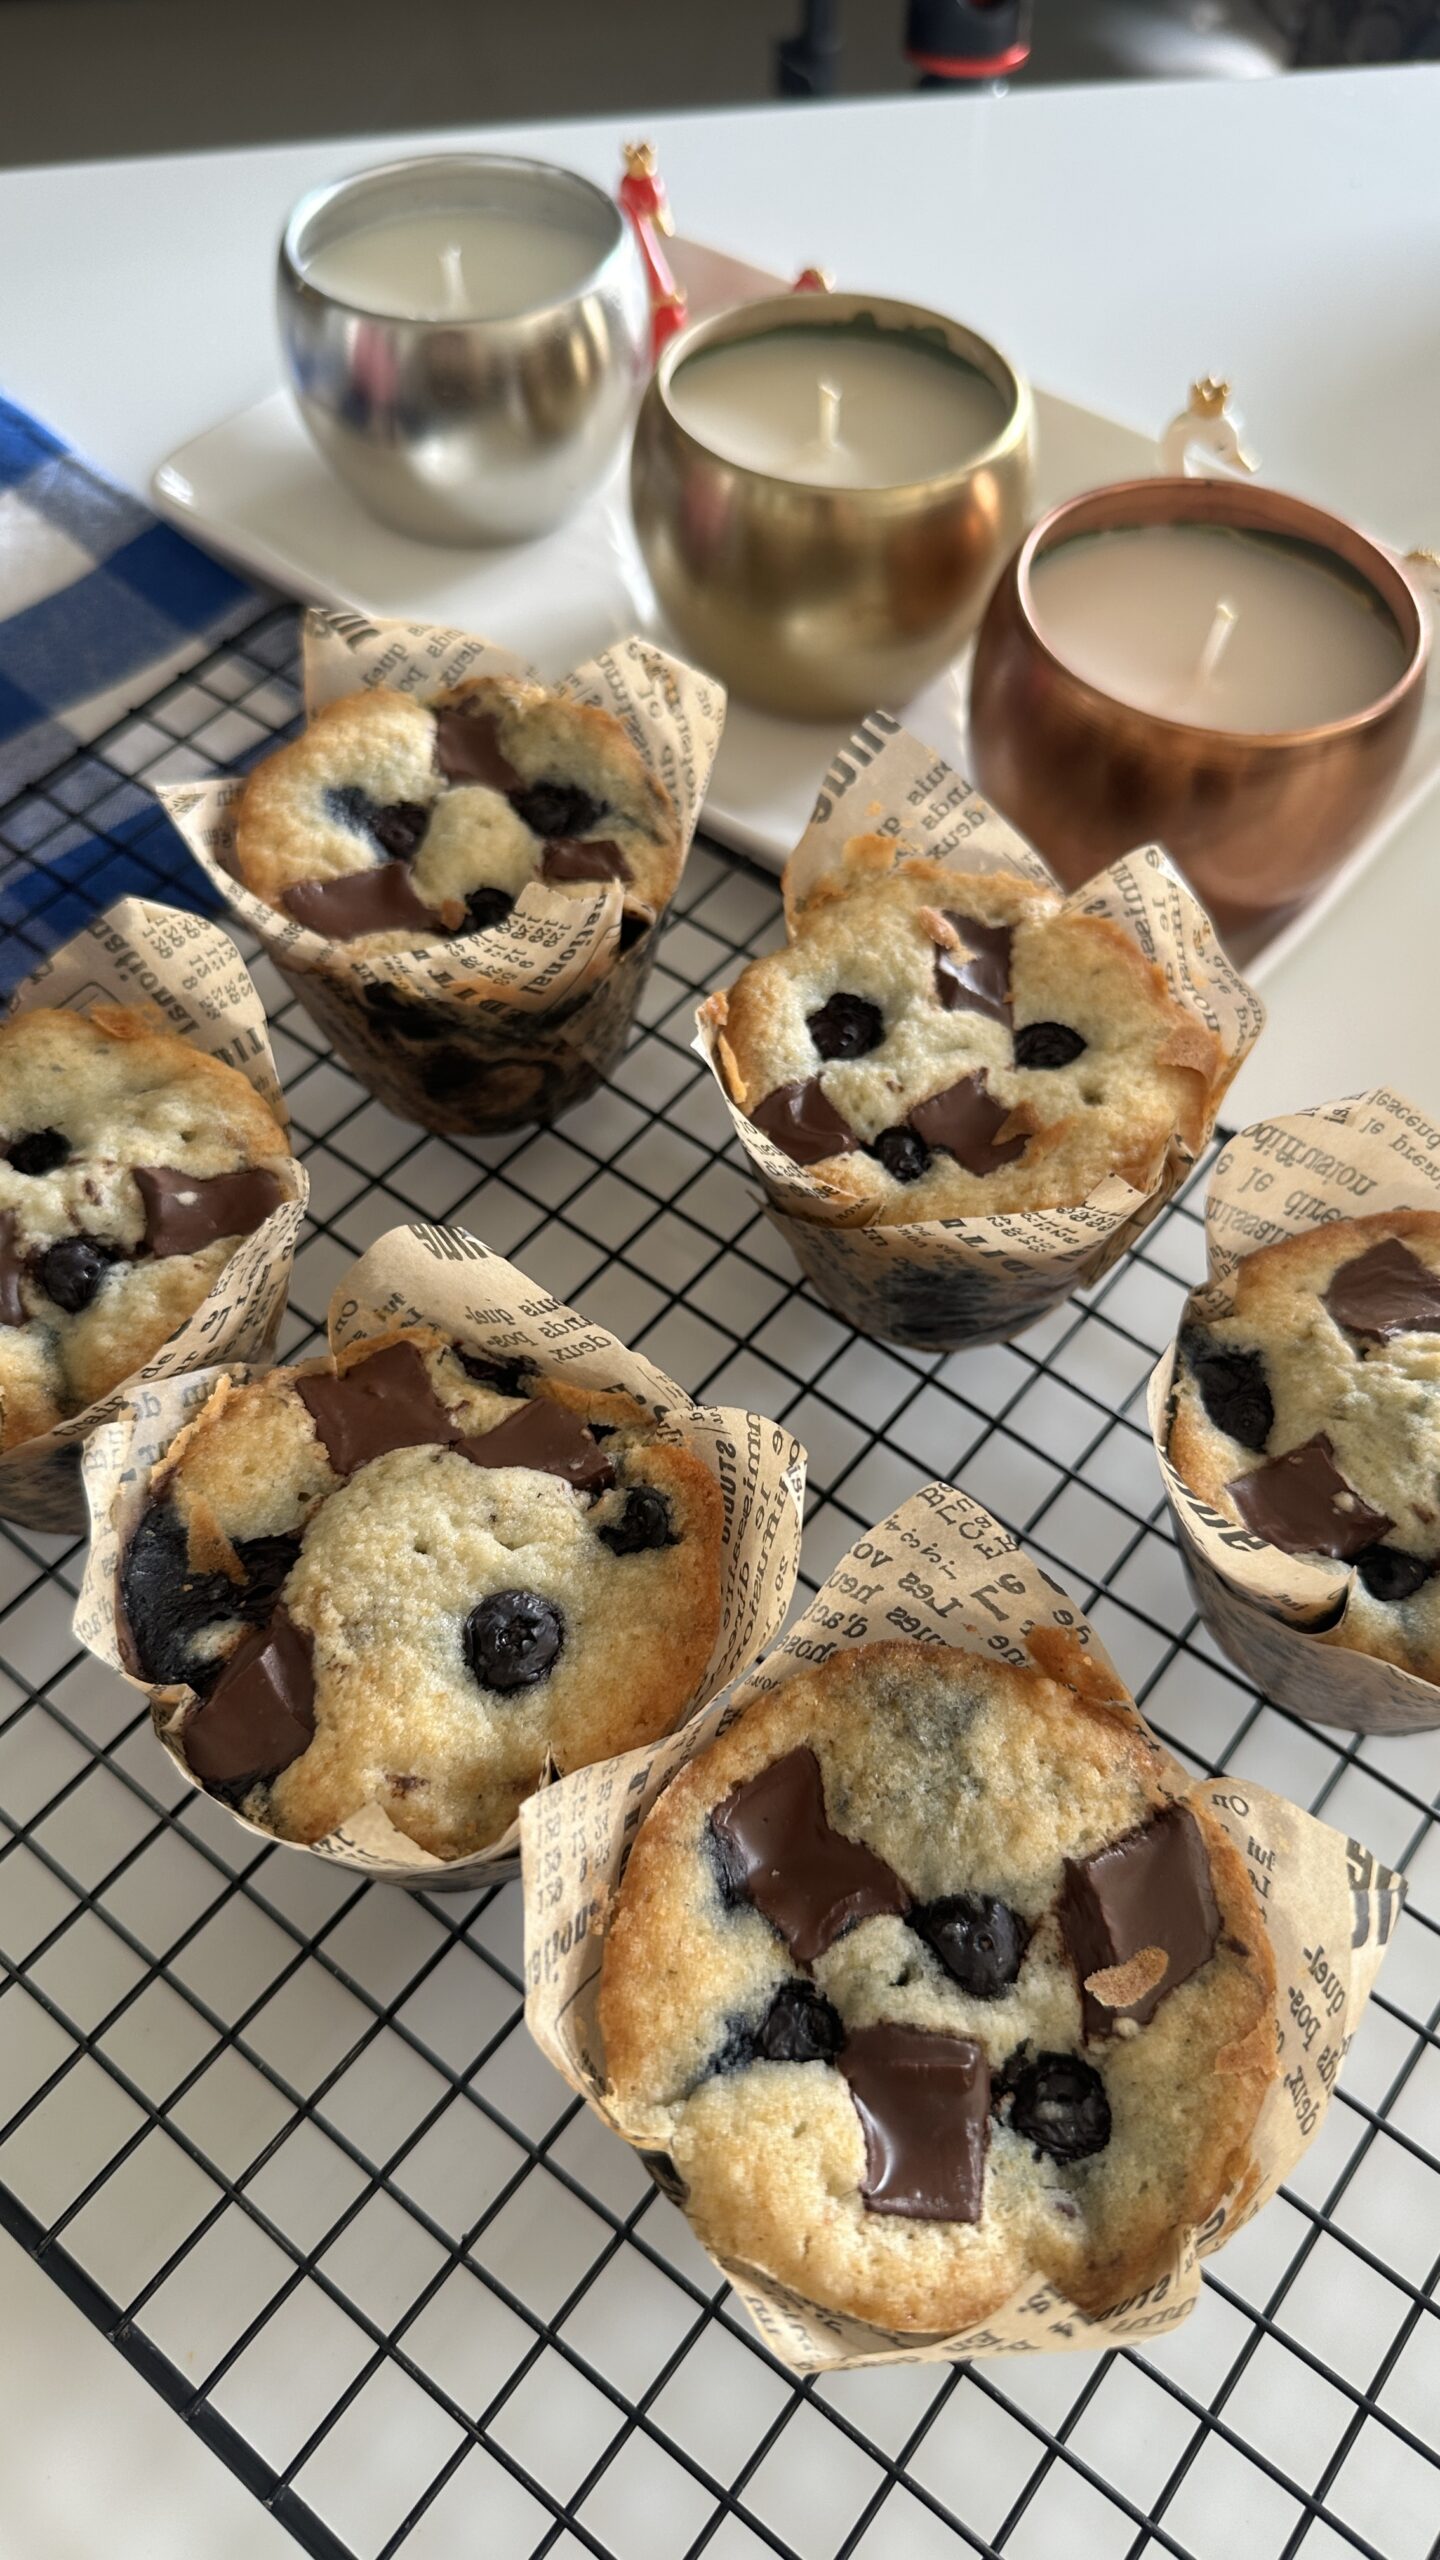
Blueberries and chocolate in one muffin — I genuinely do not understand why this combination is not talked about more. The tartness of the blueberries cuts right through the richness of the chocolate, and what you get is something so perfectly balanced it is difficult to stop at one.
These muffins are soft, moist, and fluffy — the kind of bake that makes your whole kitchen smell incredible. And they come together with very simple, everyday ingredients. No fancy techniques, no complicated equipment. Just good baking and one step you absolutely cannot skip — creaming the butter and sugar properly until it is pale, fluffy, and cloud-like. Everything else follows beautifully from there.
I have made these many times now and they never disappoint. Whether you are baking for your family on a weekend morning or looking for something impressive to take to a gathering, these blueberry chocolate muffins will always deliver.
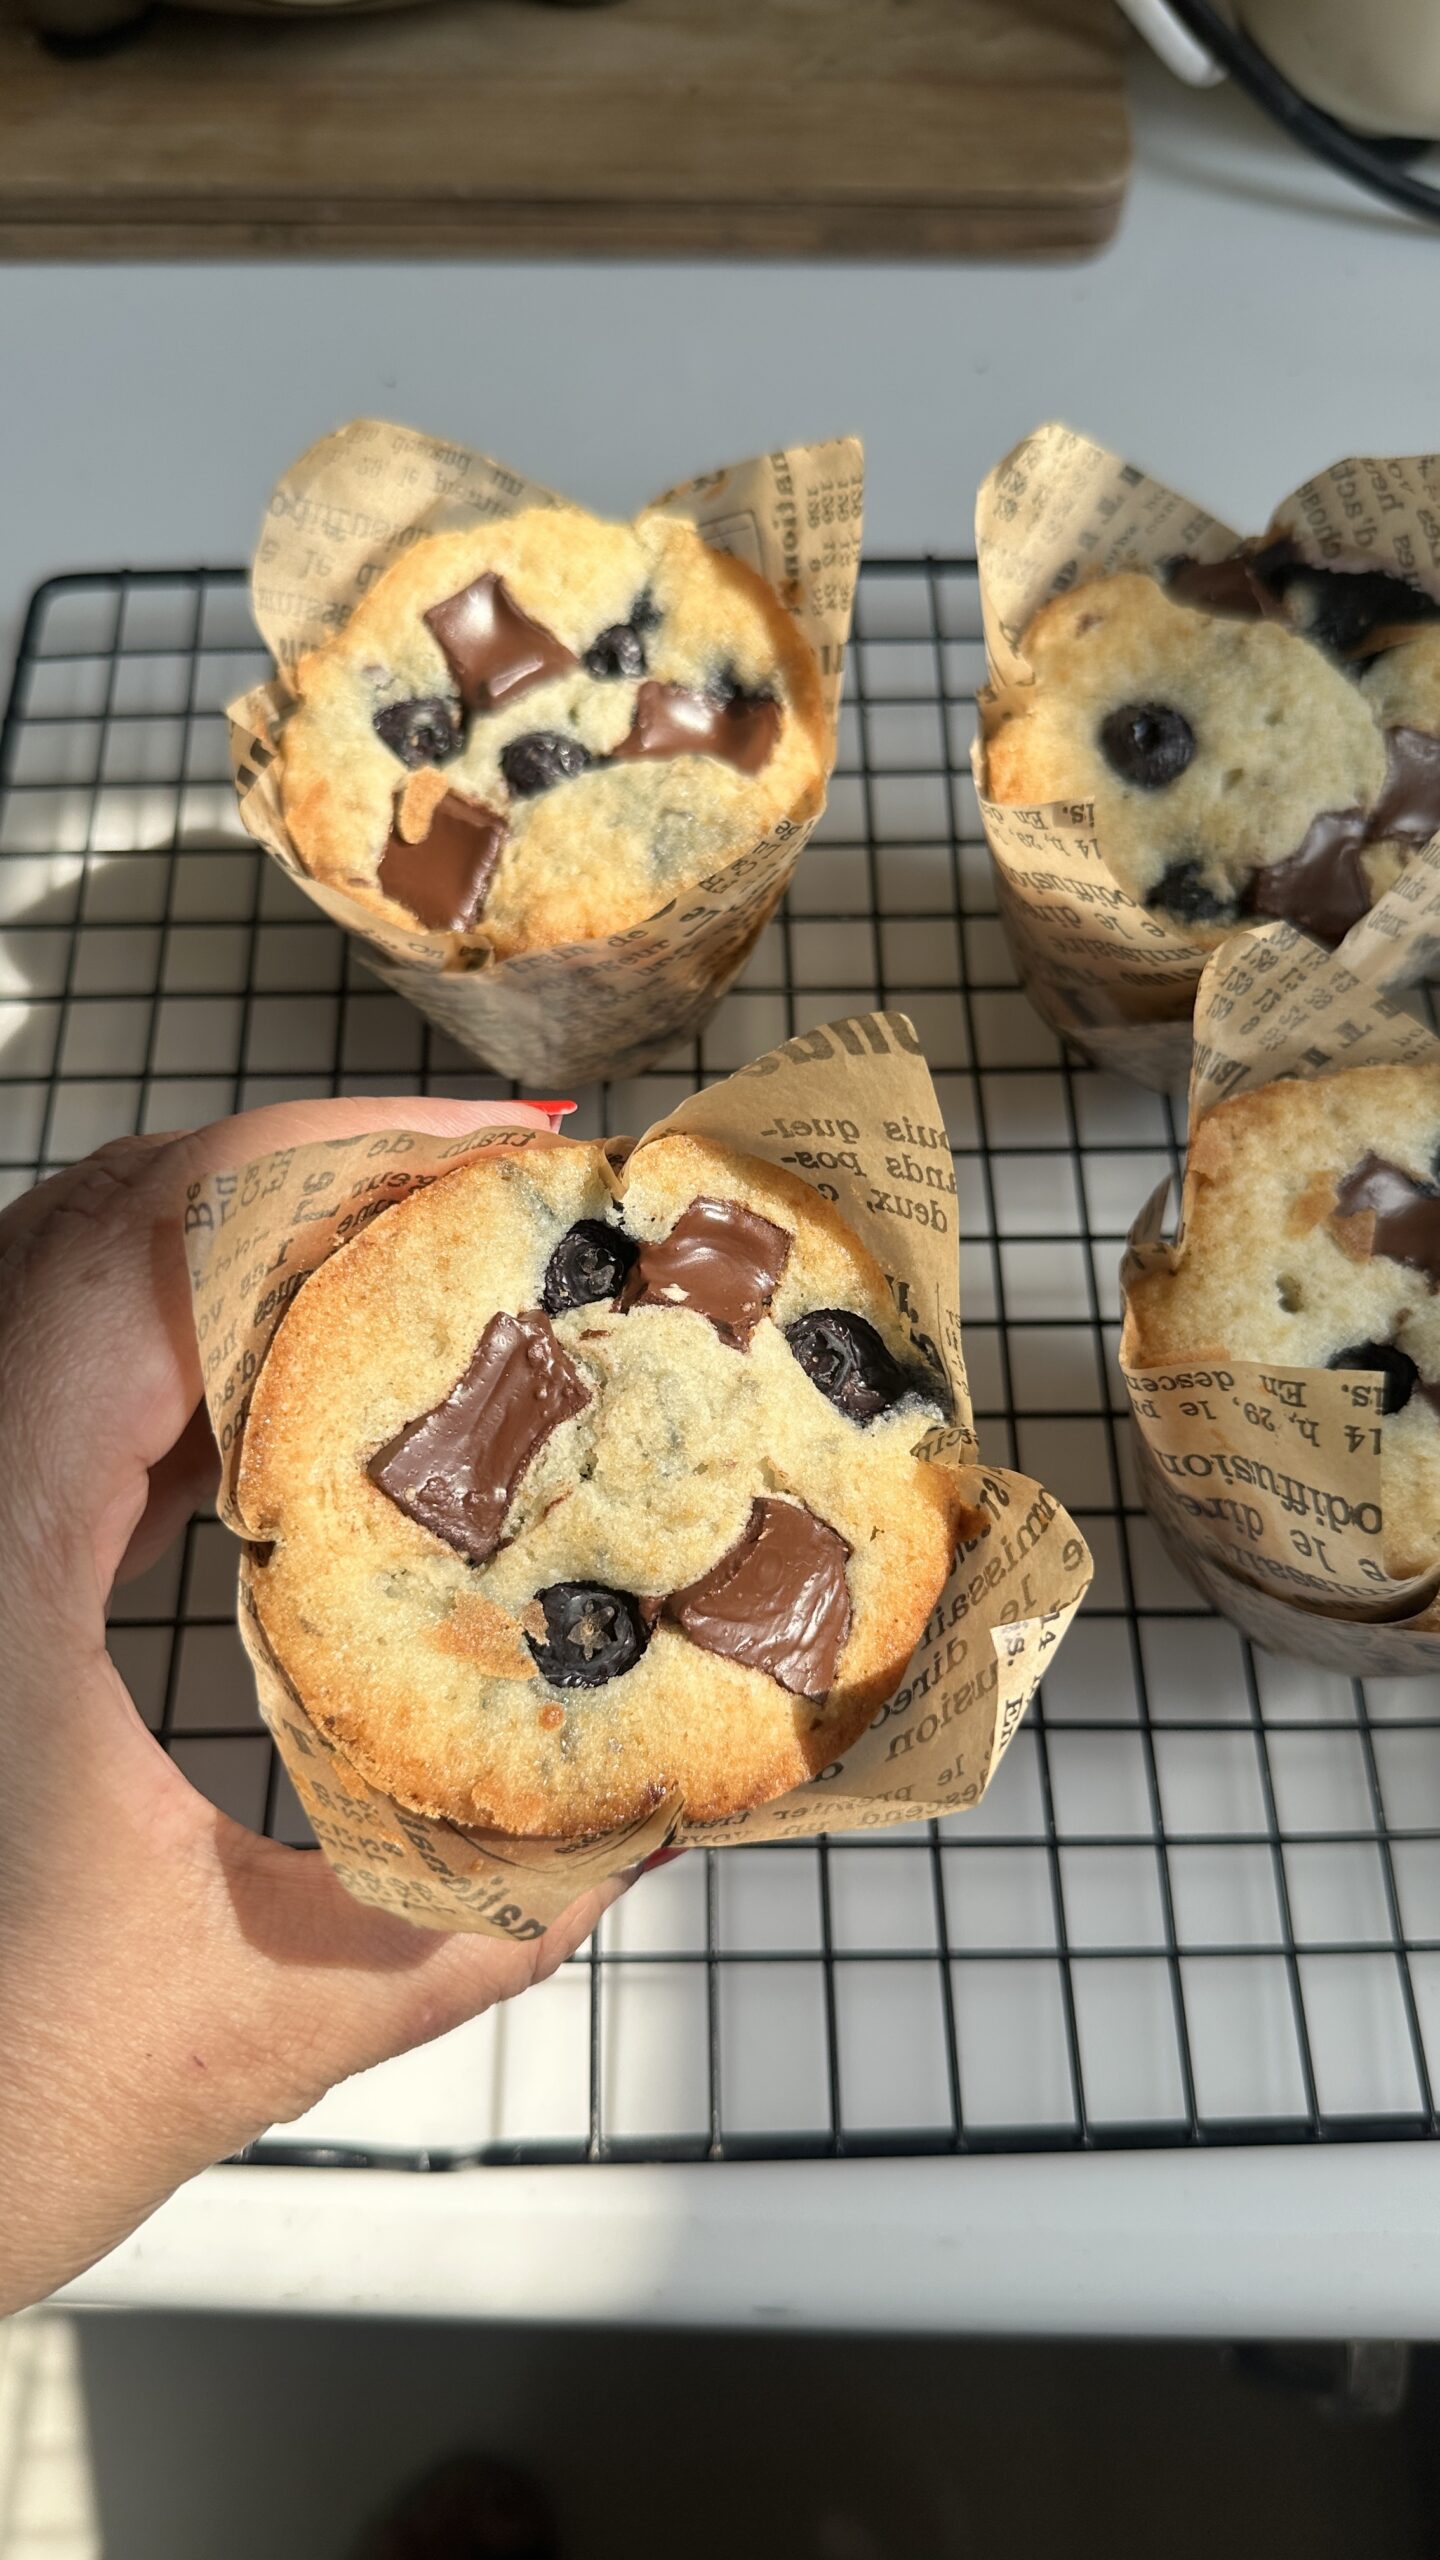
Look at that soft, blueberry and chocolate-packed centre — Bake with Deepali
Why You Will Love This Recipe
These muffins are everything you want in a bake — simple ingredients, straightforward method, and results that look and taste like they came from a professional bakery. The blueberries bring a natural tartness that cuts through the richness of the chocolate beautifully. And with chocolate chunks pressed both inside and on top, every single bite has a melty chocolate moment.
This is also a very forgiving recipe. As long as you do not overmix once the flour goes in, you will get a beautiful soft crumb every single time.
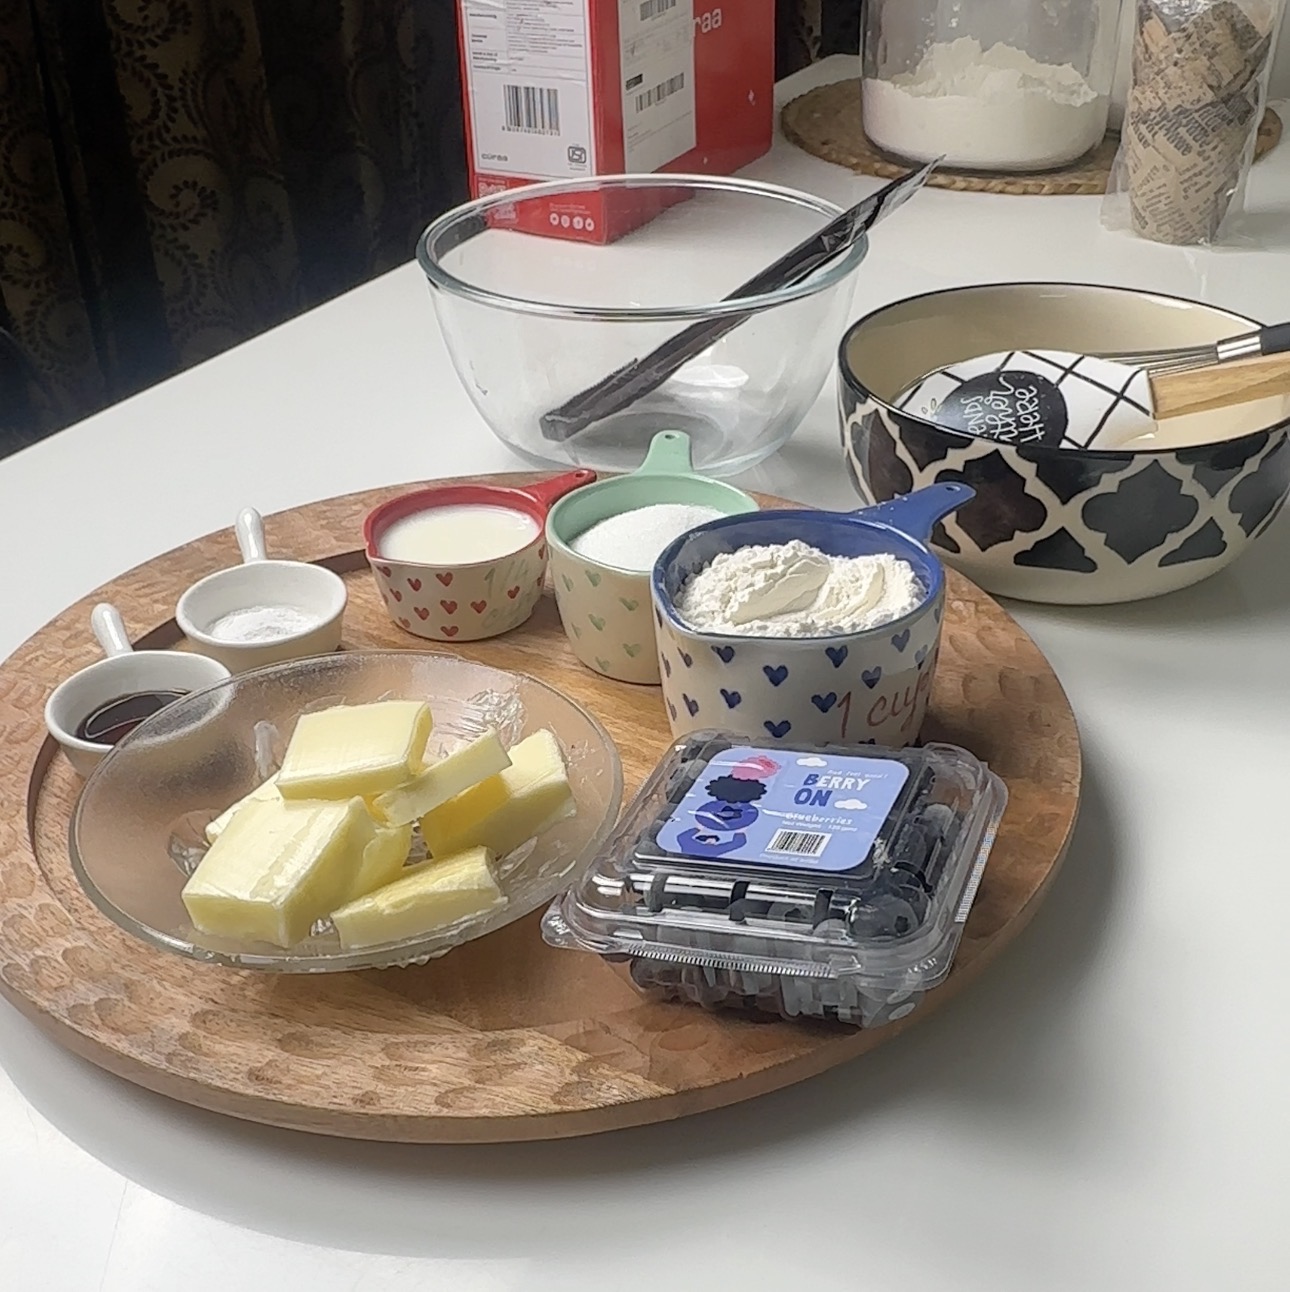
Everything you need for these beautiful Blueberry Chocolate Muffins — Bake with Deepali
Fresh Blueberries
Always use fresh blueberries in this recipe. They hold their shape better during baking and give you those beautiful blueberry bursts inside the muffin. Make sure they are completely dry before going into the batter — any excess water will affect the texture.
Cake Flour
Please use cake flour here and not all-purpose flour. Cake flour has a lower protein content which means less gluten development — and that is exactly what gives these muffins their soft, tender, bakery-style crumb. All-purpose flour will give you a denser, tougher result.
Compound Chocolate
Cut your chocolate into rough, uneven chunks. This is intentional — the smaller pieces melt completely into the batter and the bigger ones stay as little pockets of chocolate. That contrast is what makes these muffins so special.
Softened Butter
Your butter must be at room temperature — softened, not melted. Press your finger in and it should leave an indent easily. Cold butter will not cream properly and will affect the entire texture of your muffin.
Egg and Milk
Both should also be at room temperature. A cold egg can cause the batter to look curdled and split. Take everything out of the fridge at least 30 to 45 minutes before you start.
Tips and Tricks
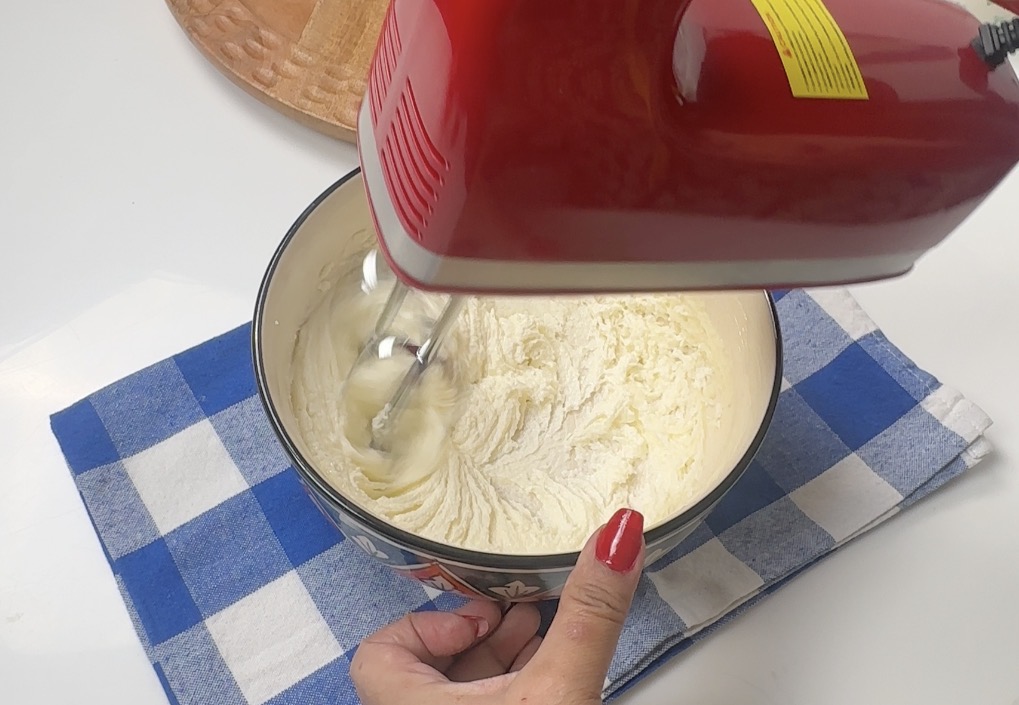
This is what properly creamed butter looks like — pale, fluffy, and cloud-like — Bake with Deepali
Do not rush the creaming step
This is the most important step in this entire recipe. Beat your butter and sugar on medium speed for a full 3 to 4 minutes until the mixture is pale, fluffy, and almost white. This is where you build the texture and lightness of your muffin. Do not skip this or cut it short.
Put the mixer away once flour goes in
From the moment your first batch of flour goes in, switch to a spatula. Overmixing develops gluten and gives you tough, dense muffins. Fold slowly and stop the moment you no longer see dry flour. A few small lumps are completely fine.
Dry your blueberries completely
After washing, spread your blueberries on a clean kitchen towel and pat them dry. Any moisture on the berries will create soggy pockets in your muffins.
Extra chocolate chunks on top are non-negotiable
Pressing 2 to 3 extra chocolate chunks into the top of each muffin before baking gives you those beautiful visible chocolate pools on the surface once they come out of the oven. This is what makes them look bakery-level.
Test with a toothpick carefully
When testing for doneness, insert the toothpick into the centre of the muffin but avoid going through a chocolate chunk — it will come out wet even when the muffin is perfectly baked.
How to Make Blueberry Chocolate Muffins — Step by Step
Step 1 — Preheat your oven
Before anything else, preheat your oven to 180 degrees C or 355 degrees F. Always preheat first so your oven is at the right temperature when your batter is ready.
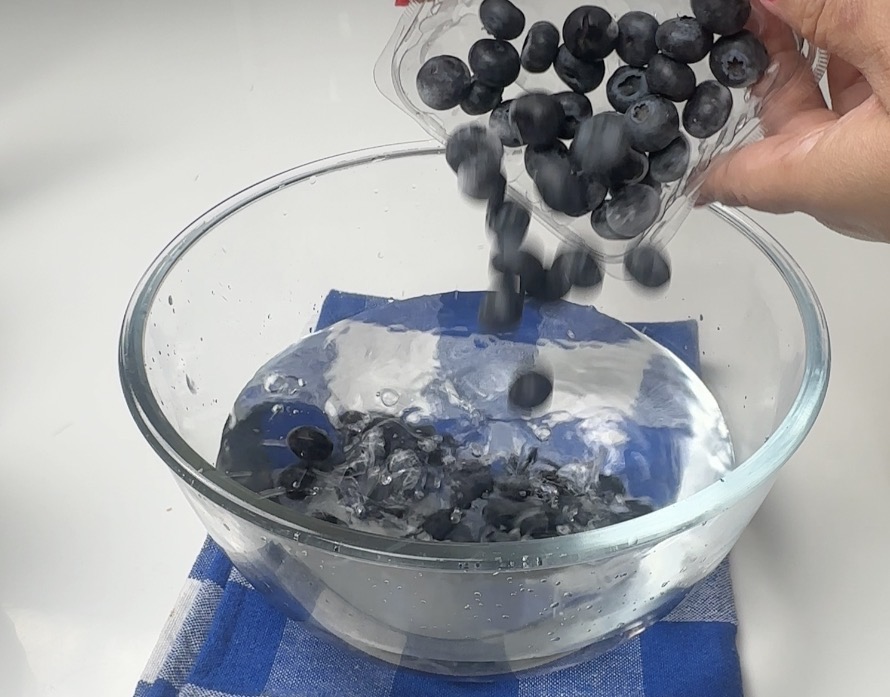
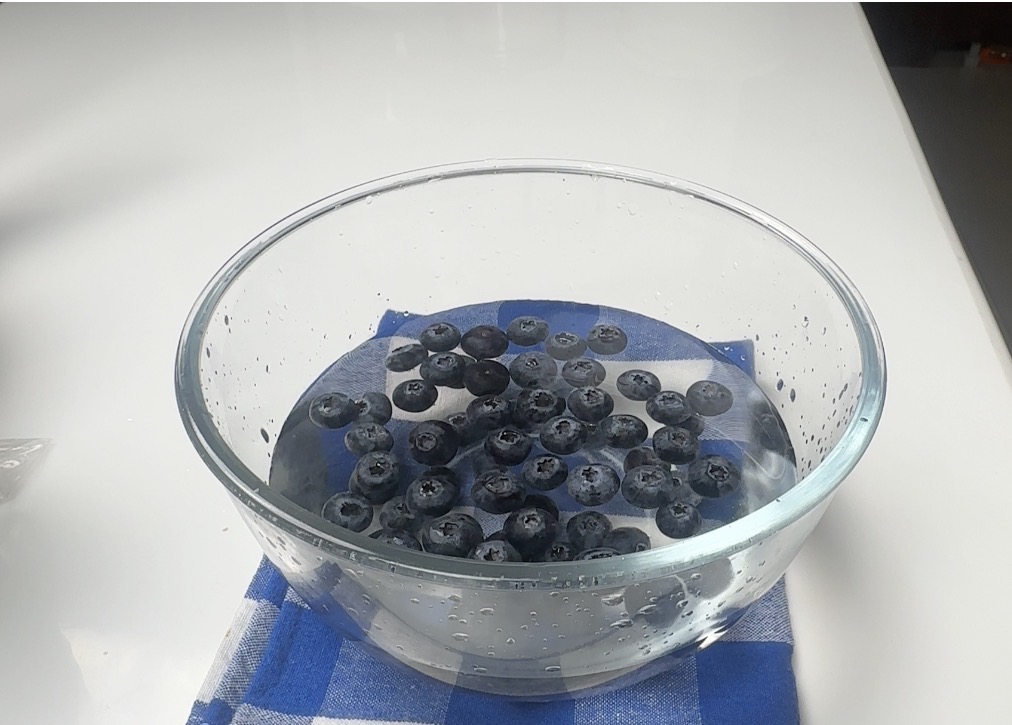
Step 2 — Prepare your blueberries
Wash your blueberries thoroughly in a bowl of water. Strain well and spread on a clean kitchen towel. Pat completely dry and set aside.
Always wash your blueberries thoroughly and dry completely before adding to the batter — Bake with DeepaliFresh blueberries soaking in water — pat them completely dry before adding to your batter — Bake with Deepali
Step 3 — Chop your chocolate
Cut your compound chocolate into rough, uneven chunks. Set aside in a small bowl.
Chop your chocolate into rough, uneven chunks — the different sizes create the best texture — Bake with Deepali
Step 4 — Sift dry ingredients
Sift your cake flour, baking powder, and salt together into a bowl. Set aside.
Step 5 — Cream butter and sugar
Cut your softened butter into chunks and place in a large mixing bowl. Add your sugar. Before switching on your mixer, use a spatula to roughly combine them for about 10 seconds — this stops the sugar from flying out.
Now use your electric mixer on medium speed. Beat until the mixture is pale, creamy, and fluffy. This takes 3 to 4 minutes. Do not rush this step.
Step 6 — Add egg
Add your egg and mix until fully incorporated. Scrape down the sides of the bowl as you go.
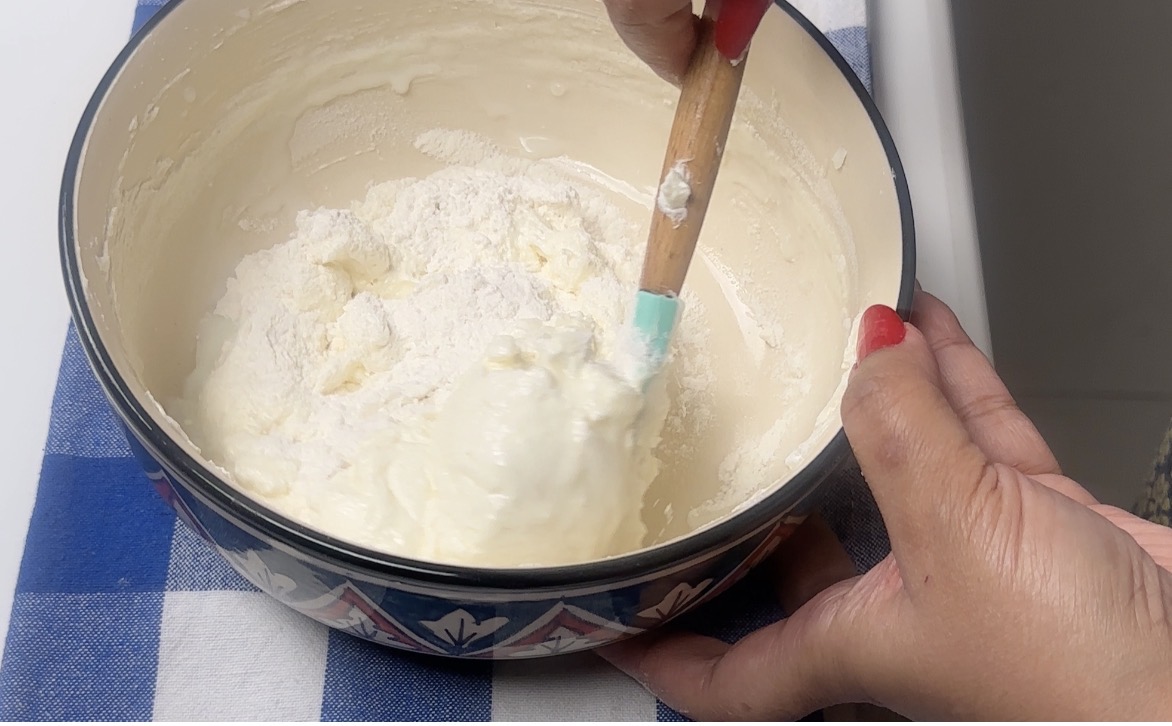
Step 7 — Add dry ingredients and milk
From this point, put your mixer away and use only a spatula. Add half your flour mixture and fold gently. Add half your milk and fold again. Add the remaining flour, fold, then the remaining milk. Finally add your vanilla extract and fold until you no longer see any dry flour.
Once the flour goes in, put the mixer down — fold gently with a spatula only — Bake with Deepali
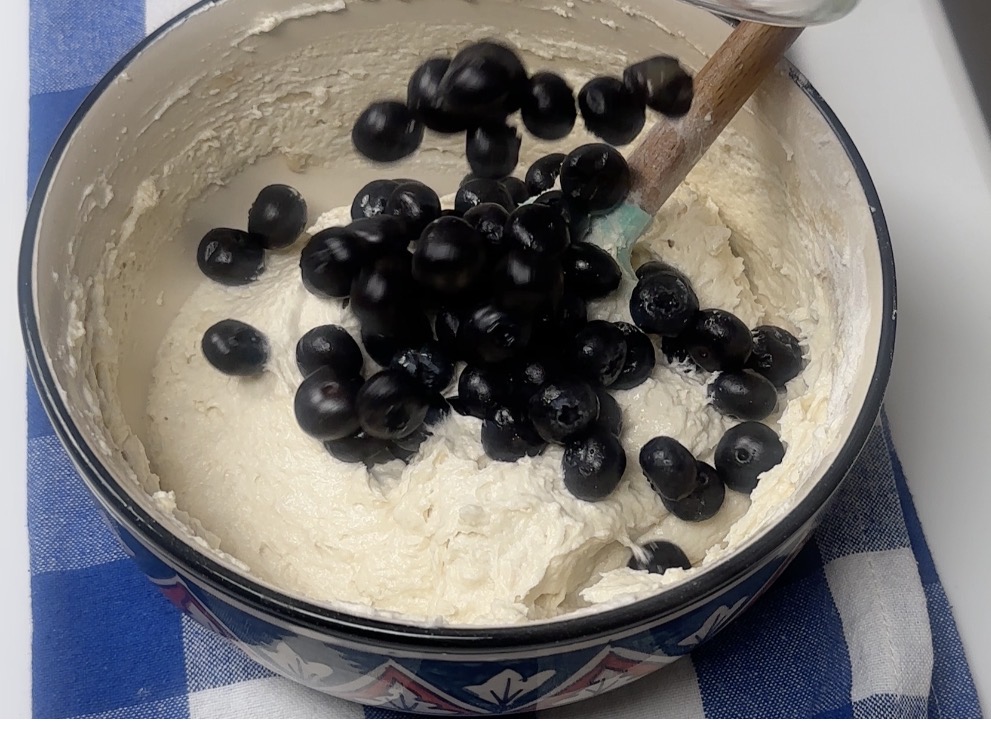
Step 8 — Fold in blueberries and chocolate
Add your blueberries and fold in gently — you do not want to crush them. Then add your chocolate chunks and fold once more until evenly distributed.
hat purple against the pale batter — one of the most beautiful moments in baking — Bake with Deepali
Step 9 — Fill liners and bake
Place 6 muffin liners in your muffin pan. Fill each one three quarters full using a spoon or ice cream scoop. Press 2 to 3 extra chocolate chunks and a few blueberries into the top of each muffin.
Batter filled, chocolate chunks and blueberries pressed on top — ready for the oven — Bake with Deepali
Bake at 180 degrees C for 30 minutes. Do not open the oven door during baking. Test with a toothpick — it should come out clean. Cool on a wire rack for at least 15 minutes before serving.
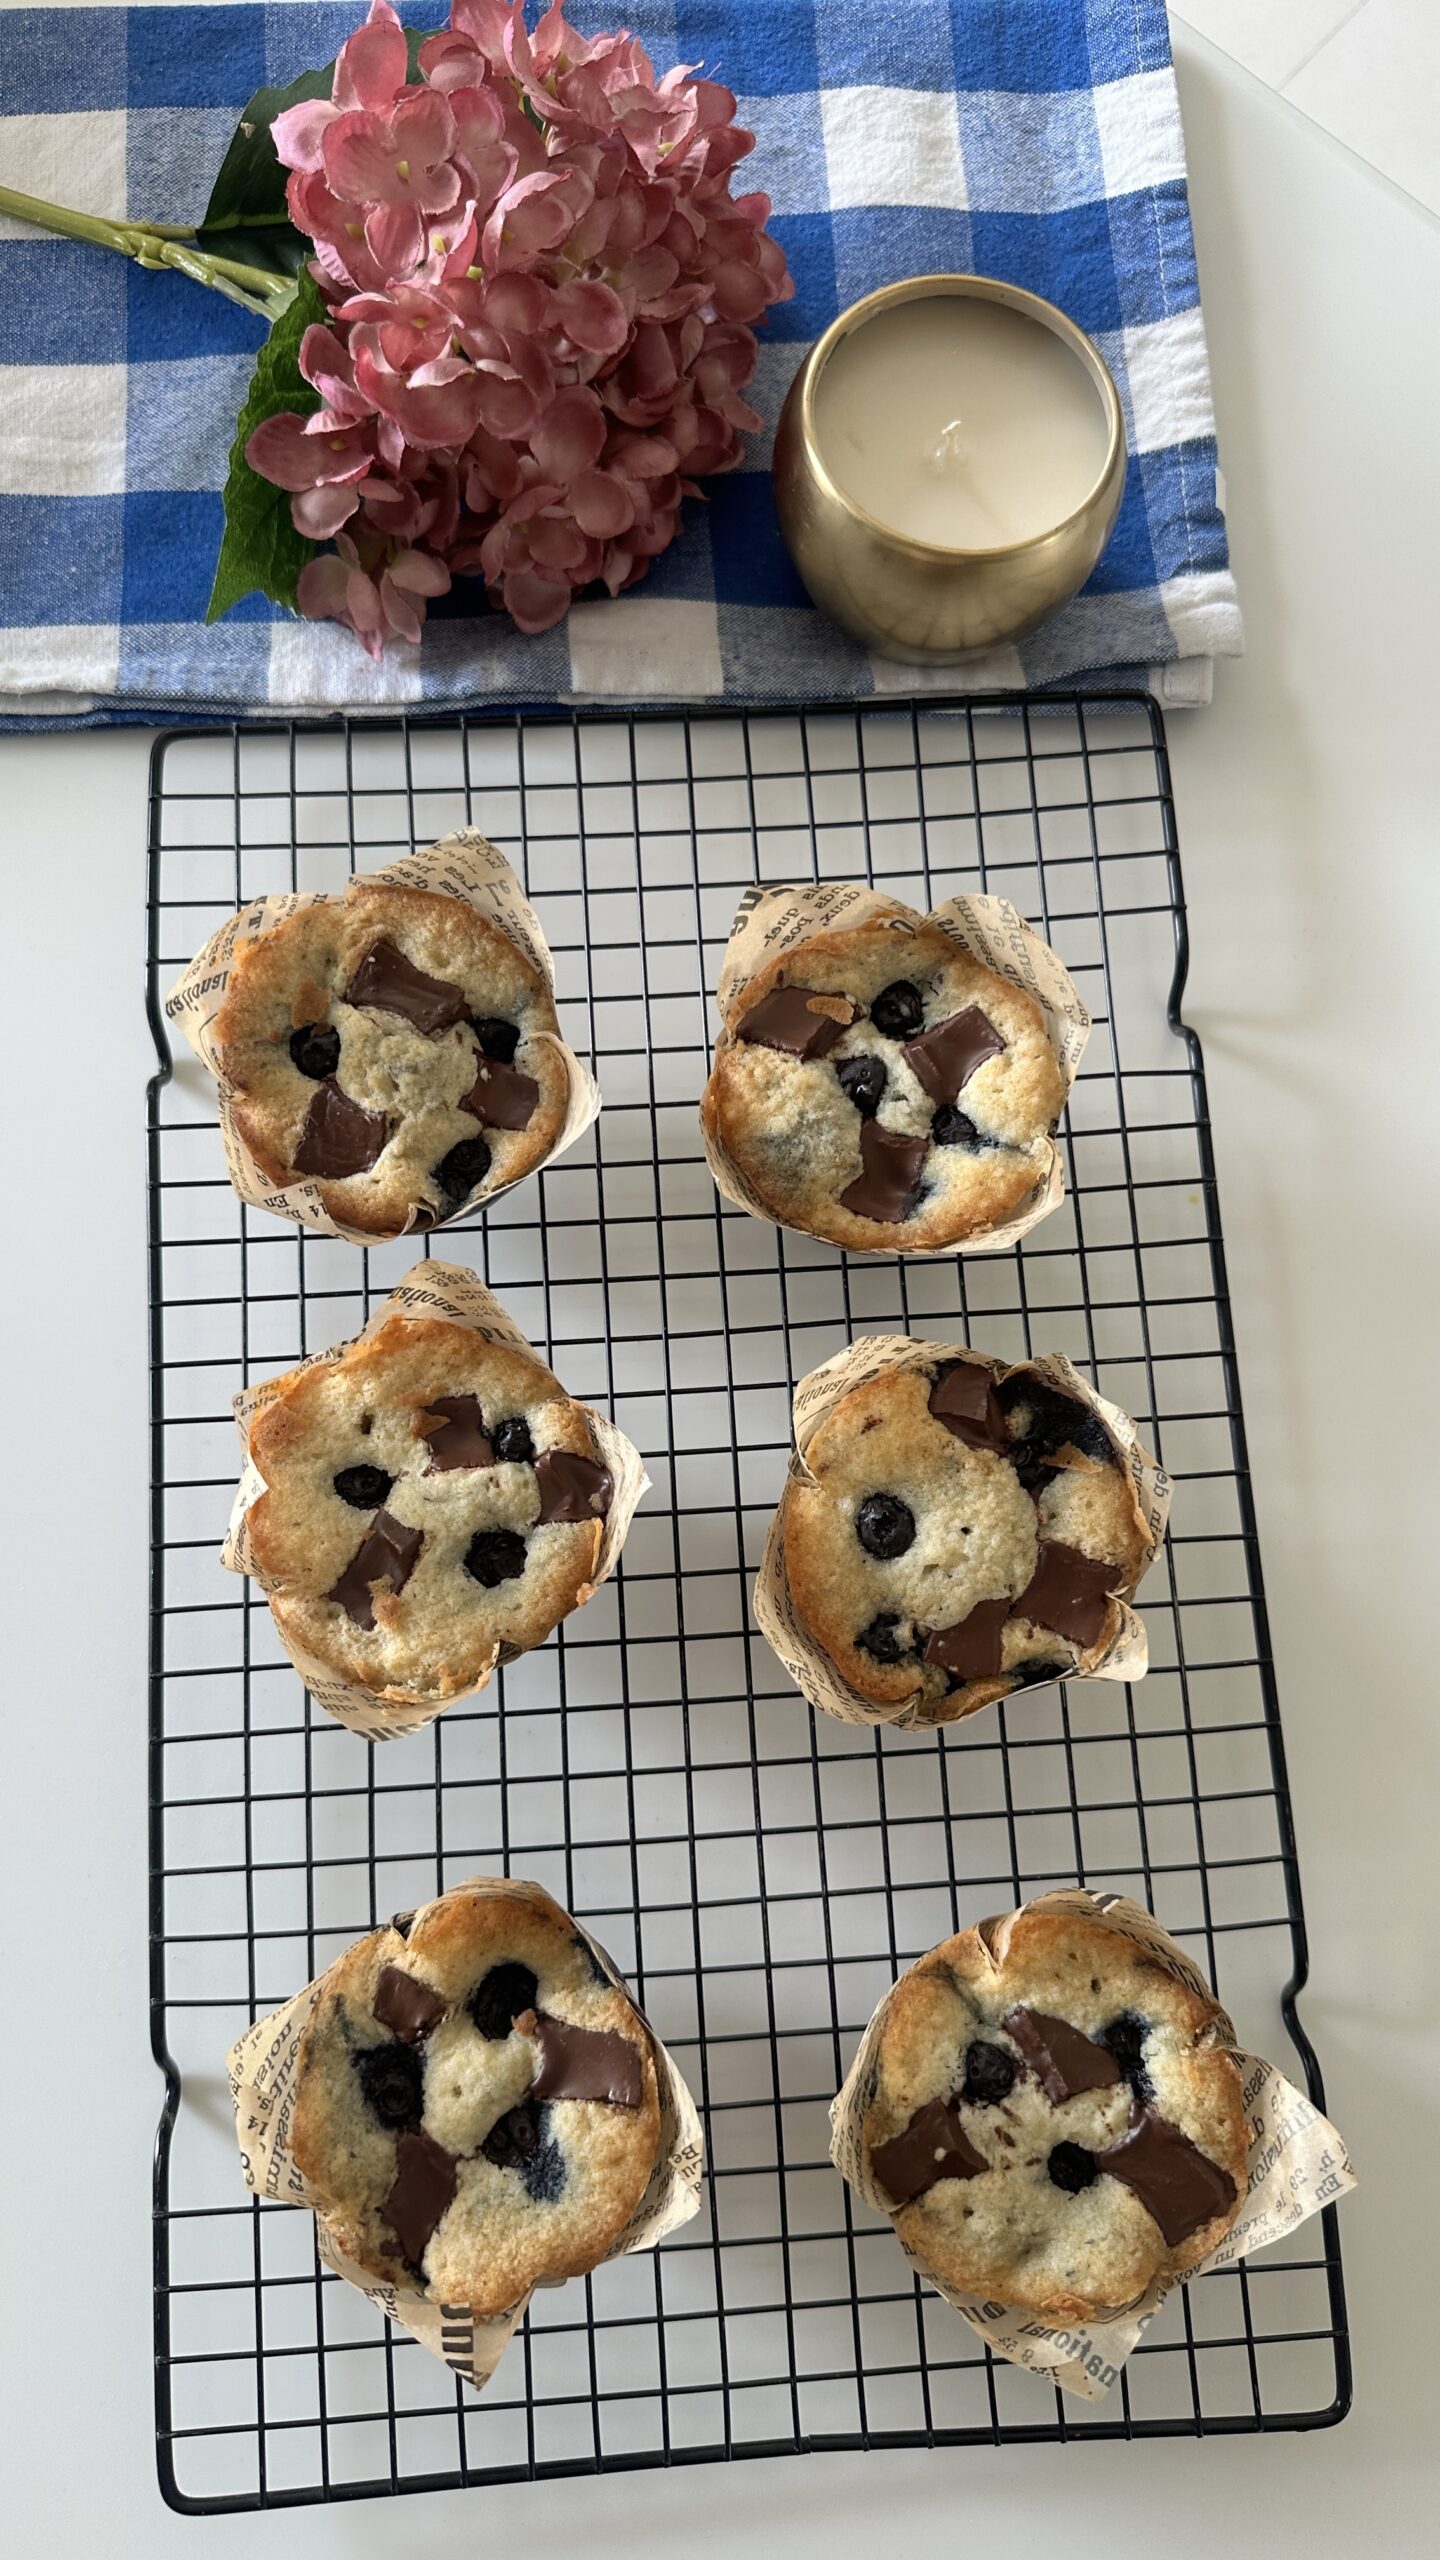
Fresh out of the oven — six perfect Blueberry Chocolate Muffins — Bake with DeepaliThis is what your kitchen will smell like — and what your muffins will look like — Bake with Deepali
How to Store
Once completely cooled, store in an airtight container at room temperature for up to 2 days or refrigerate for up to 5 days. To reheat — 15 seconds in the microwave and they taste freshly baked.
Soft, moist and absolutely delicious muffins made with fresh blueberries and rich chocolate chunks. The perfect bake for any time of day — simple ingredients and beautiful results every single time.
Equipment
Electric hand mixer
Muffin pan (6 cavity)
Muffin liners
Large mixing bowl
Spatula
Sifter
Wire cooling rack
Kitchen scale
Wire hisk
Ingredients
125g1 cup fresh blueberries
100g1/2 cup compound chocolate, cut in chunks
113g1 cup cake flour
1tspbaking powder
1/4tspsalt
113g1/2 cup unsalted butter, softened
100g1/2 cup fine sugar
1egg(room temperature)
60g1/4 cup whole milk
1tspvanilla extract
Instructions
Preheat oven to 180 degrees C / 355 degrees F.
Wash blueberries thoroughly, strain and pat completely dry. Set aside.
Chop chocolate into rough uneven chunks. Set aside.
Sift cake flour, baking powder and salt together into a bowl. Set aside.
Beat softened butter and sugar with electric mixer on medium speed until pale, fluffy and cloud-like — about 3 to 4 minutes. Do not rush this step.
Add egg and mix until fully incorporated. Scrape down sides of bowl.
Add dry ingredients in two batches alternating with milk. Fold gently with spatula only — no mixer from here.
Add vanilla extract. Fold until just combined and no dry flour is visible.
Fold in blueberries gently, then chocolate chunks.
Fill 6 muffin liners three quarters full. Press extra chocolate chunks and blueberries on top of each.
Bake at 180 degrees C for 30 minutes until golden on top. Test with toothpick inserted in centre — should come out clean.
Cool on wire rack for at least 15 minutes before serving.
Video
Notes
NOTES / TIPS
Always use cake flour — it gives a much softer, more tender crumb than all-purpose flour
Butter and egg must be at room temperature before you start
Dry your blueberries completely — any moisture affects the texture
Do not overmix once flour goes in — fold gently and stop when you no longer see dry flour
Press extra chocolate chunks and blueberries on top before baking for a beautiful bakery finish
Store in airtight container — 2 days room temperature, 5 days refrigerated
Reheat in microwave for 15 seconds and they taste freshly baked
Author: Deepali Ohri
Course: Dessert, Snack
Cuisine: International
Keyword: baking from scratch, blueberry chocolate muffins, easy muffin recipe, home baking, muffin recipe, muffins with eggs, soft moist muffins
Light, fluffy and perfectly soft, these eggless vanilla muffins are a reader favourite and a wonderful everyday bake. Simple ingredients, beautiful results.
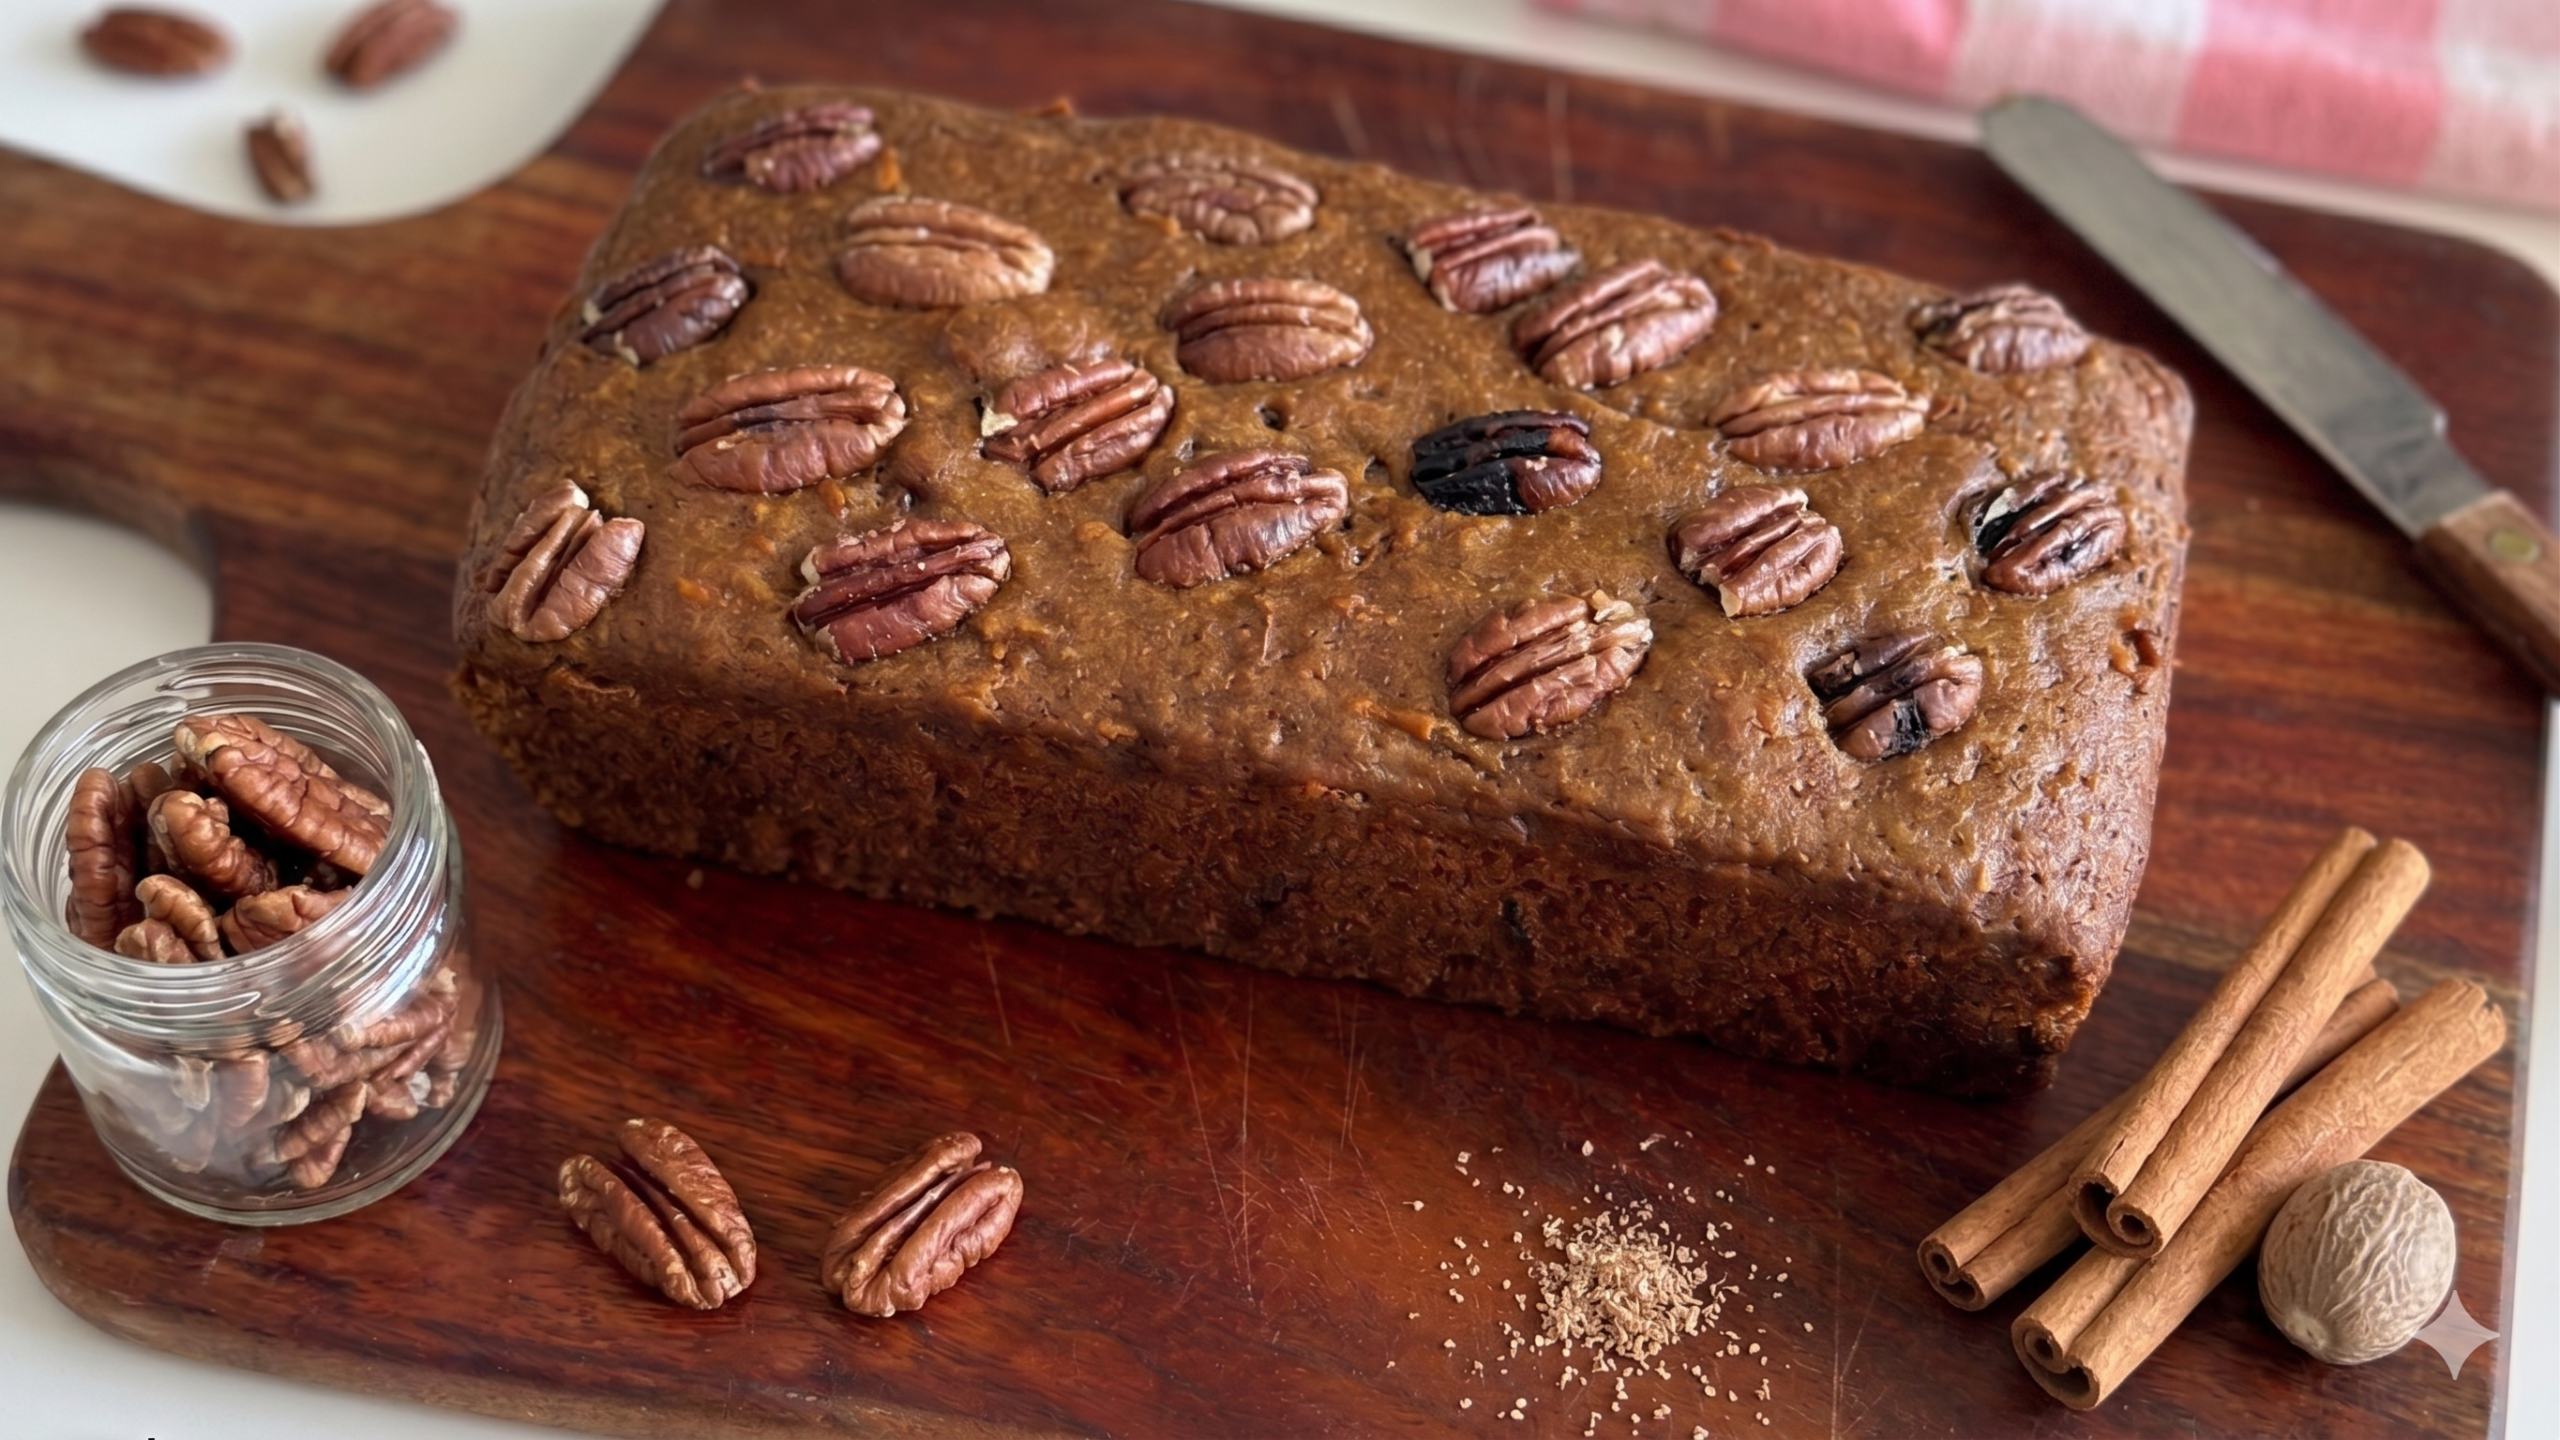
This Eggless Date & Carrot Cake is the kind of bake I keep coming back to — a soft, whole wheat loaf naturally sweetened by soft dates, gently spiced with cinnamon and nutmeg, and finished with toasted pecans on top. It’s an easy, one-bowl recipe that tastes far more indulgent than it actually is.
The dates do almost all of the sweetening work for us, so we use very little added sugar. The whole wheat flour keeps the cake wholesome without making it dense, and the warm spices give every slice a deep, comforting flavour.
It’s the kind of slice you want with your morning coffee, your afternoon chai, or quietly all by itself, straight from the board.
Eggless Dates & Carrot Cake on a wooden board with cinnamon sticks, whole nutmeg and a jar of pecans.
Why You’ll Love This Eggless Dates & Carrot Cake
It’s eggless — perfect for daily baking, festivals, and anyone who avoids eggs.
Made with whole wheat flour for a wholesome, nourishing crumb.
Naturally sweetened by soft dates — far less added sugar than a traditional cake.
Warm-spiced with cinnamon and nutmeg for that comforting, cosy bite.
One bowl, one blender, no fancy equipment needed.
Tastes even better the next day as the spices settle and the dates redistribute their moisture.
Beginner friendly — you cannot mess this one up.
Why Dates and Carrots, Together
If you’ve made a traditional carrot cake before, you’ll notice this Eggless Dates & Carrot Cake has less carrot than usual. That’s on purpose. In this recipe, the dates lead the flavour — they bring depth, sweetness, and an almost toffee-like richness that white sugar cannot match. The carrots support quietly: a little colour through the crumb, a little extra moisture, but not the loud, shredded-carrot character of a classic carrot cake.
Think of it as a date cake with a whisper of carrot, rather than a carrot cake with dates. The result is something more wholesome, deeper in flavour, and gentler in sweetness — and somehow, more satisfying.
The One Trick That Changes Everything
If you’ve used dates in baking before, you may have just chopped them small and folded them into the batter. That works — but there’s a much better way.
Soak the chopped dates in warm milk for ten minutes, then blend them into a smooth, silky paste. This paste is what carries the whole cake. It distributes sweetness evenly through every bite, dissolves into the crumb so you never get chunks of date in some places and not others, and it gives the cake a soft, almost toffee-like richness you simply cannot achieve with sugar alone.
It takes ten minutes of soaking and twenty seconds of blending — and it is the single most important step in this recipe.
Ingredients for Eggless Date & Carrot Cake
Each ingredient earns its place. Here’s what each one does:
For the date paste
Pitted dates — ½ cup (75 g). Any soft variety works. Medjool gives the deepest, most caramel-like flavour. If your dates are very dry, soak them a few extra minutes.
Warm milk — ½ cup (120 ml). Drinking-warm, not hot. Dairy milk works beautifully, but any plant-based milk will work too — almond, oat, or soy. The milk softens the dates and helps them blend into a silky paste.
For the dry mix
Whole wheat flour (atta) — 1½ cups (180 g). Regular Indian atta works perfectly here. The dates and yogurt keep the crumb soft, so you won’t get that dry, dense atta-cake feeling.
Baking powder — 1 tsp (4 g). For the lift.
Baking soda — ½ tsp (3 g). Reacts with the yogurt to give the cake its tender rise.
Cinnamon powder — 1 tsp. The headline spice. Fresh-ground is even better if you have it.
Nutmeg powder — ¼ tsp. A whisper, not a shout. Nutmeg in small amounts is what gives the cake its warm depth.
Salt — a pinch. Don’t skip it. Salt sharpens every other flavour in the cake.
For the wet mix
Grated carrots — ½ cup (55 g). Grate them on the thicker side of your box grater so they melt into the cake without disappearing entirely.
Oil — ¼ cup (60 ml). Any neutral oil works. Coconut oil gives a faint coconut warmth that goes beautifully with the spices.
Plain yogurt (curd) — ¼ cup (60 g). Room temperature, important. Cold yogurt makes the oil seize. Yogurt is what gives the cake its tender, eggless crumb.
Brown sugar — ½ cup (110 g). Packed. Less than a traditional cake by quite a bit, because the dates are doing half the sweetening work for us.
Vanilla extract — 1 tsp. Pure vanilla, ideally. It rounds out the warm spices beautifully.
For folding in and topping
Chopped pecans — ½ cup (60 g). Walnuts work too. Toast them lightly in a dry pan for a minute first — it changes everything.
Whole pecans — 12 to 15. Optional, but they make the cake look stunning and add a beautiful nutty bite to the top.
How to Make Eggless Date & Carrot Cake — Step by Step
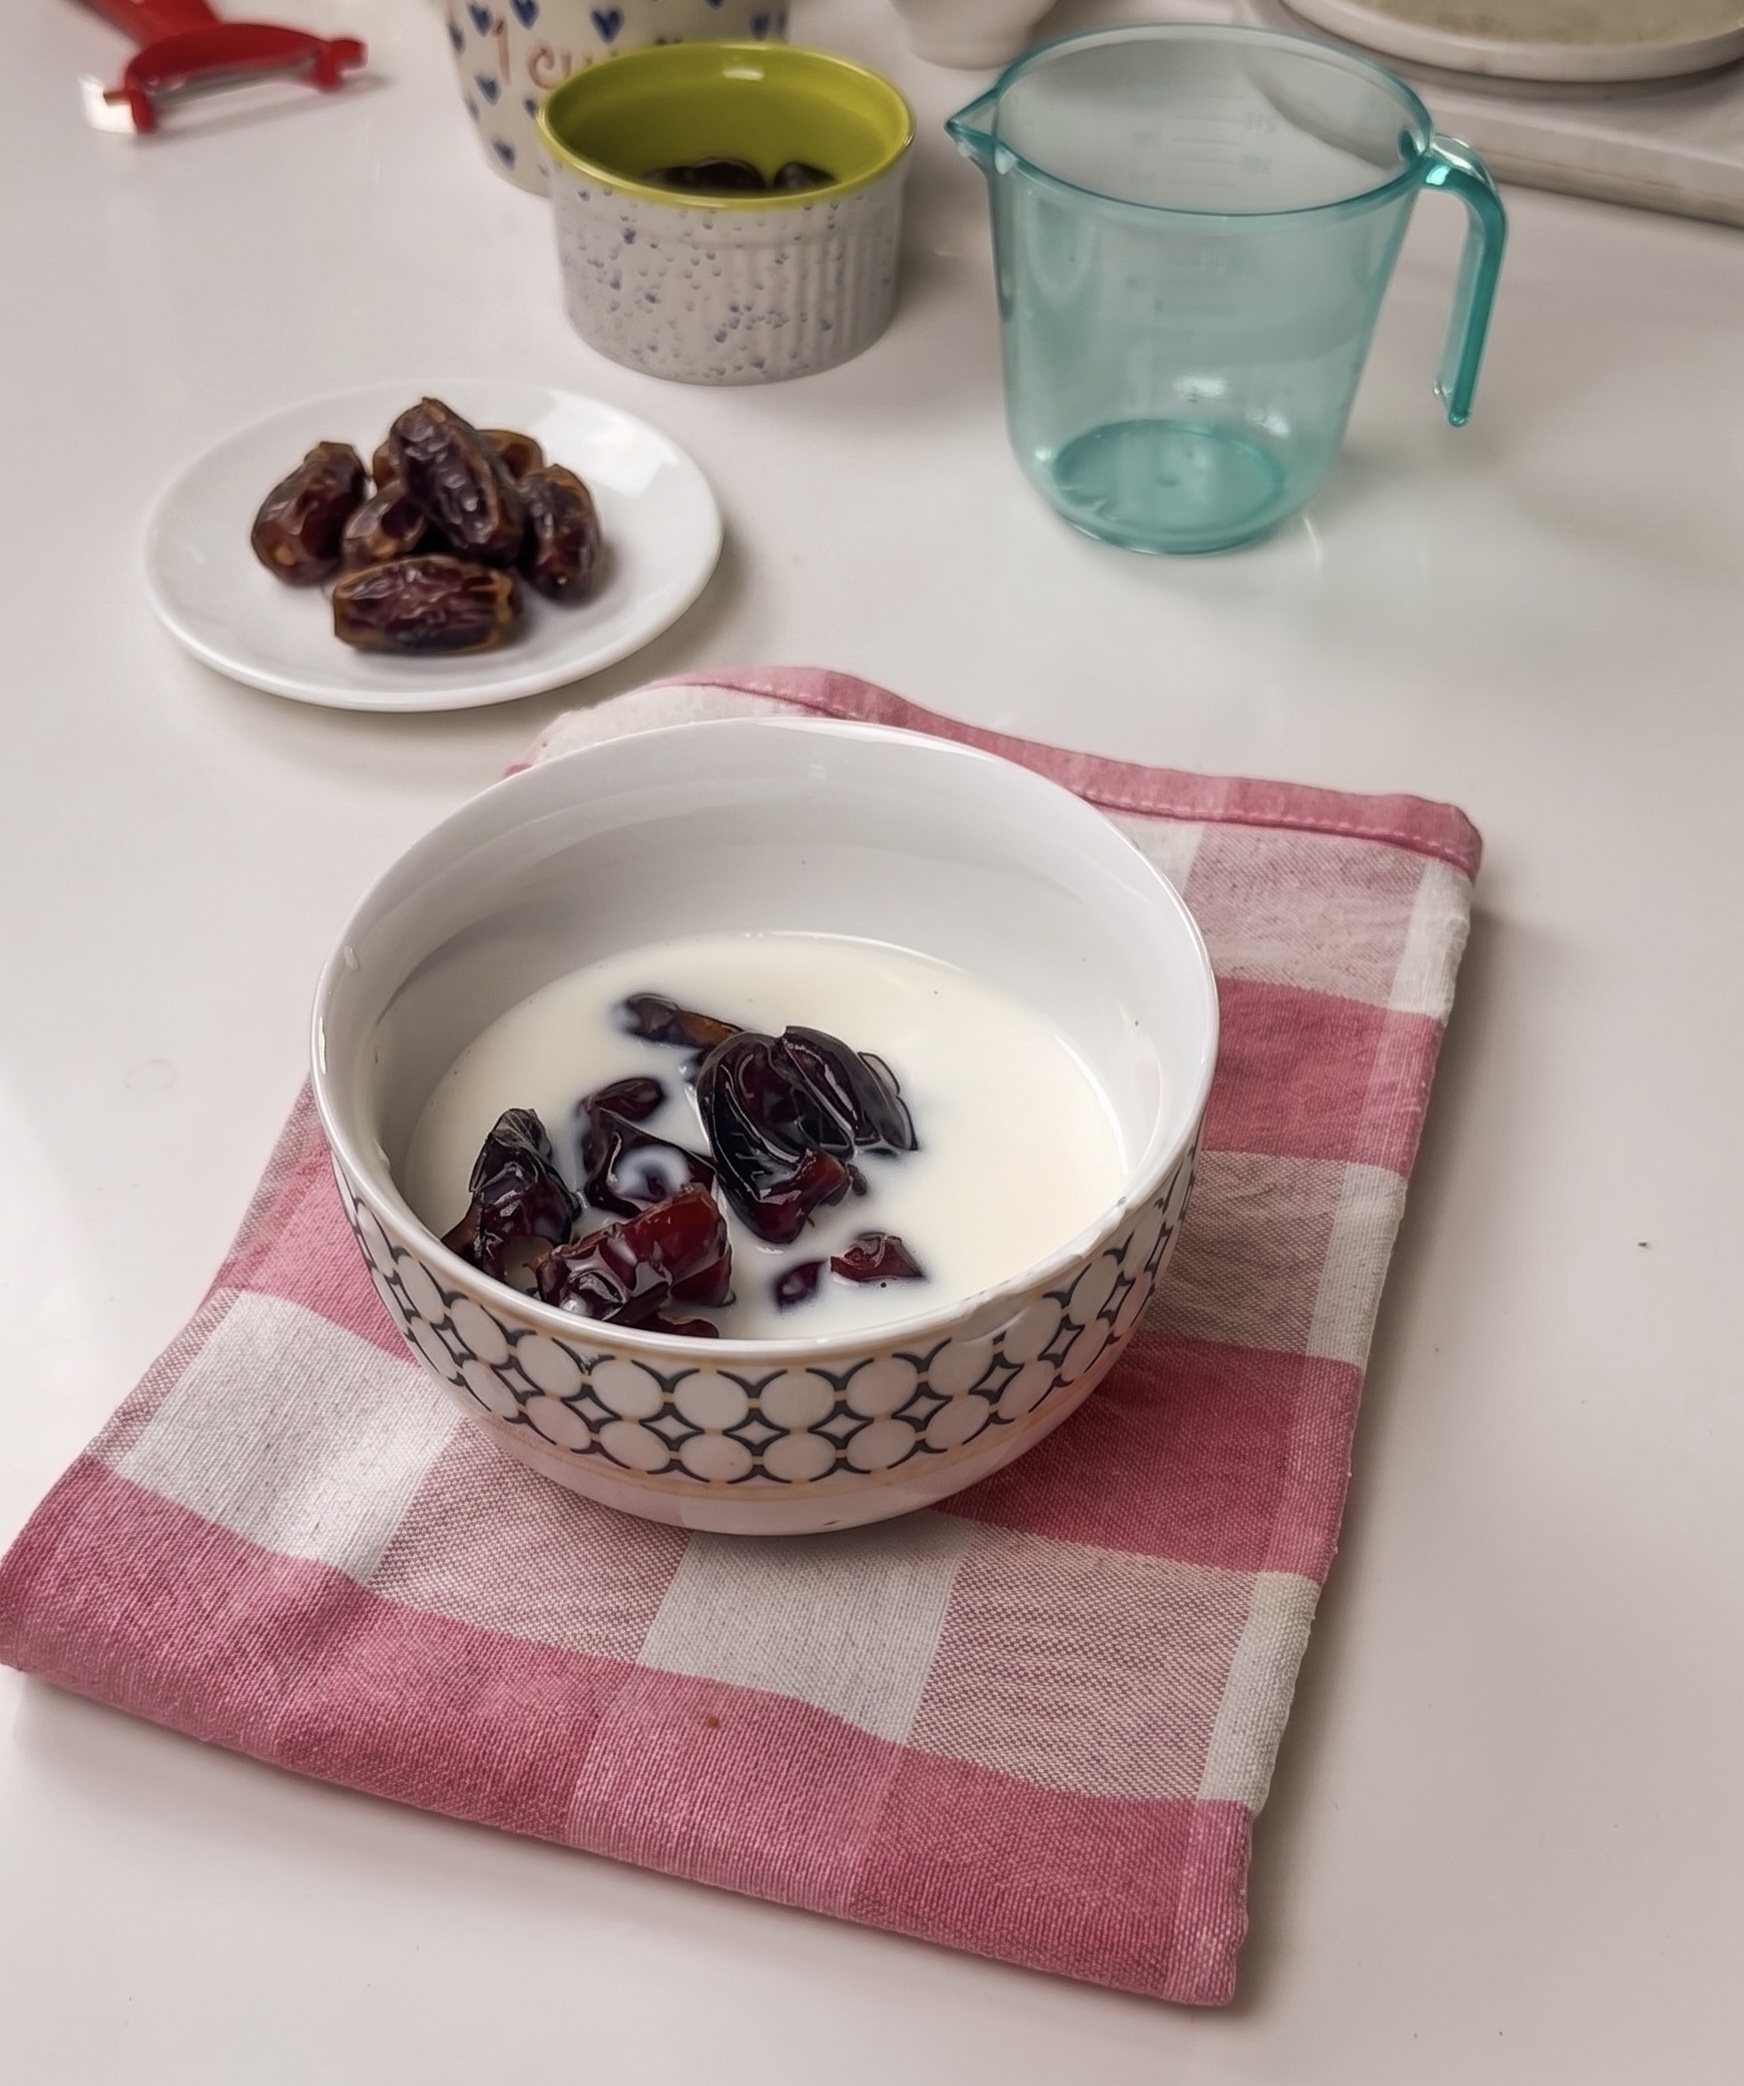
Step 1 — Soak the dates in warm milk
Chop ½ cup pitted dates and pour ½ cup warm milk over them in a small bowl. Let them sit for 10 minutes. The dates will plump up and the milk will turn a soft caramel colour.
Chopped dates soaking in warm milk — the first step in making a smooth date paste for the cake.
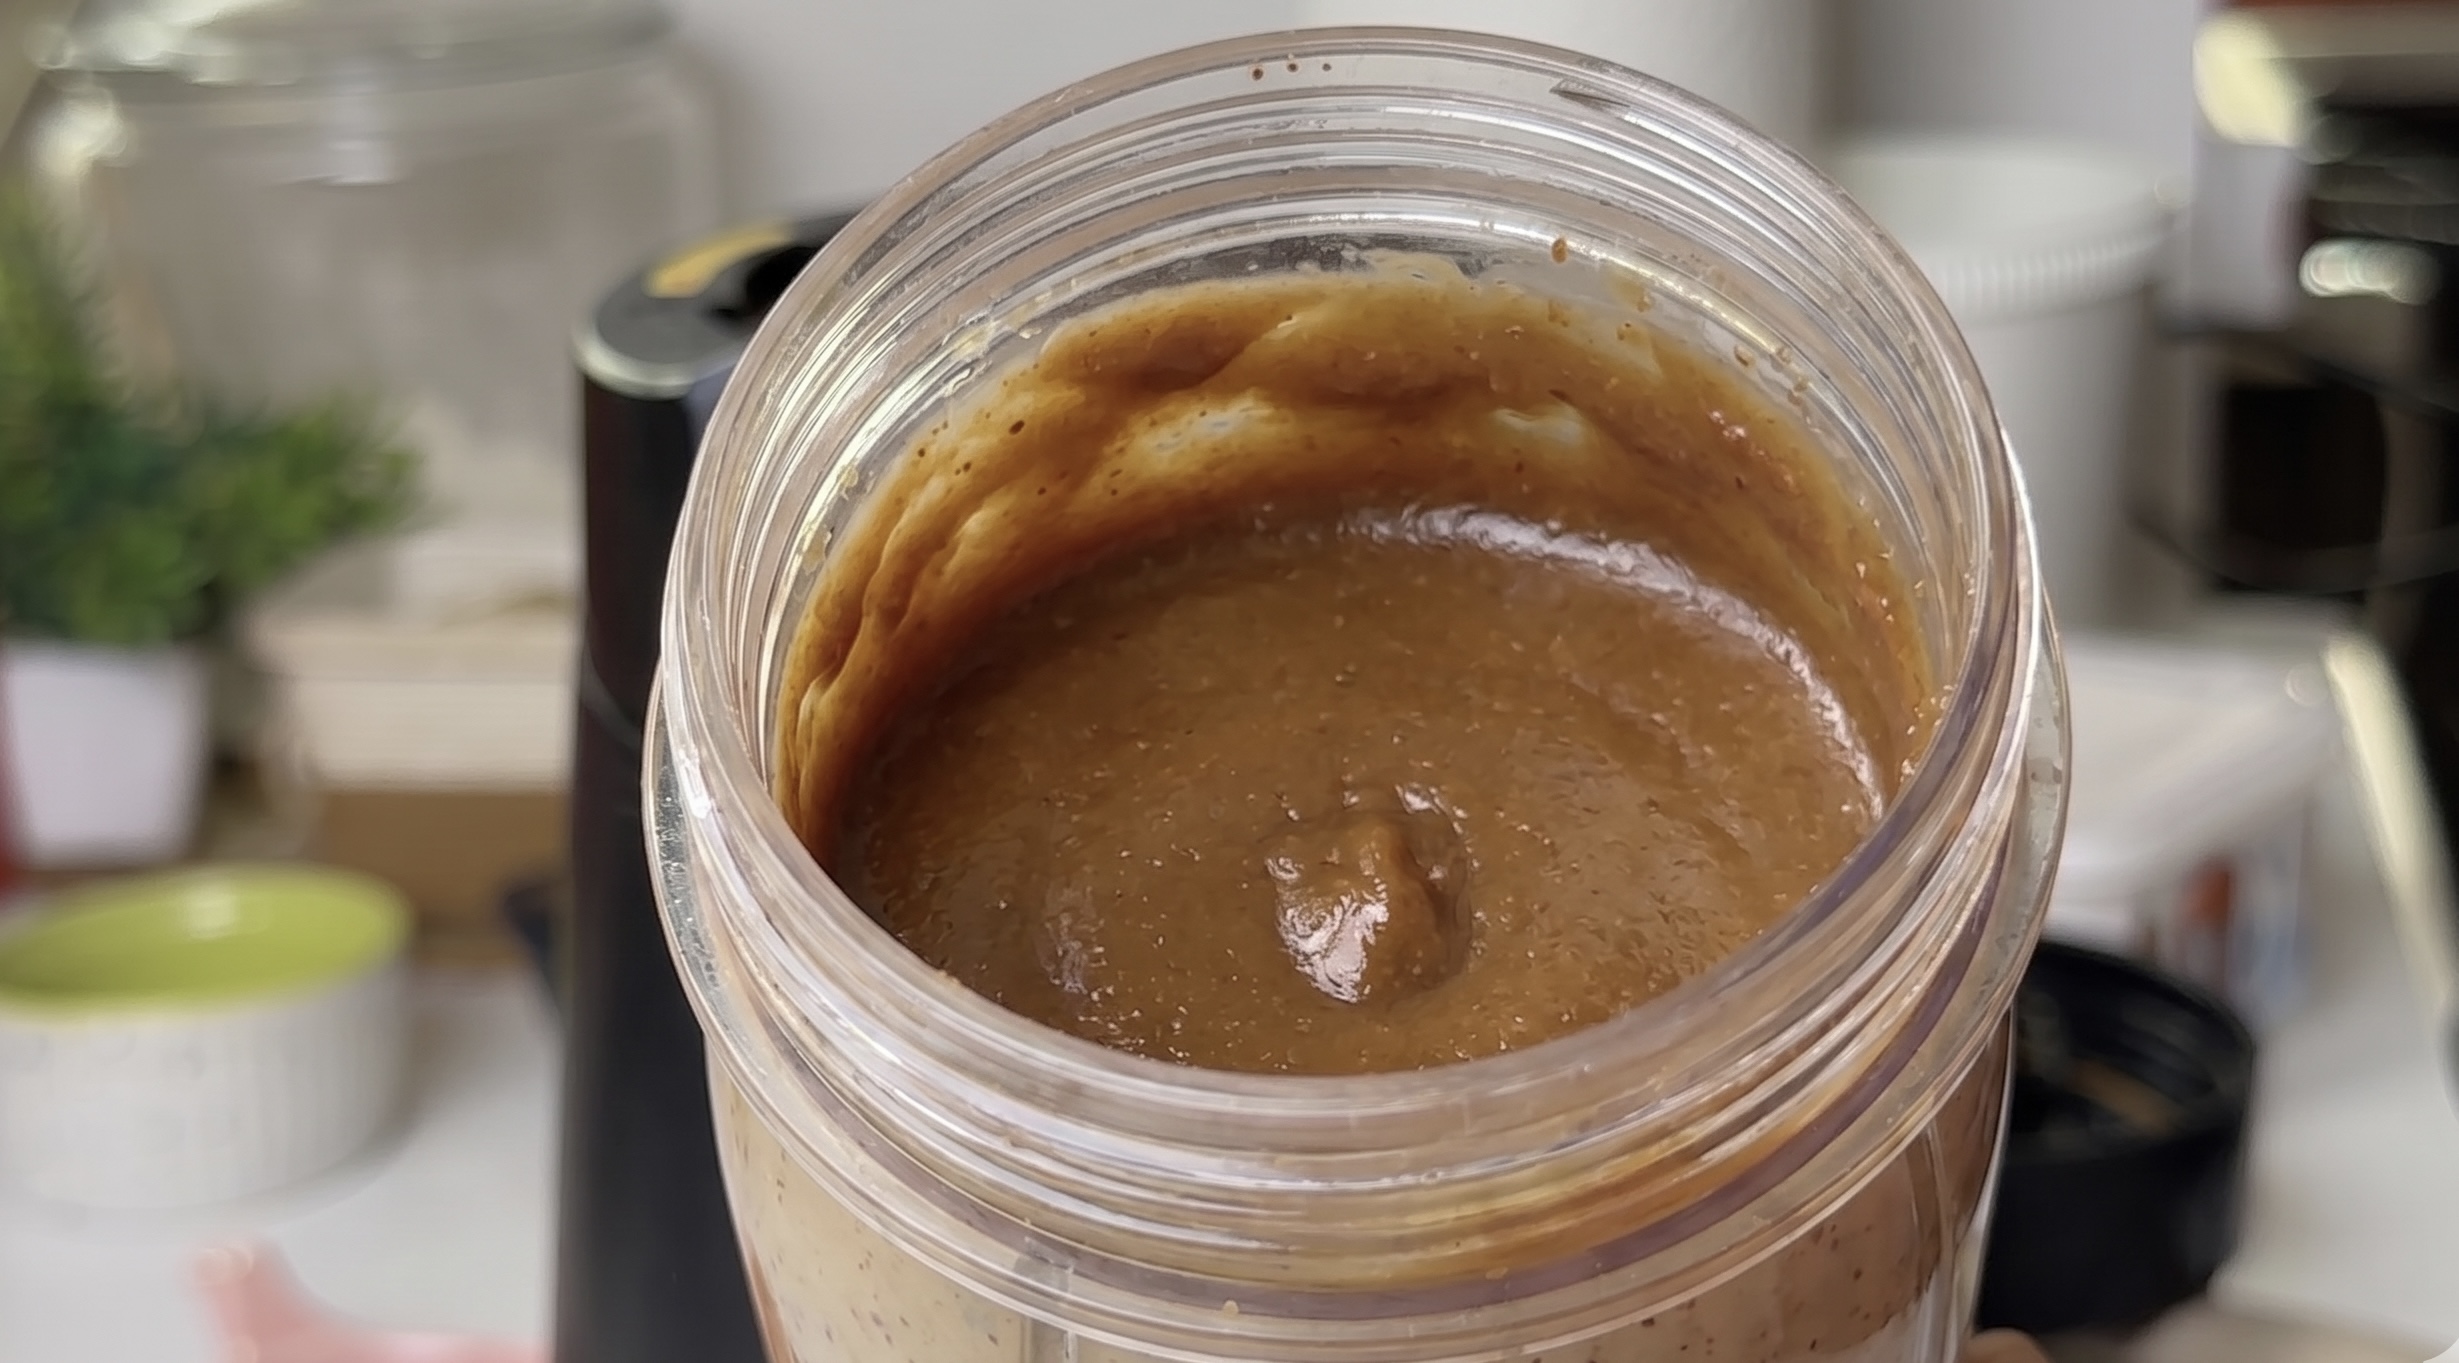
Step 2 — Blend into a smooth paste
Transfer the soaked dates and all of the soaking milk into a small blender or use a hand blender. Blend until you get a smooth, silky paste. A few tiny flecks of date skin are fine — they melt into the batter as the cake bakes.
Smooth, silky date paste — the secret to naturally sweetening this whole wheat loaf.
Step 3 — Whisk the dry mix
In a large mixing bowl, add the whole wheat flour, baking powder, baking soda, cinnamon, nutmeg, and the pinch of salt. Whisk for a full 20 seconds. This is your only chance to evenly distribute the spices and the leaveners through the flour, so whisk well. Set aside.
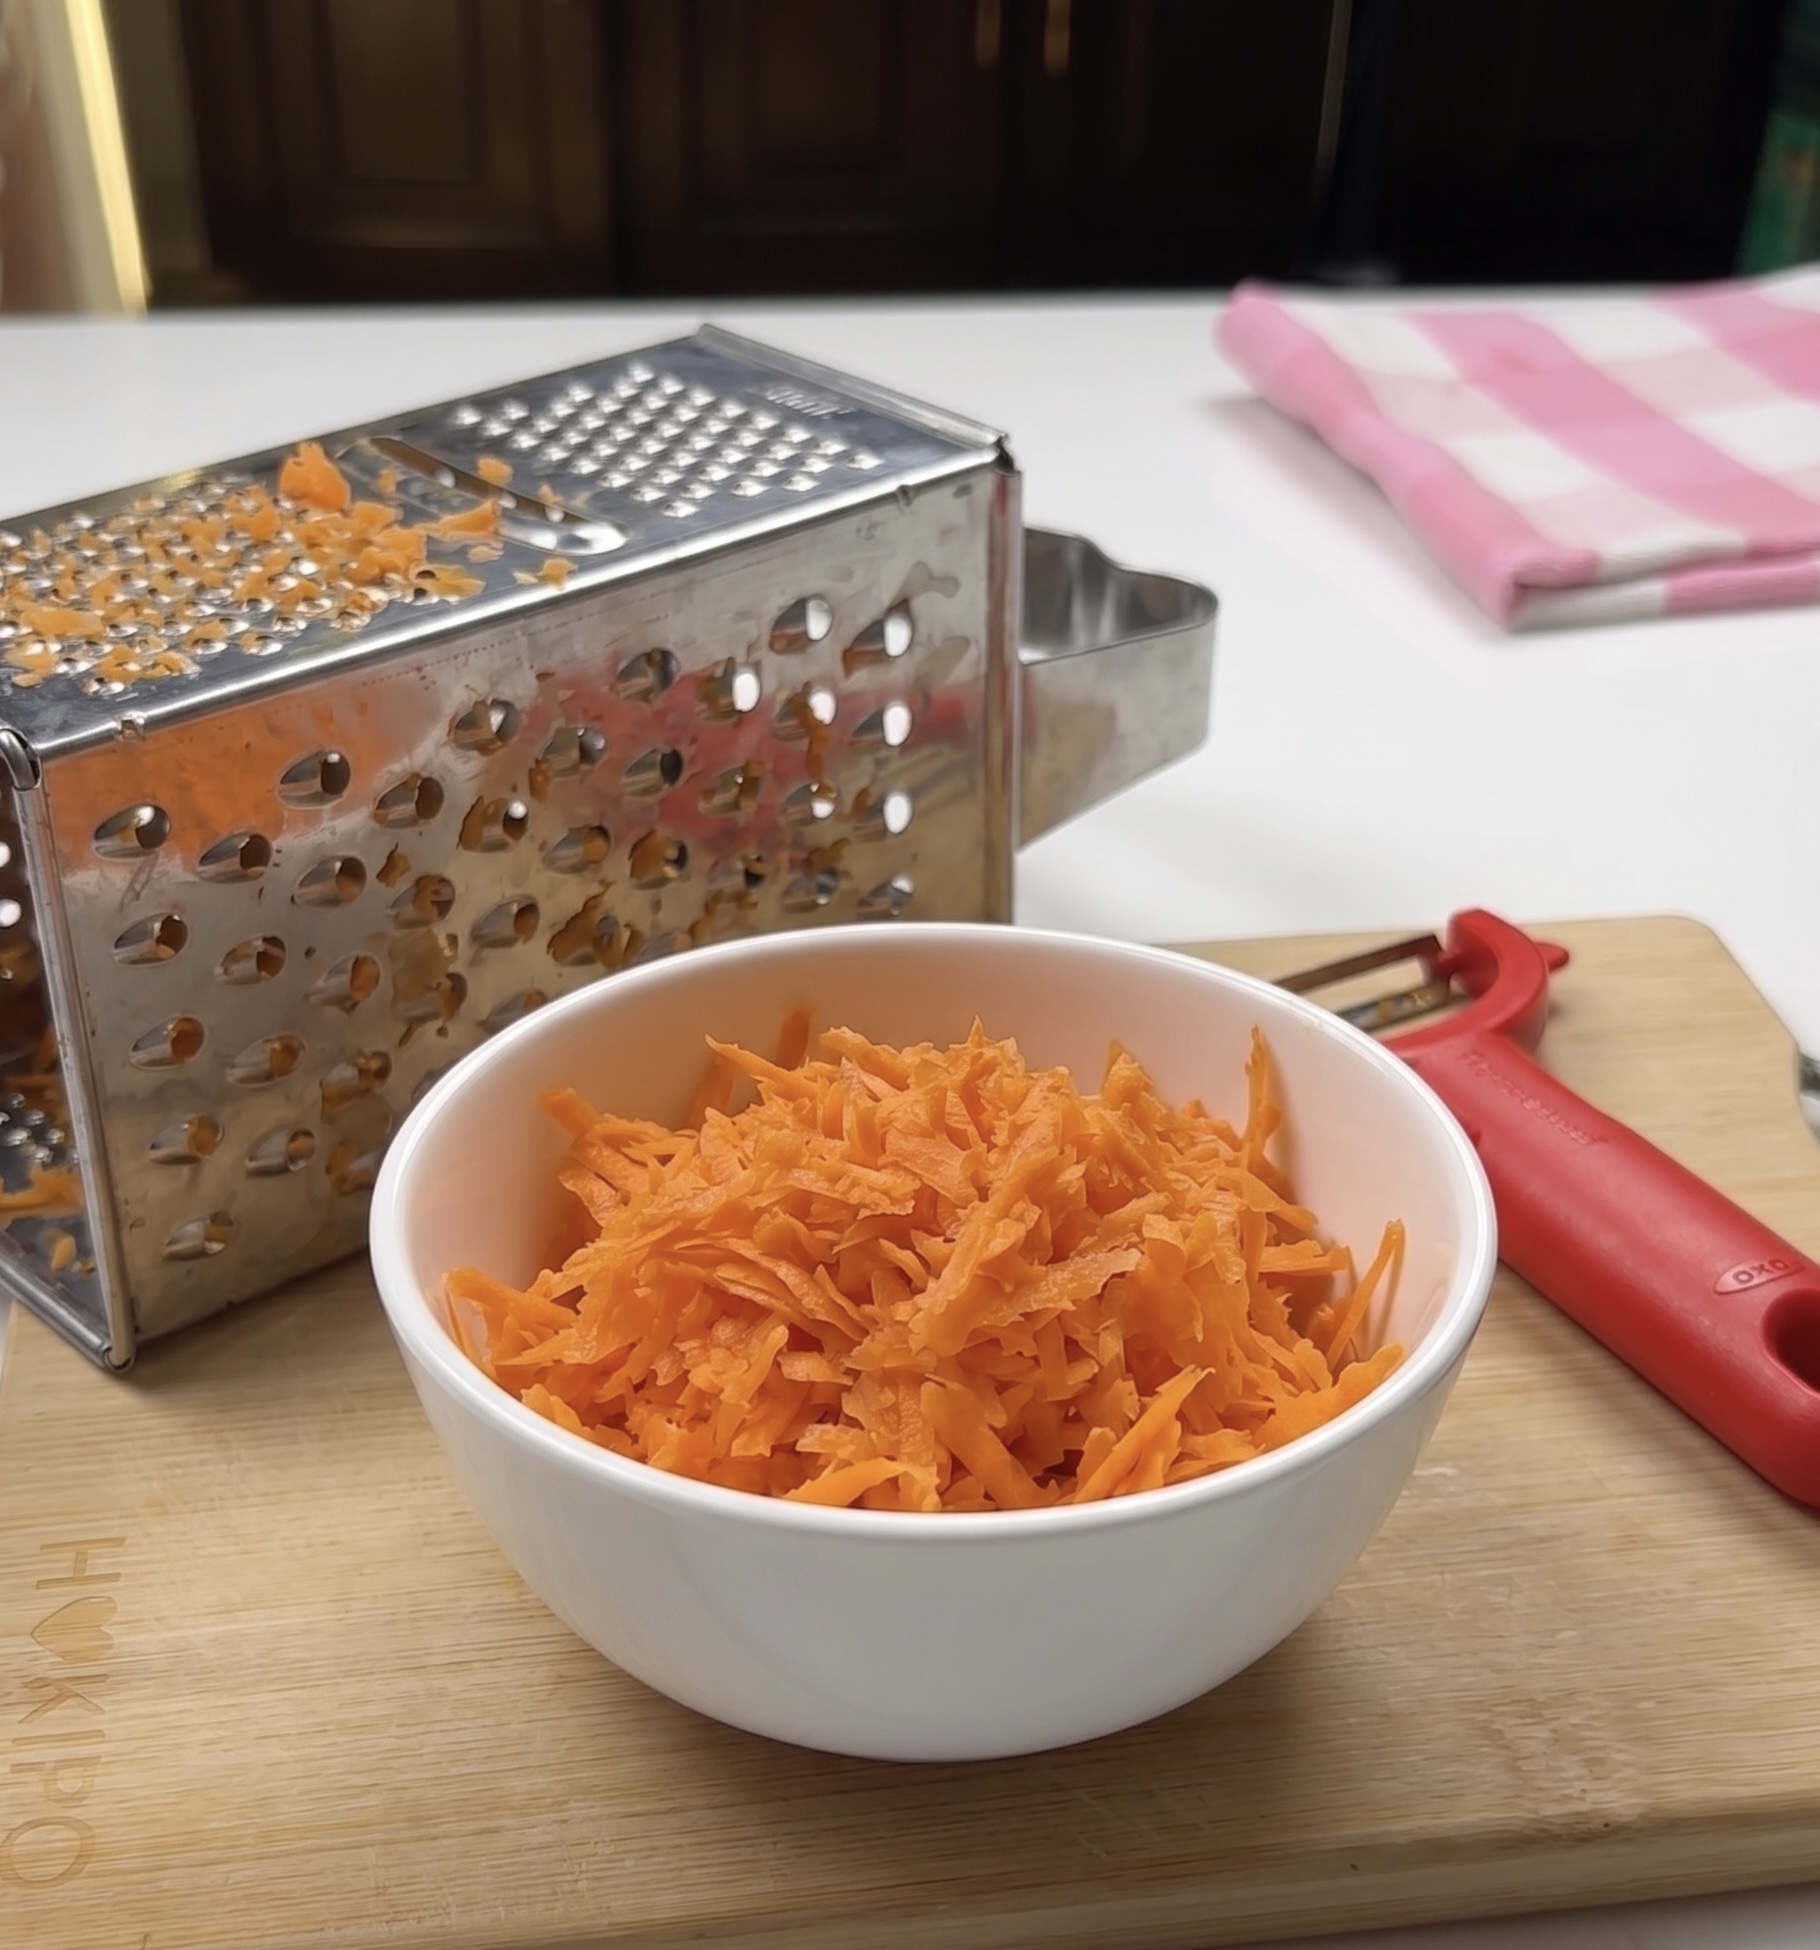
Step 4 — Grate the carrots
Peel and grate ½ cup of carrots, using the thicker side of your grater. Set aside.
Freshly grated carrots — adding colour, moisture and quiet sweetness to the loaf.
Step 5 — Build the wet bowl
Pour the date paste into a fresh mixing bowl. Add the oil and the room-temperature yogurt and whisk well. Then add the brown sugar and whisk again until the sugar dissolves into the wet mix. Add the grated carrots and the vanilla extract, and whisk to combine.
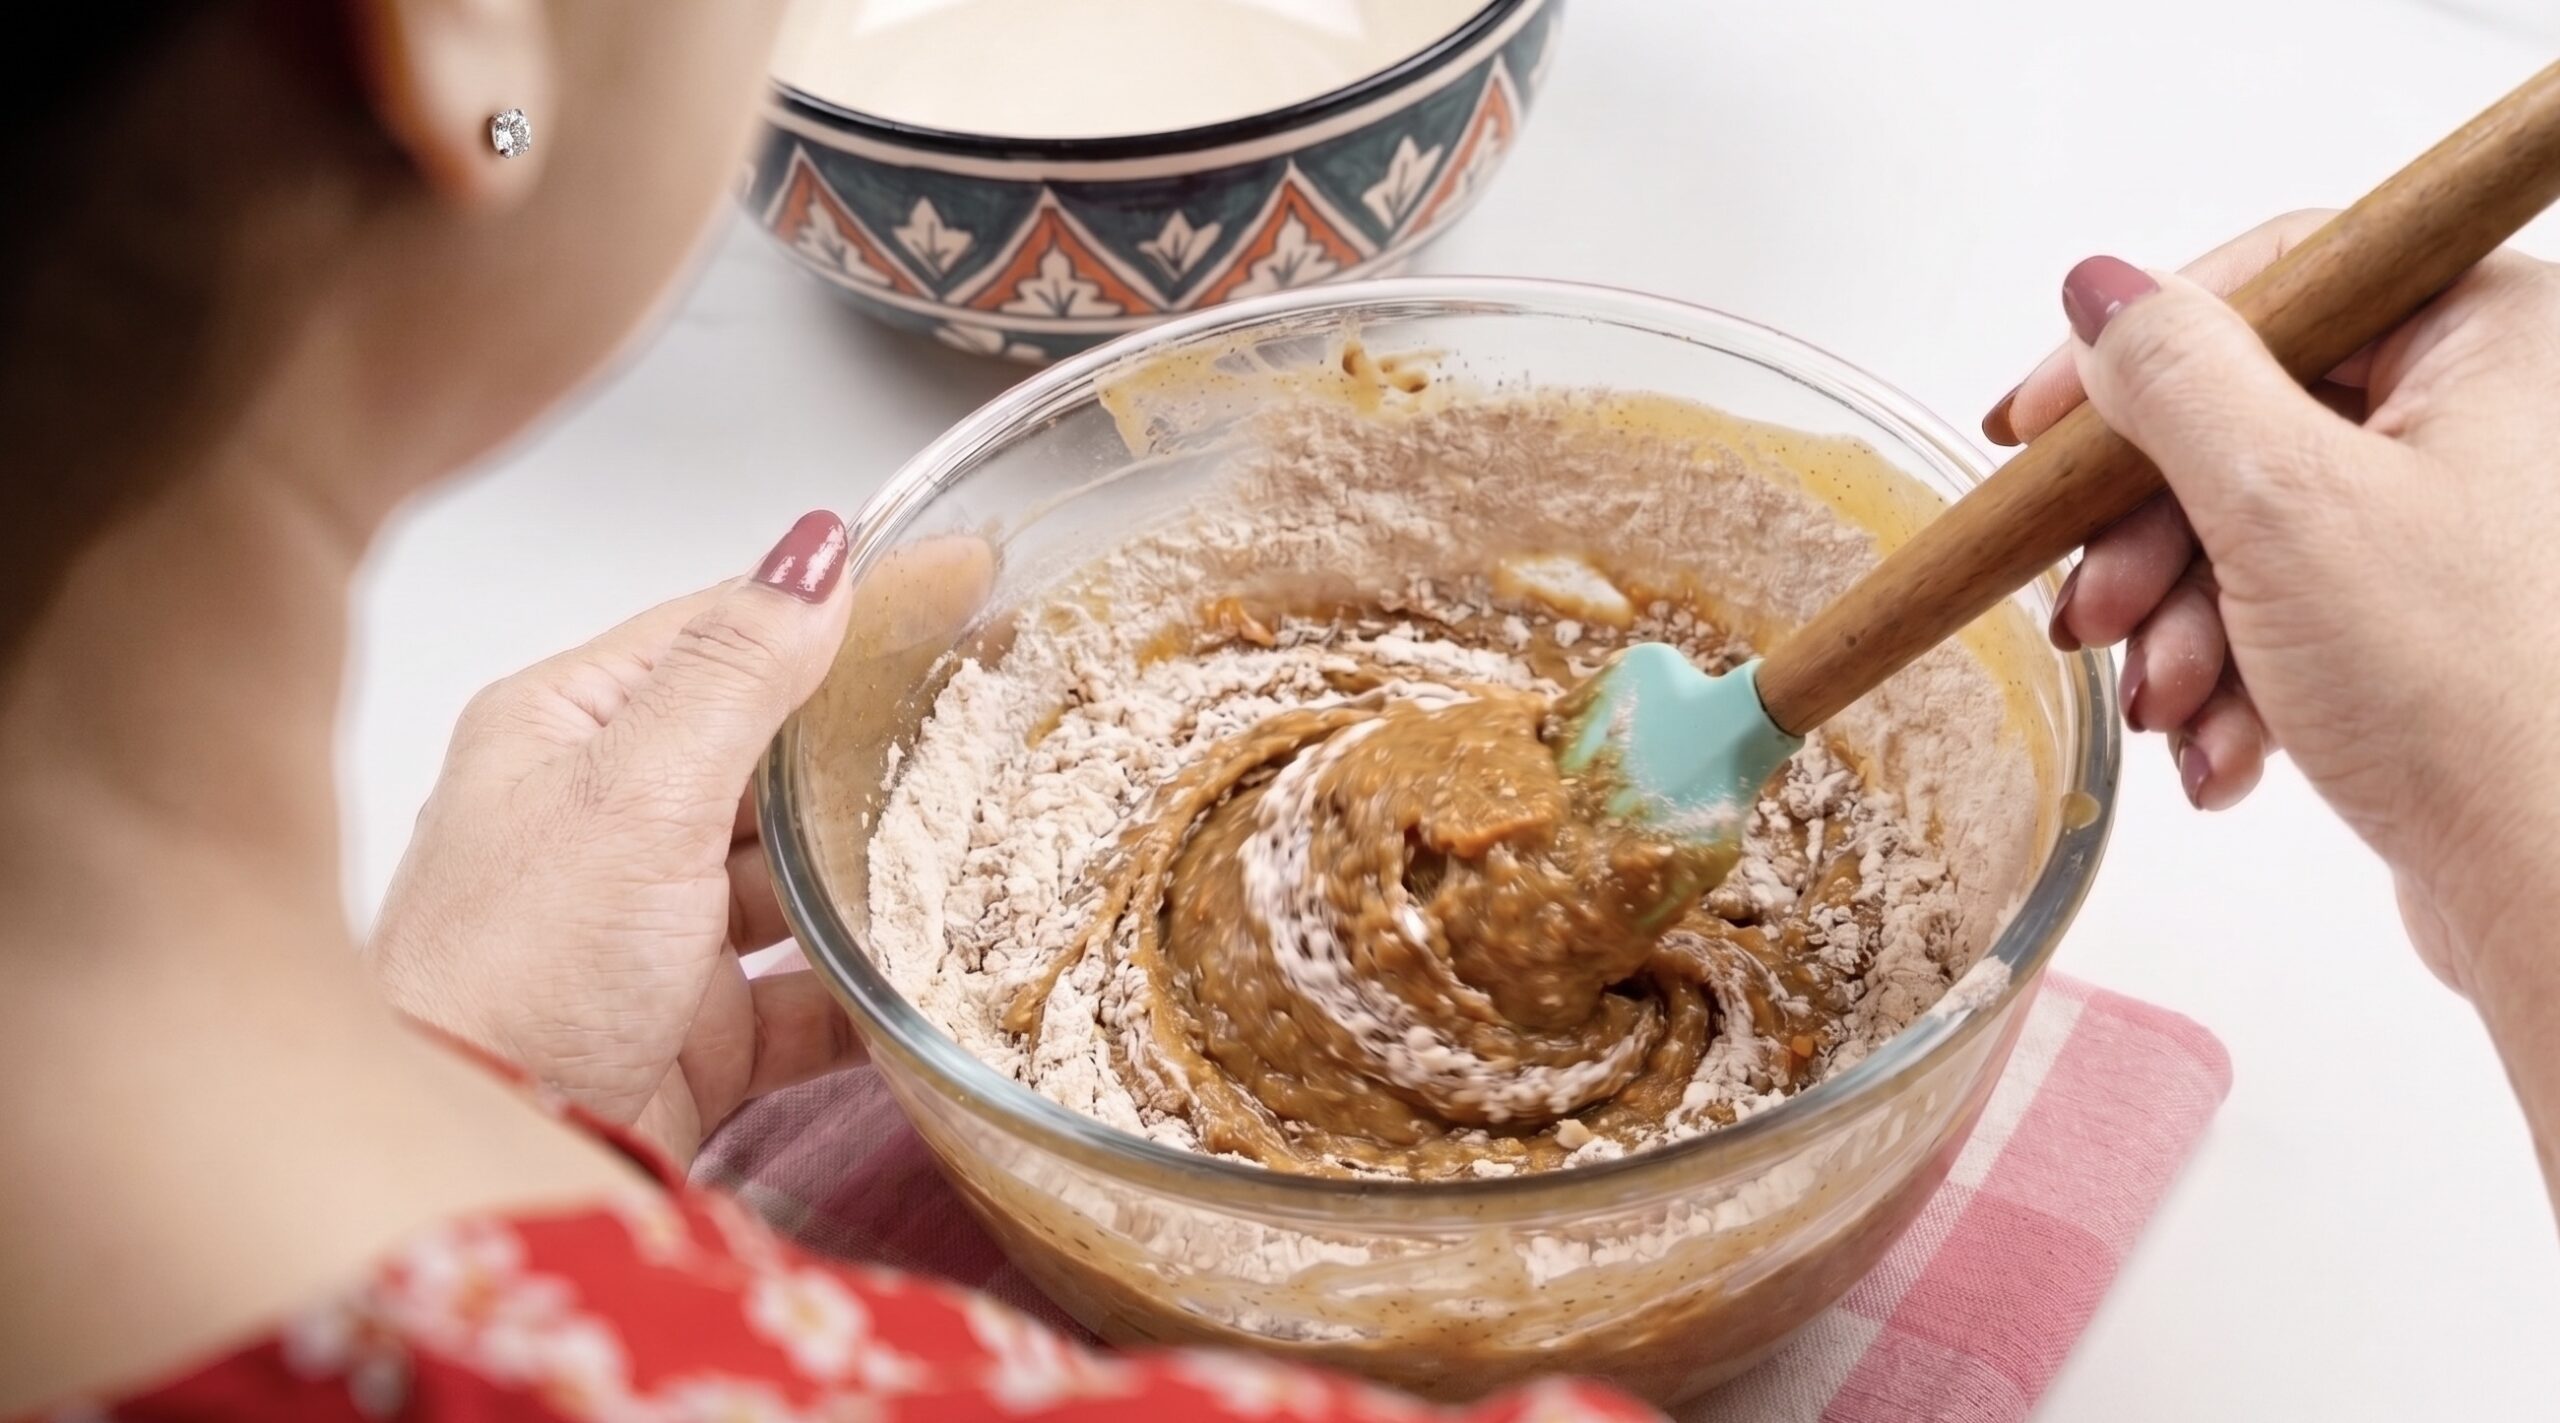
Step 6 — Fold the dry into the wet — gently
Add the dry mix to the wet mix in three additions. Use a spatula, not a whisk, and fold gently. Stop the moment you can’t see dry flour anymore. A few small specks of flour are fine; they will disappear in the oven.
This is the single most important step in the whole recipe. Overmixing develops gluten in the whole wheat, which gives you a chewy, dense cake. In eggless baking, there are no eggs to mask this mistake — so fold, don’t beat. Stop early.
Folding the dry mix into the wet mix gently — the single most important step in eggless baking.
Step 7 — Fold in the chopped pecans
Add the ½ cup of chopped pecans and fold lightly through the batter — just two or three turns of the spatula. The batter will be thick, glossy, and flecked with carrot and pecan.
Step 8 — Pour into the pan and top with pecans
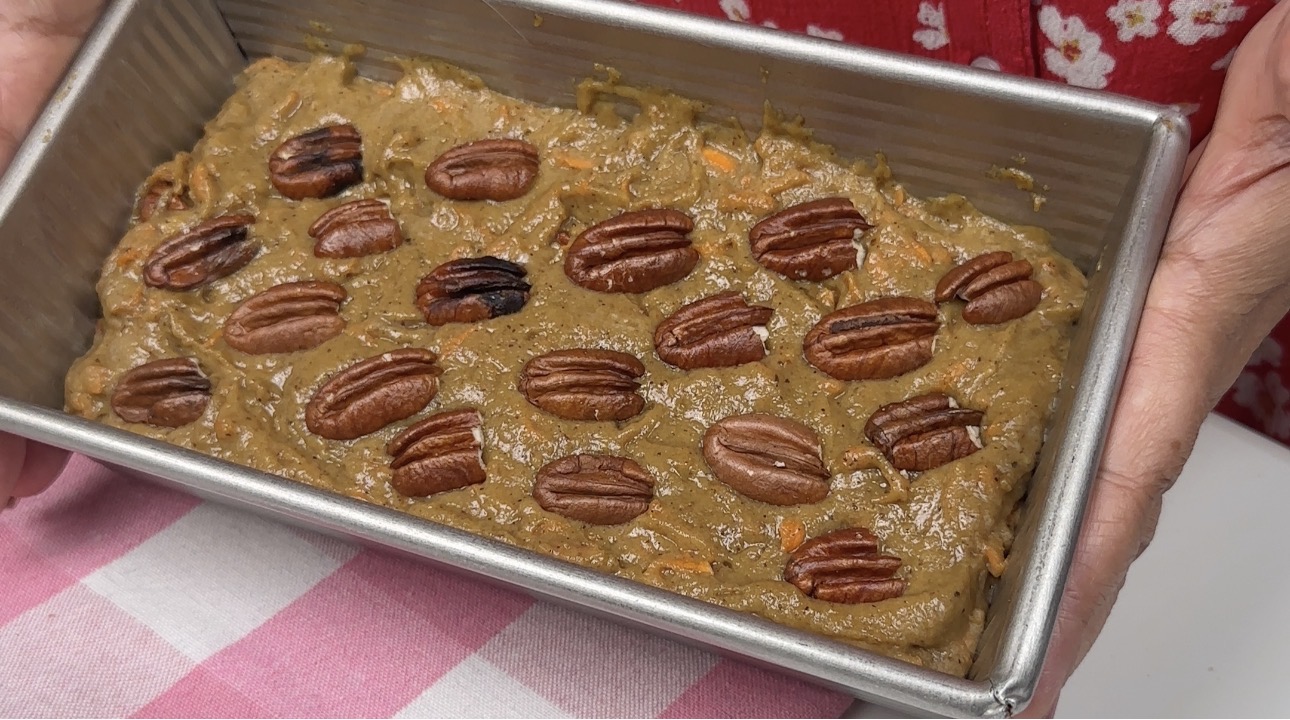
Grease a 9 × 5 inch loaf pan and line the base with parchment paper. Pour the batter into the pan, then smooth the top gently with a spatula. Decorate with the whole pecans — press them lightly into the top of the batter in even rows.
The batter poured into a 9×5 inch loaf pan and decorated with whole pecans, ready to go into the oven.
Step 9 — Bake
Place the pan in the centre of your preheated oven at 175°C (350°F). Bake for 50 to 55 minutes, or until a skewer inserted into the centre comes out with just a few moist crumbs clinging to it. Start checking at 48 minutes — every oven runs a little differently.
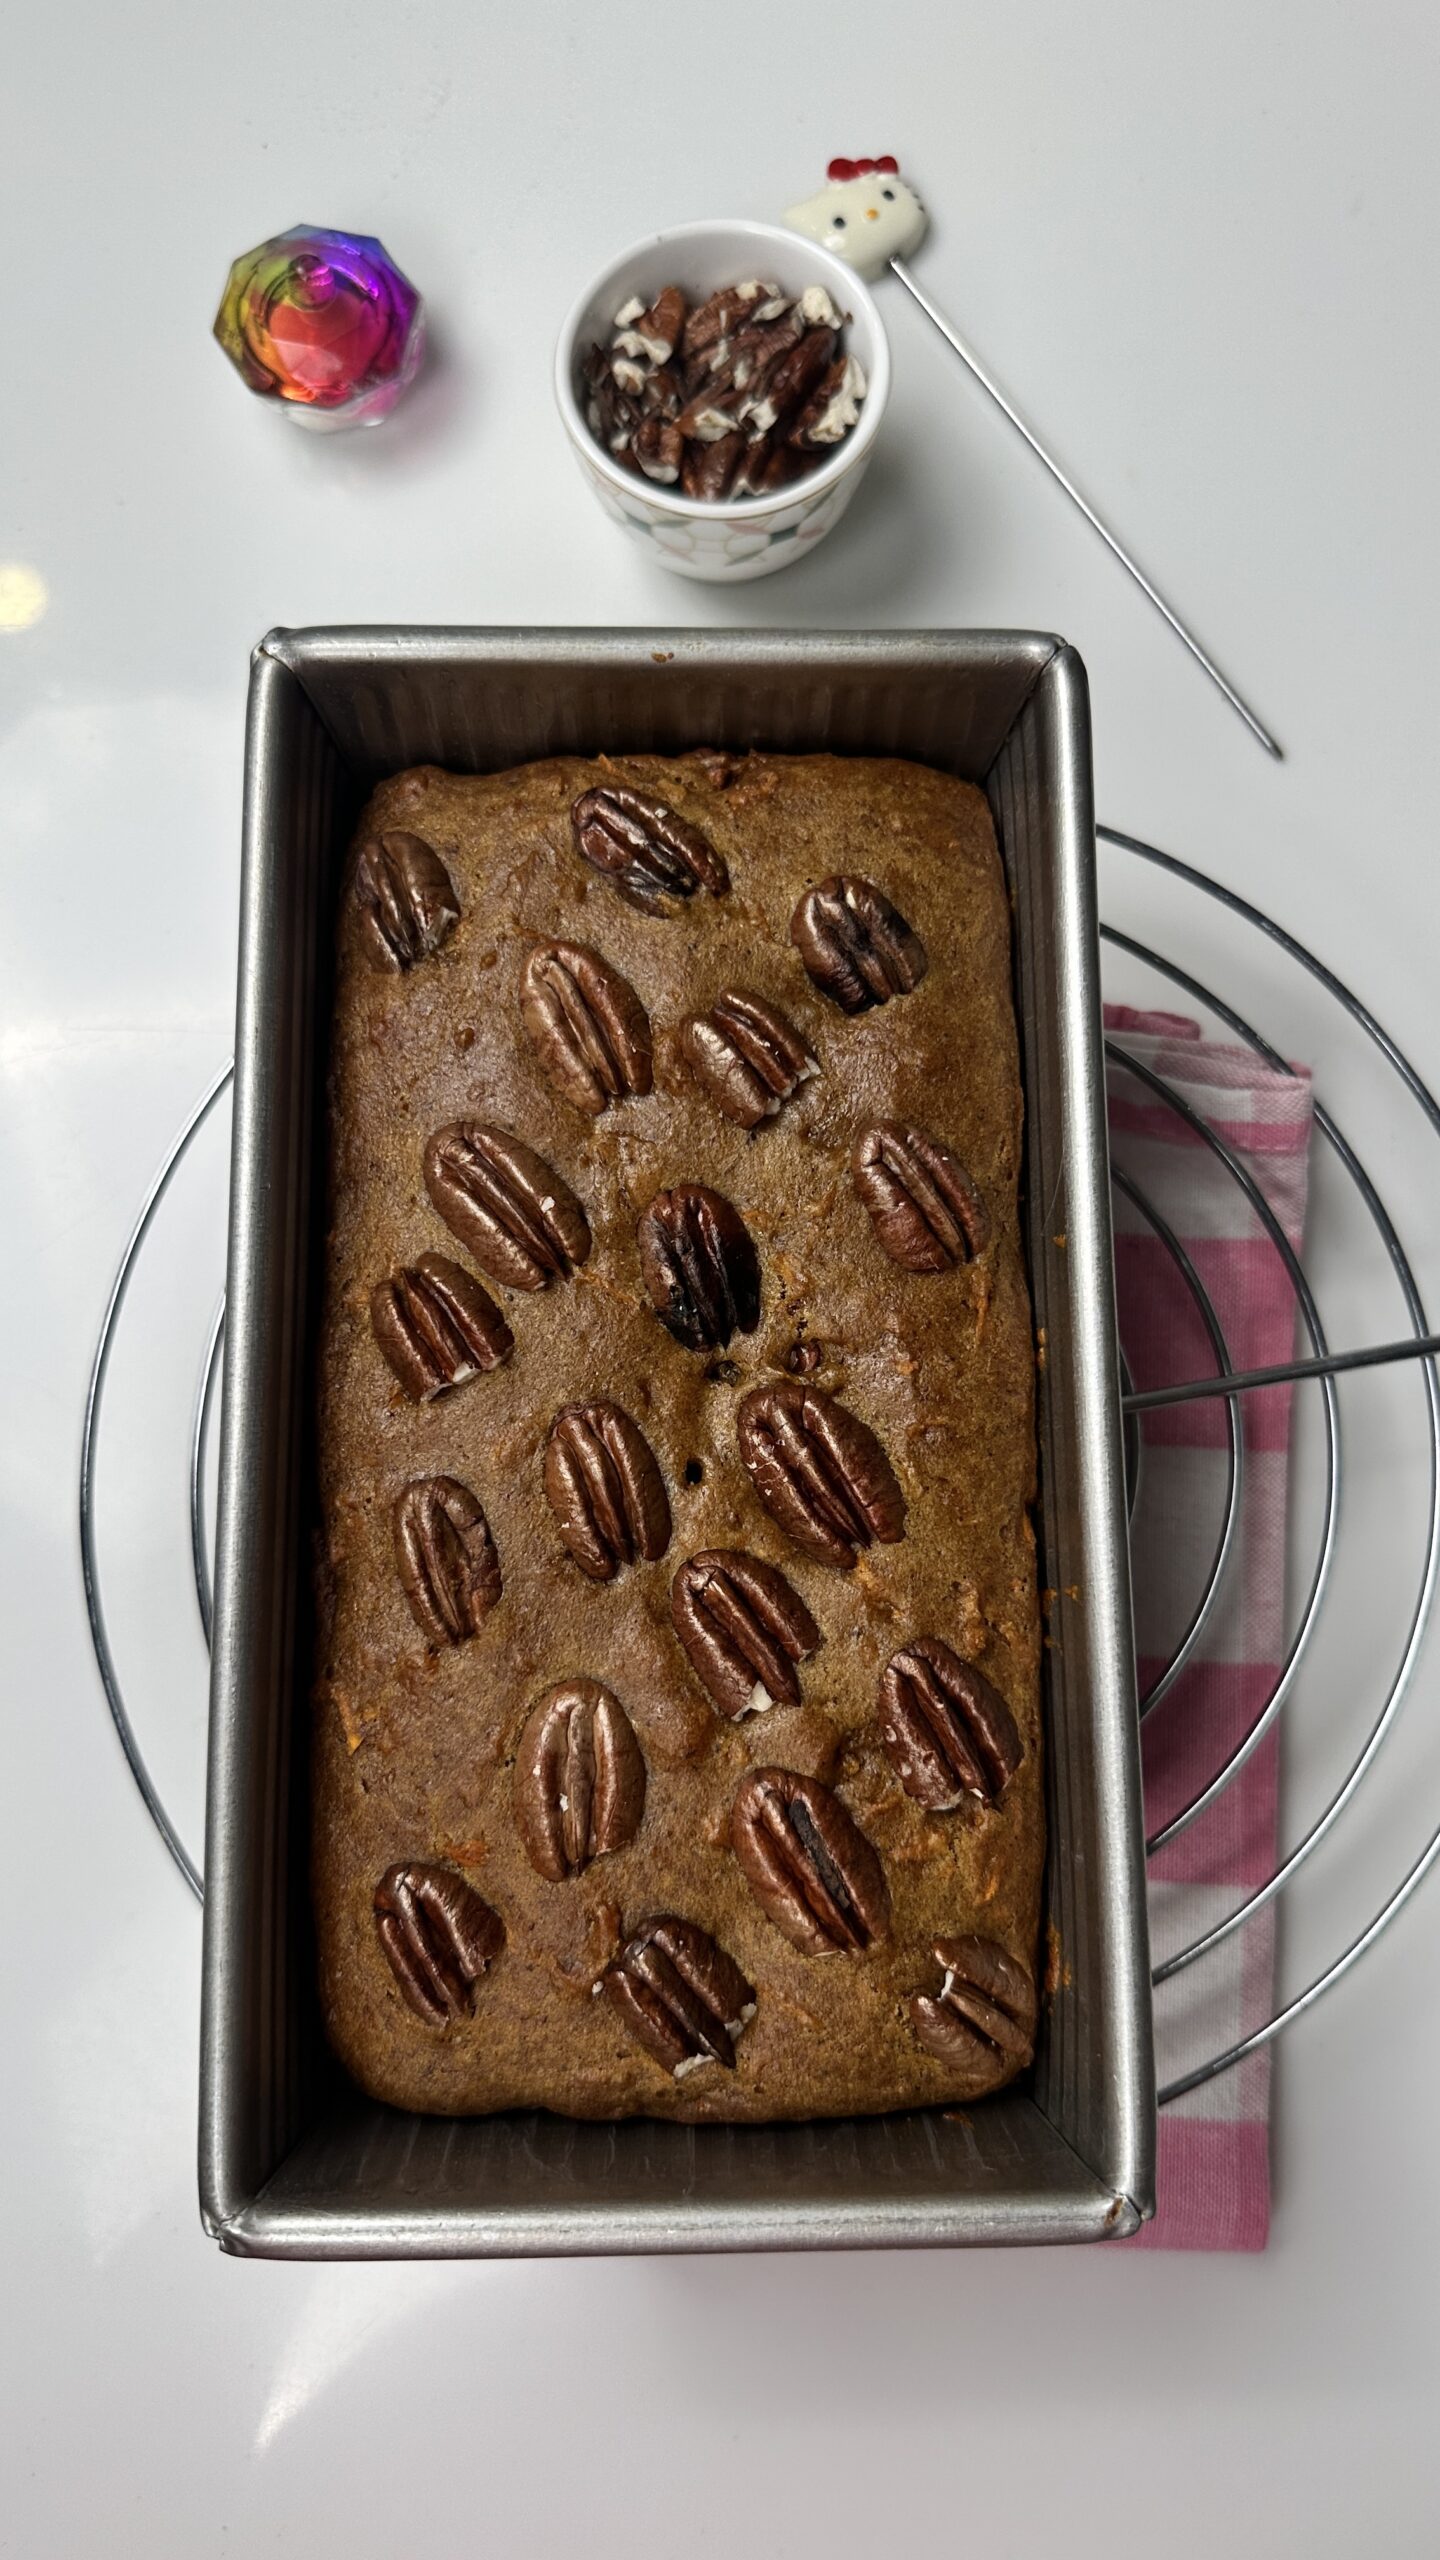
Just out of the oven — cooling in the loaf pan before demolding.
Step 10 — Cool, demold, and slice
Place the pan on a wire rack and let the cake cool completely in the pan — don’t rush this. Once fully cooled, run a thin knife around the edges, demold gently, and slice with a serrated knife for clean slices.
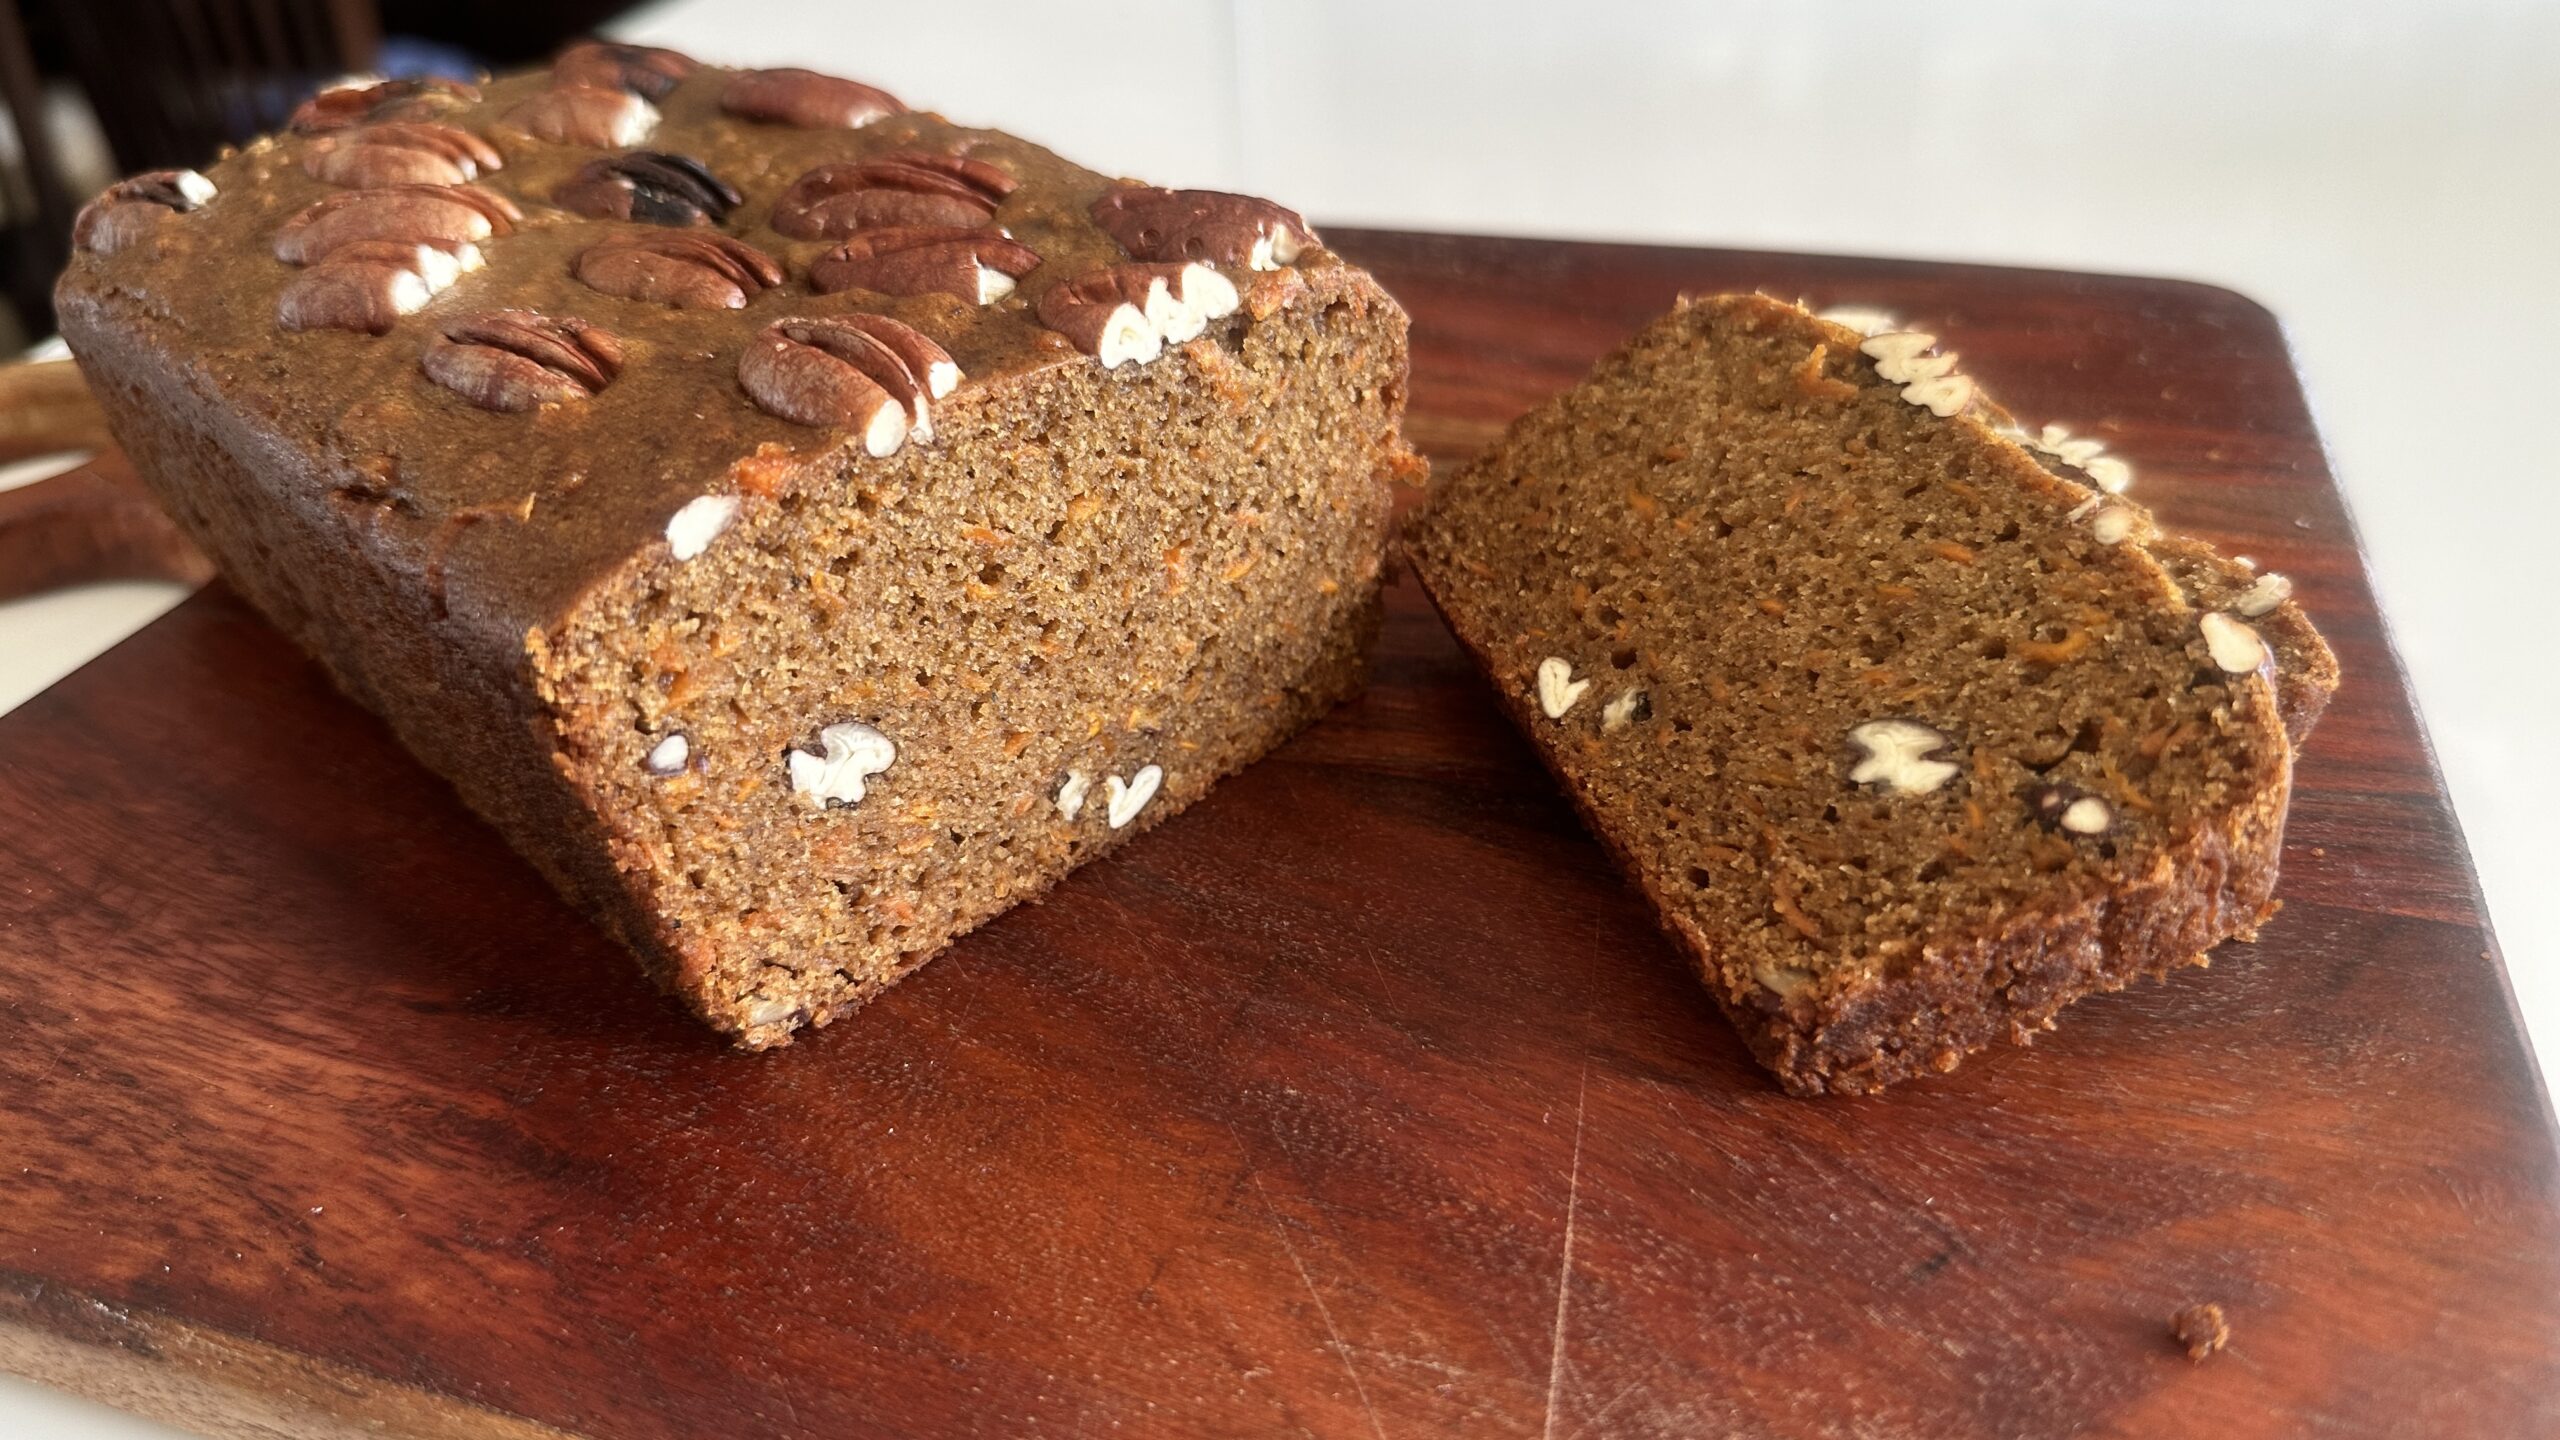
The first cut — revealing the soft, moist crumb flecked with carrot and pecan.
Tips for the Perfect Eggless Date & Carrot Cake
Use yogurt at room temperature. Cold yogurt makes the oil seize. Take it out 20 minutes before you start.
Whisk the dry mix properly. A full 20 seconds. This is the only chance to spread the spices and leaveners evenly.
Toast the pecans if you can. Just one minute in a hot dry pan. Toasted pecans taste deeper and nuttier.
Tap the pan twice before baking. Releases any air pockets hiding in the batter — gives you an even crumb.
Don’t overbake. A few moist crumbs on the skewer is perfect. Bone-dry skewer means it’s already past.
Let it rest overnight if you can. This Eggless Date & Carrot Cake tastes even better on day two. Bake it on a Friday, serve it on a Saturday.
Substitutions That Work
Whole wheat flour can be swapped with a 50:50 mix of whole wheat and all-purpose flour for an even lighter crumb.
Brown sugar can be swapped with jaggery powder — same quantity. The cake will taste a touch deeper and more rustic.
Plant-based milk and curd work perfectly for a fully dairy-free version. Almond milk and coconut yogurt are my favourites.
Pecans can be replaced with walnuts, or skipped entirely for a nut-free version.
Coconut oil instead of neutral oil adds a soft coconut warmth that goes beautifully with the spices.
How to Store This Cake
Wrap the cake (whole or sliced) in cling film or store it in an airtight container at room temperature for up to 3 days — it improves overnight. For longer storage, refrigerate for up to 1 week, and bring slices to room temperature before serving. Individual slices freeze beautifully for up to 1 month.
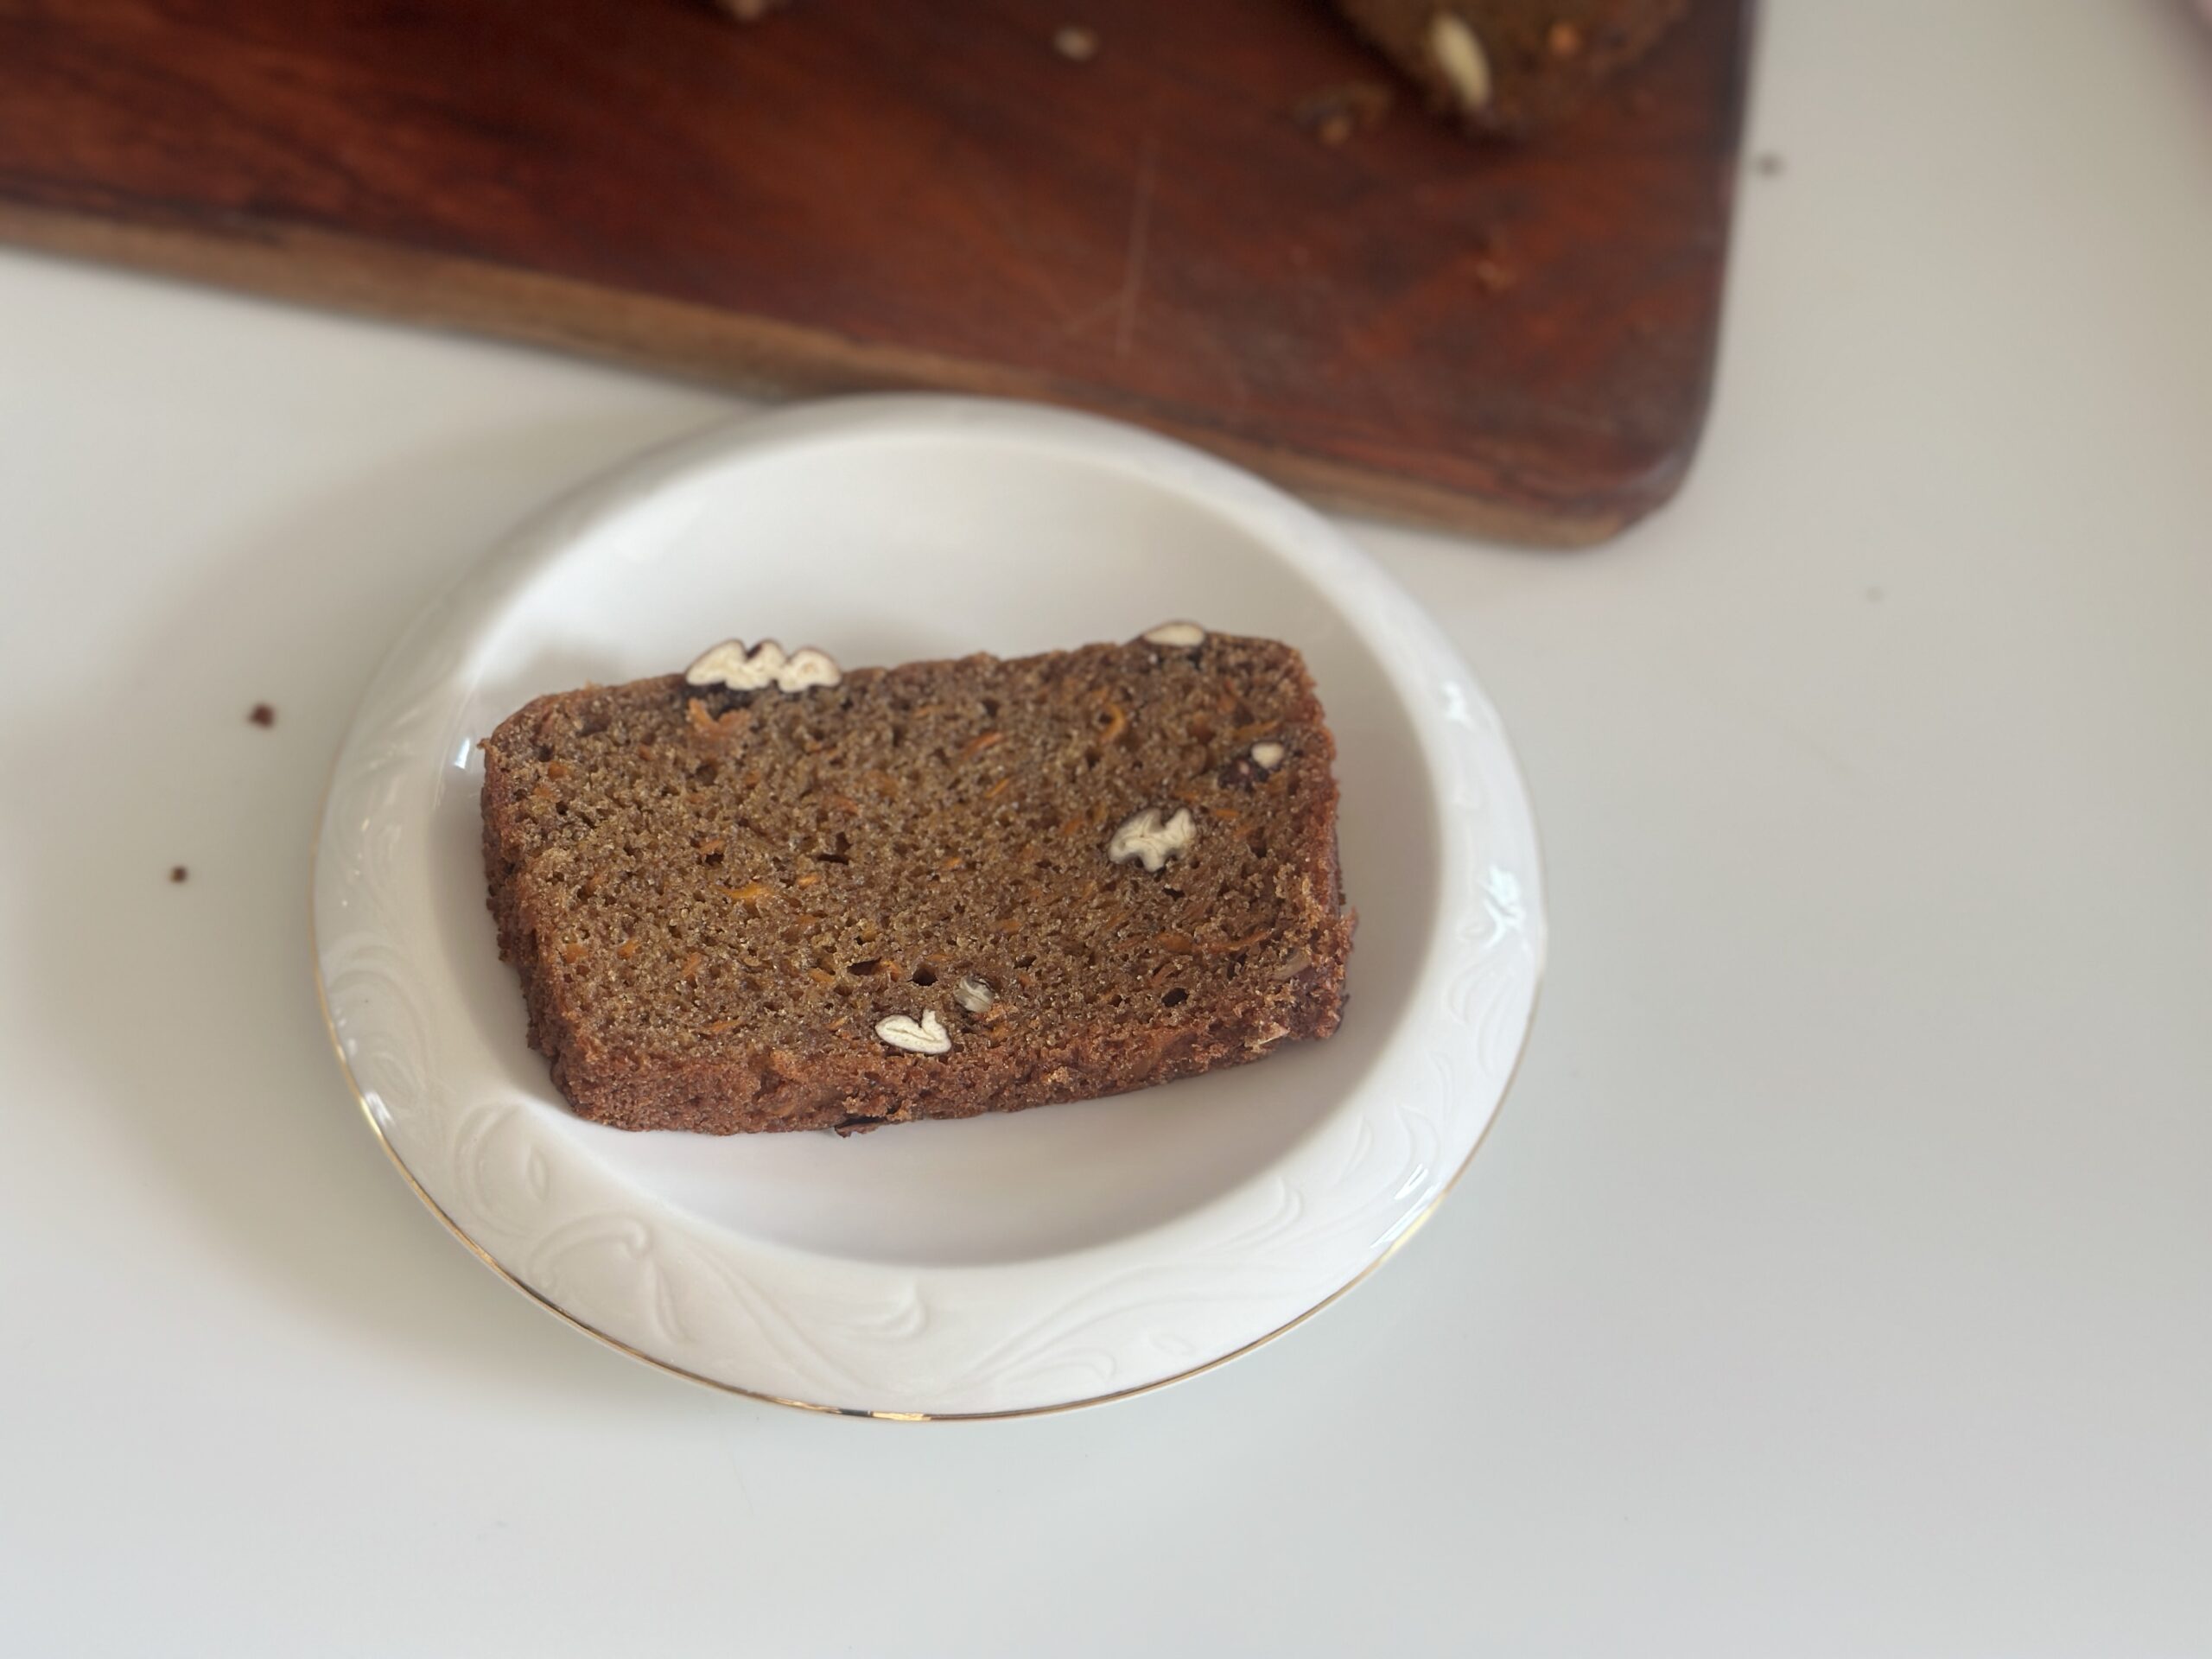
Sliced, packed, and ready to share — this cake is even better the next day.
How to Serve It
Slice this Eggless Date & Carrot Cake just slightly warm and pair it with a strong cup of black coffee or masala chai. For something more indulgent, smear with cream cheese frosting, drizzle with a thin maple glaze, or simply dust with powdered sugar. Honestly though — this cake is good enough to eat plain, straight off the board.
Want More Eggless Baking Ideas?
If you love this recipe, try my Eggless Vanilla Muffins — soft, fluffy, foundational eggless muffins perfect for breakfast or tea-time. Or if you want a richer, more indulgent eggless bake, try my Classic Butter Cake — one of the most-loved recipes on the channel. And if you’re just starting out, my guide to the Essential Baking Tools every home baker needs covers everything you need to set up a baking kitchen from scratch.
A Note on Dates and Whole Wheat Flour
Soft dates are nature’s caramel — they’re rich in natural sugars, fibre, and minerals. Medjool dates in particular are wonderful for baking because they’re sweeter and softer than most varieties, and they blend into the smoothest paste. Combined with whole wheat flour, which keeps the cake nutritious and grounded, you get a bake that’s genuinely good for you without sacrificing the soft, indulgent character of a real cake.
A moist Eggless Date & Carrot Cake made with whole wheat flour and naturally sweetened by soft dates. Warm-spiced with cinnamon and nutmeg, topped with toasted pecans, and easy enough for any home baker. The dates do half the sweetening work — so we use far less added sugar than a traditional cake.
Equipment
9 × 5 inch loaf pan
Small blender or immersion blender
Box grater
Two mixing bowls (one for dry, one for wet)
Silicone Spatula
Wire whisk
Cooling Rack
parchment paper
Ingredients
For the date paste:
½cuppitted dates(chopped (75 g))
½cupwarm milk(120 ml — dairy or plant-based)
For the dry mix:
1½cupswhole wheat flour(180 g)
1tspbaking powder(4 g)
½tspbaking soda(3 g)
1tspcinnamon powder
¼tspnutmeg powder
A pinch of salt
For the wet mix:
½cupgrated carrots(55 g)
¼cupoil(60 ml — neutral or coconut)
¼cupplain yogurt / curd(60 g — room temperature)
½cupbrown sugar(110 g — packed)
1tspvanilla extract
For folding in and topping:
½cupchopped pecans(60 g — or walnuts, optional)
12–15 whole pecans for topping(optional)
Instructions
Preheat your oven to 175°C (350°F). Grease a 9 × 5 inch loaf pan and line the base with parchment paper.
Chop the dates and soak them in warm milk for 10 minutes.
Transfer the soaked dates and milk to a small blender. Blend until you get a smooth, silky paste.
In a large bowl, whisk together the whole wheat flour, baking powder, baking soda, cinnamon, nutmeg, and salt. Whisk for a full 20 seconds. Set aside.
Peel and grate the carrots from the thicker side of your grater.
In a fresh mixing bowl, pour the date paste. Add the oil and yogurt, whisk well. Add the brown sugar and whisk again until smooth. Add the grated carrots and vanilla extract, and whisk to combine.
Add the dry mix to the wet mix in 3 additions, folding gently with a spatula. Stop the moment you can't see dry flour. Do not overmix.
Fold in the chopped pecans with two or three gentle turns.
Pour the batter into the prepared loaf pan. Smooth the top with a spatula. Decorate with whole pecans in even rows.
Bake at 175°C for 50–55 minutes, or until a skewer inserted into the centre comes out with just a few moist crumbs.
Place the pan on a wire rack and let the cake cool completely in the pan. Demold and slice once fully cooled.
Video
Notes
Notes & Tips
Yogurt must be at room temperature, or the oil will seize.
Whisk the dry mix for a full 20 seconds — this is your only chance to distribute spices evenly.
Toast the pecans lightly in a dry pan before folding in to deepen the flavour.
Do not overmix the batter once you add the flour — fold gently, stop early.
This cake tastes even better on the second day. Wrap and rest overnight if you can.
Store at room temperature for 3 days, or refrigerate for up to a week.
Freezer-friendly — wrap individual slices and freeze for up to 1 month.
Author: Deepali Ohri
Course: Dessert, Snack, Tea-time Treat
Cuisine: Indian, International
Keyword: date paste cake, eggless carrot loaf, eggless date and carrot cake, healthy eggless cake, naturally sweet cake, whole wheat date cake
Want More Baking Magic in Your Life?
🔔 Subscribe to my YouTube channel for two new eggless baking videos every week — every Wednesday and Saturday at 6 PM IST.
📸 Follow along for daily baking inspiration on Instagram, Pinterest, and Facebook.
The temperature in Punjab crossed 41 degrees this week. My kitchen has become an oven of its own without needing one switched on. Somewhere between April and June every year, I quietly stop using my OTG. The mangoes start arriving in their crates from the market, the air smells of them by evening, and the only thing my family wants to eat is something cold, creamy, and impossibly easy.
There’s something deeply satisfying about a cookie that asks for almost nothing and gives you everything in return. These eggless condensed milk cookies — also known fondly as Milkmaid cookies — need just four ingredients, no eggs, and barely an hour of your time. And yet, somehow, they taste like they took all afternoon.
If you have ever stood in your kitchen craving something sweet but felt too tired to bake, this recipe was made for you. This condensed milk cake is the kind of recipe that makes you feel like a genius in the kitchen — because it is impossibly simple and impossibly delicious at the same time.
There are some recipes that just feel like a warm hug. This Eggless Coffee Walnut Cake is one of them. The moment this cake goes into the oven, the entire house smells of coffee and roasted walnuts — and I am not exaggerating when I say that smell alone is worth baking it for.


")


")

