

There’s something incredibly calming about baking bread. Maybe it’s the slowness of the process. Maybe it’s the joy of watching a shaggy dough transform into a golden, fragrant loaf. Or maybe it’s just that comforting smell that fills your kitchen and warms your heart.
There’s something magical about the smell of freshly baked bread wafting through your home — it’s comforting, nostalgic, and so satisfying.
Today, I’m sharing my go-to No-Knead White Bread Loaf – the recipe I come back to over and over again. It’s soft, buttery, and incredibly simple to make, even if you don’t own a stand mixer or have hours to spend in the kitchen.
The magic? You don’t need to knead this dough. Just give it time – that’s all it asks for. Let it rise slowly, do its thing overnight in the fridge, and finish it the next day when you’re ready. This is truly a forgiving, flexible, and beginner-friendly bread recipe that gives you bakery-style results without fuss.
Let’s dive into the story of how a humble mix of flour, yeast, water, and milk becomes a cloud-like loaf of perfection.
I still remember the very first time I baked bread from scratch. I was nervous, unsure if the dough would rise or if the crust would brown evenly. But the moment I pulled that soft golden loaf out of the oven, all those doubts melted away. Since then, baking bread has become a quiet, joyful ritual — and today, I’m sharing that experience with you through this simple yet professional white bread recipe.
Whether you’re a beginner or a seasoned baker, this recipe will walk you through everything — from kneading tips to oven tricks — so your bread turns out bakery-perfect every single time.
🌾 Ingredients You’ll Need
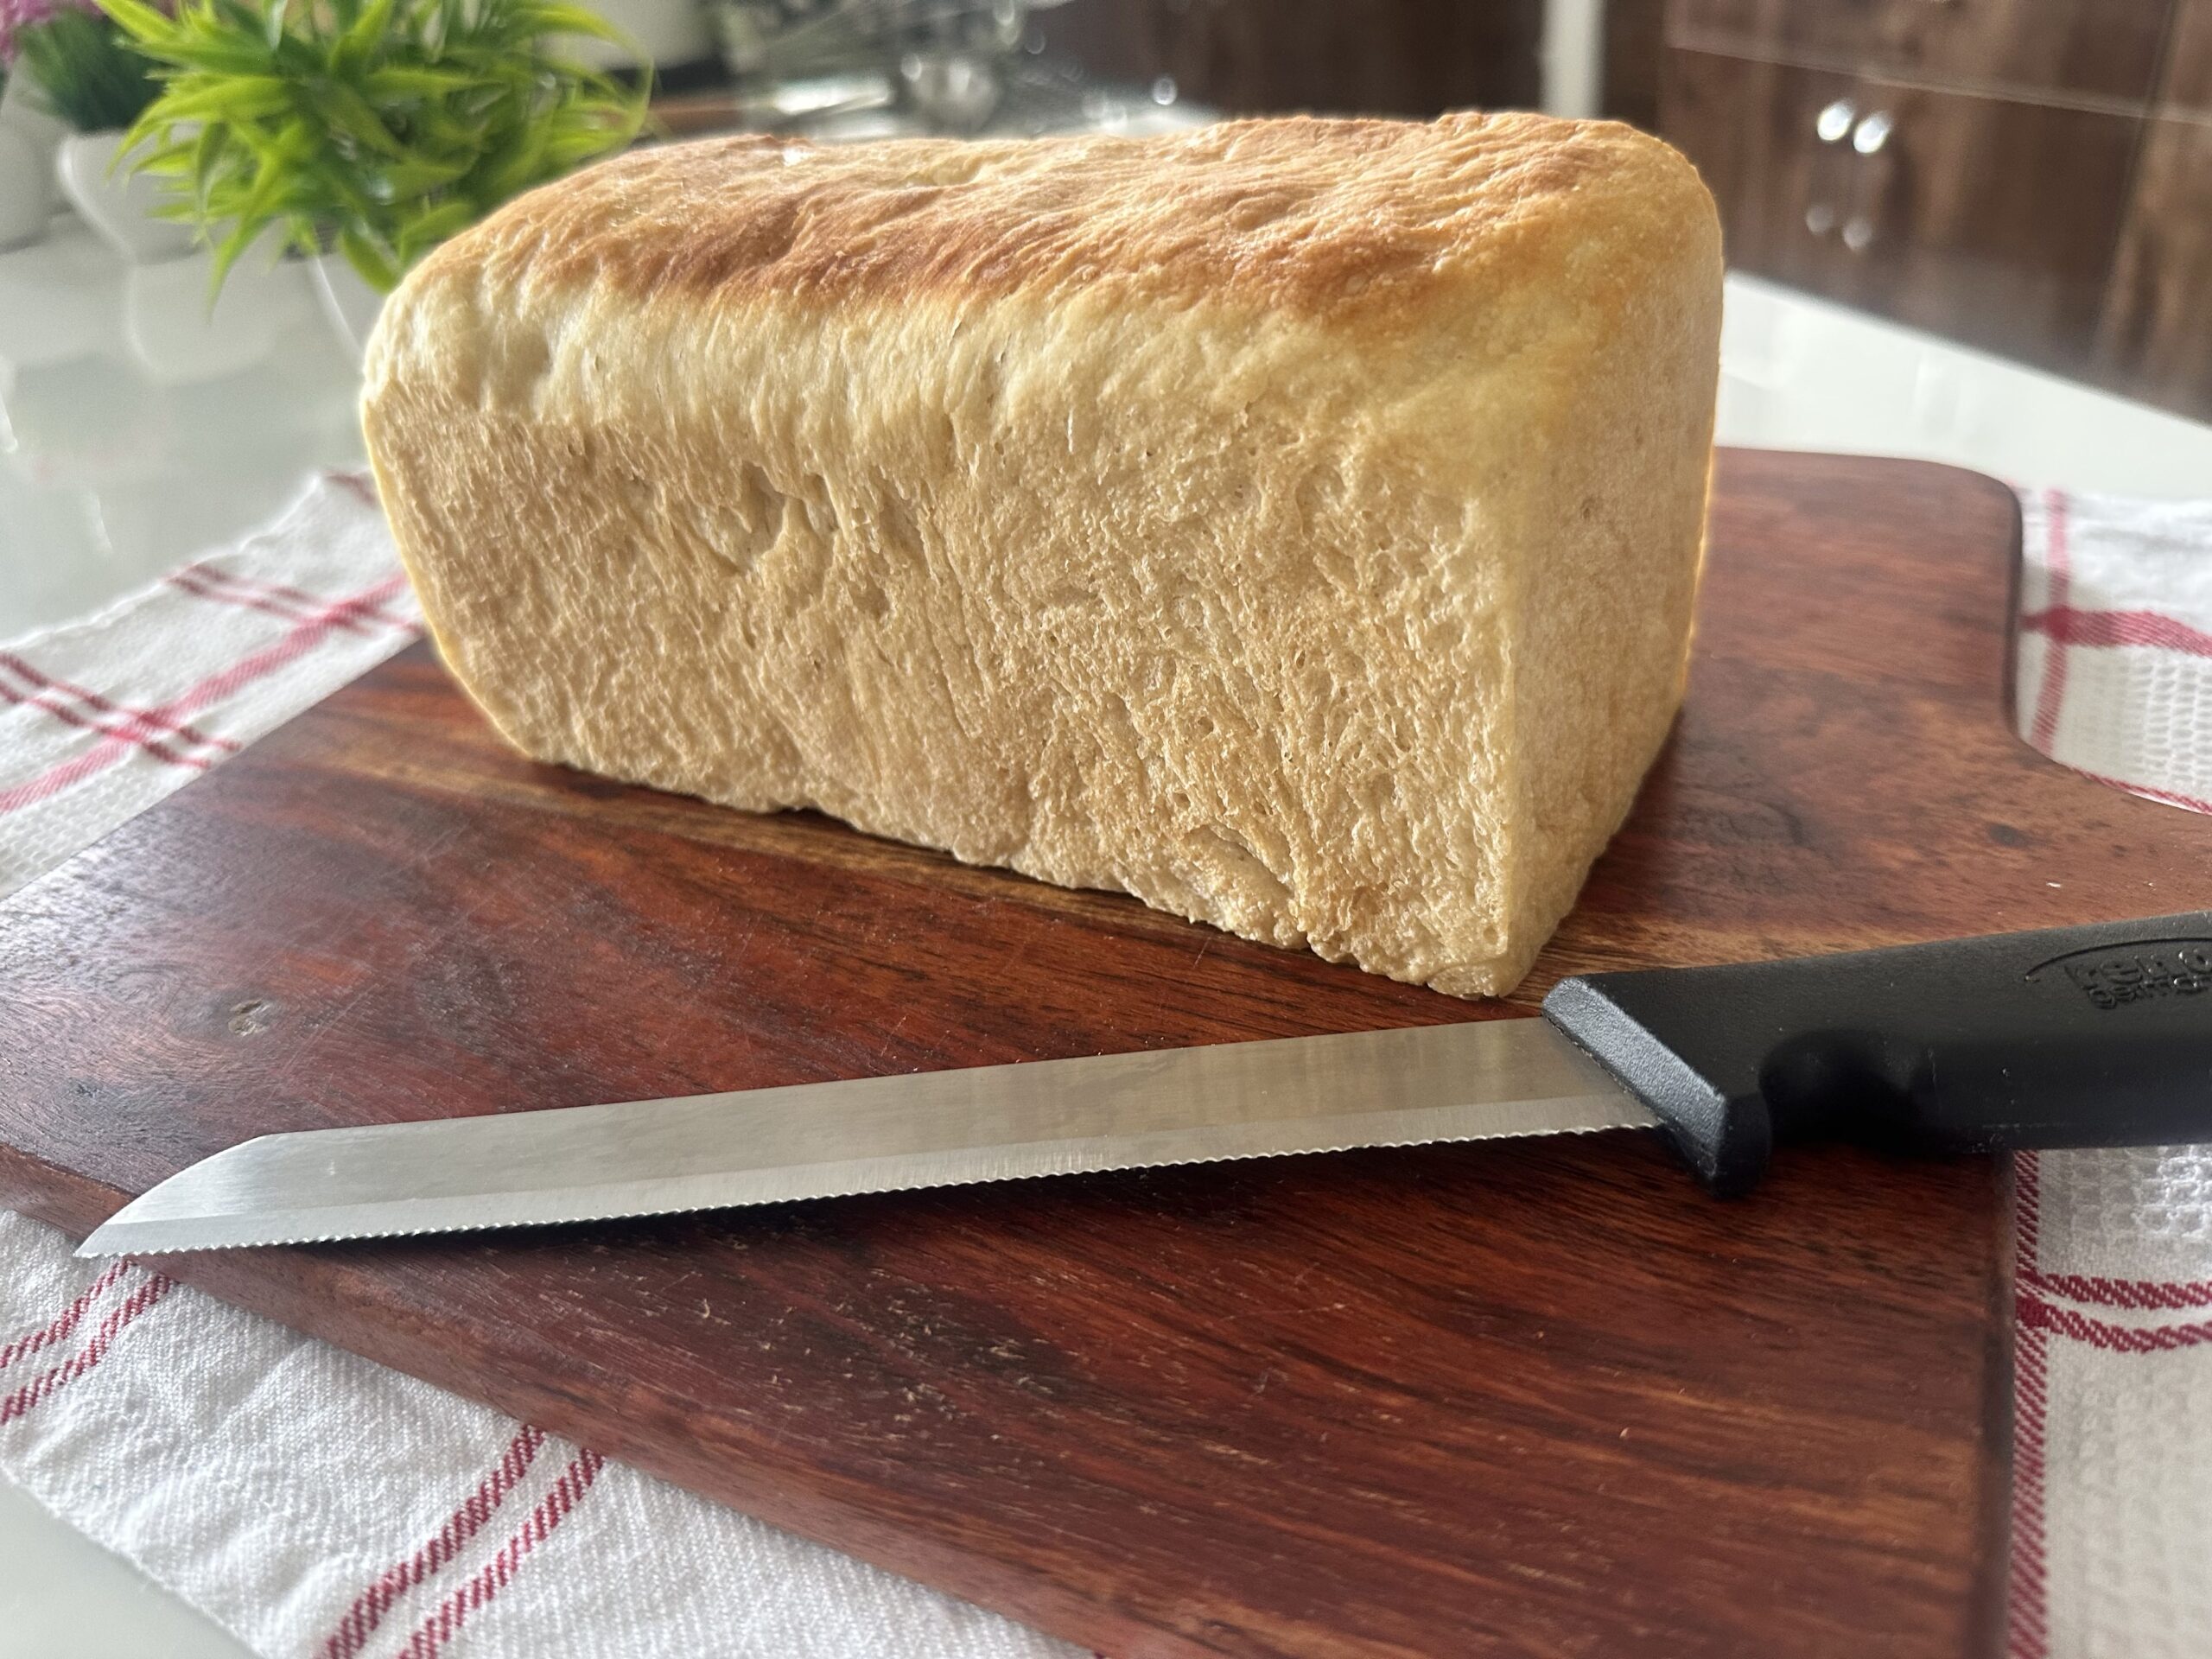
I use a 7x5x4 inch loaf pan but anything around that size (+/- an inch) will work just fine.
-
380g (2 ¾ cups) bread flour
-
1 tsp salt
-
1 tbsp sugar
-
1 tsp instant yeast
-
165g (¾ cup) warm water
-
105g (½ cup) warm milk
-
1 tbsp butter, softened (or 1 tbsp oil, but butter gives a lovely aroma)
🍽 My Preferred Method: Cold Fermentation (Overnight)
This is the method I love because it fits into a busy schedule. You do all the mixing today, pop the dough in the fridge, and finish the shaping, resting, and baking the next day. Here’s how:
👩🍳 Step-by-Step Instructions
Day 1 – Mixing and Cold Proofing
-
Combine dry ingredients
In a large mixing bowl, combine bread flour, salt, sugar, and yeast. Stir them together. -
Warm the liquids
Mix water and milk in a glass. If your milk is cold, gently warm the mixture until it’s lukewarm—think body temperature, not hot. -
Mix the dough
Make a well in the flour mixture, pour in the warm milk-water mix. Using a spatula, stir everything together until a sticky dough forms. Avoid using hands at this stage—it’s a messy dough! -
Add the butter
Spread the softened butter over the dough and gently fold it in. It might seem slippery at first but it will absorb as the dough rests. -
Cold proof
Cover the bowl tightly with cling film and place in the fridge overnight (8–12 hours). The dough will slowly rise and double in size.
Day 2 – Shaping, Resting, and Baking
-
Bring to room temp
Take the dough out of the fridge and let it rest for at least 30 minutes to warm up slightly. -
First shaping
In the bowl itself, gently press it to release air bubbles. Keep folding and shape into a rough ball. -
Rest again
Cover and let it rest for 30–45 minutes at room temperature. The dough should puff up again. -
Final shaping and pan prep
Grease your loaf pan well. Shape the dough into a tight log and place it in the pan. Press down gently to remove air pockets. -
Final rise
Cover with cling film (or the loaf pan lid if using) and let it rise for another 45–60 minutes or until it reaches the top of the pan. -
Bake!
Preheat your oven to 190°C (375°F). Bake the loaf for 35-40 minutes until golden brown on top. -
Cool completely
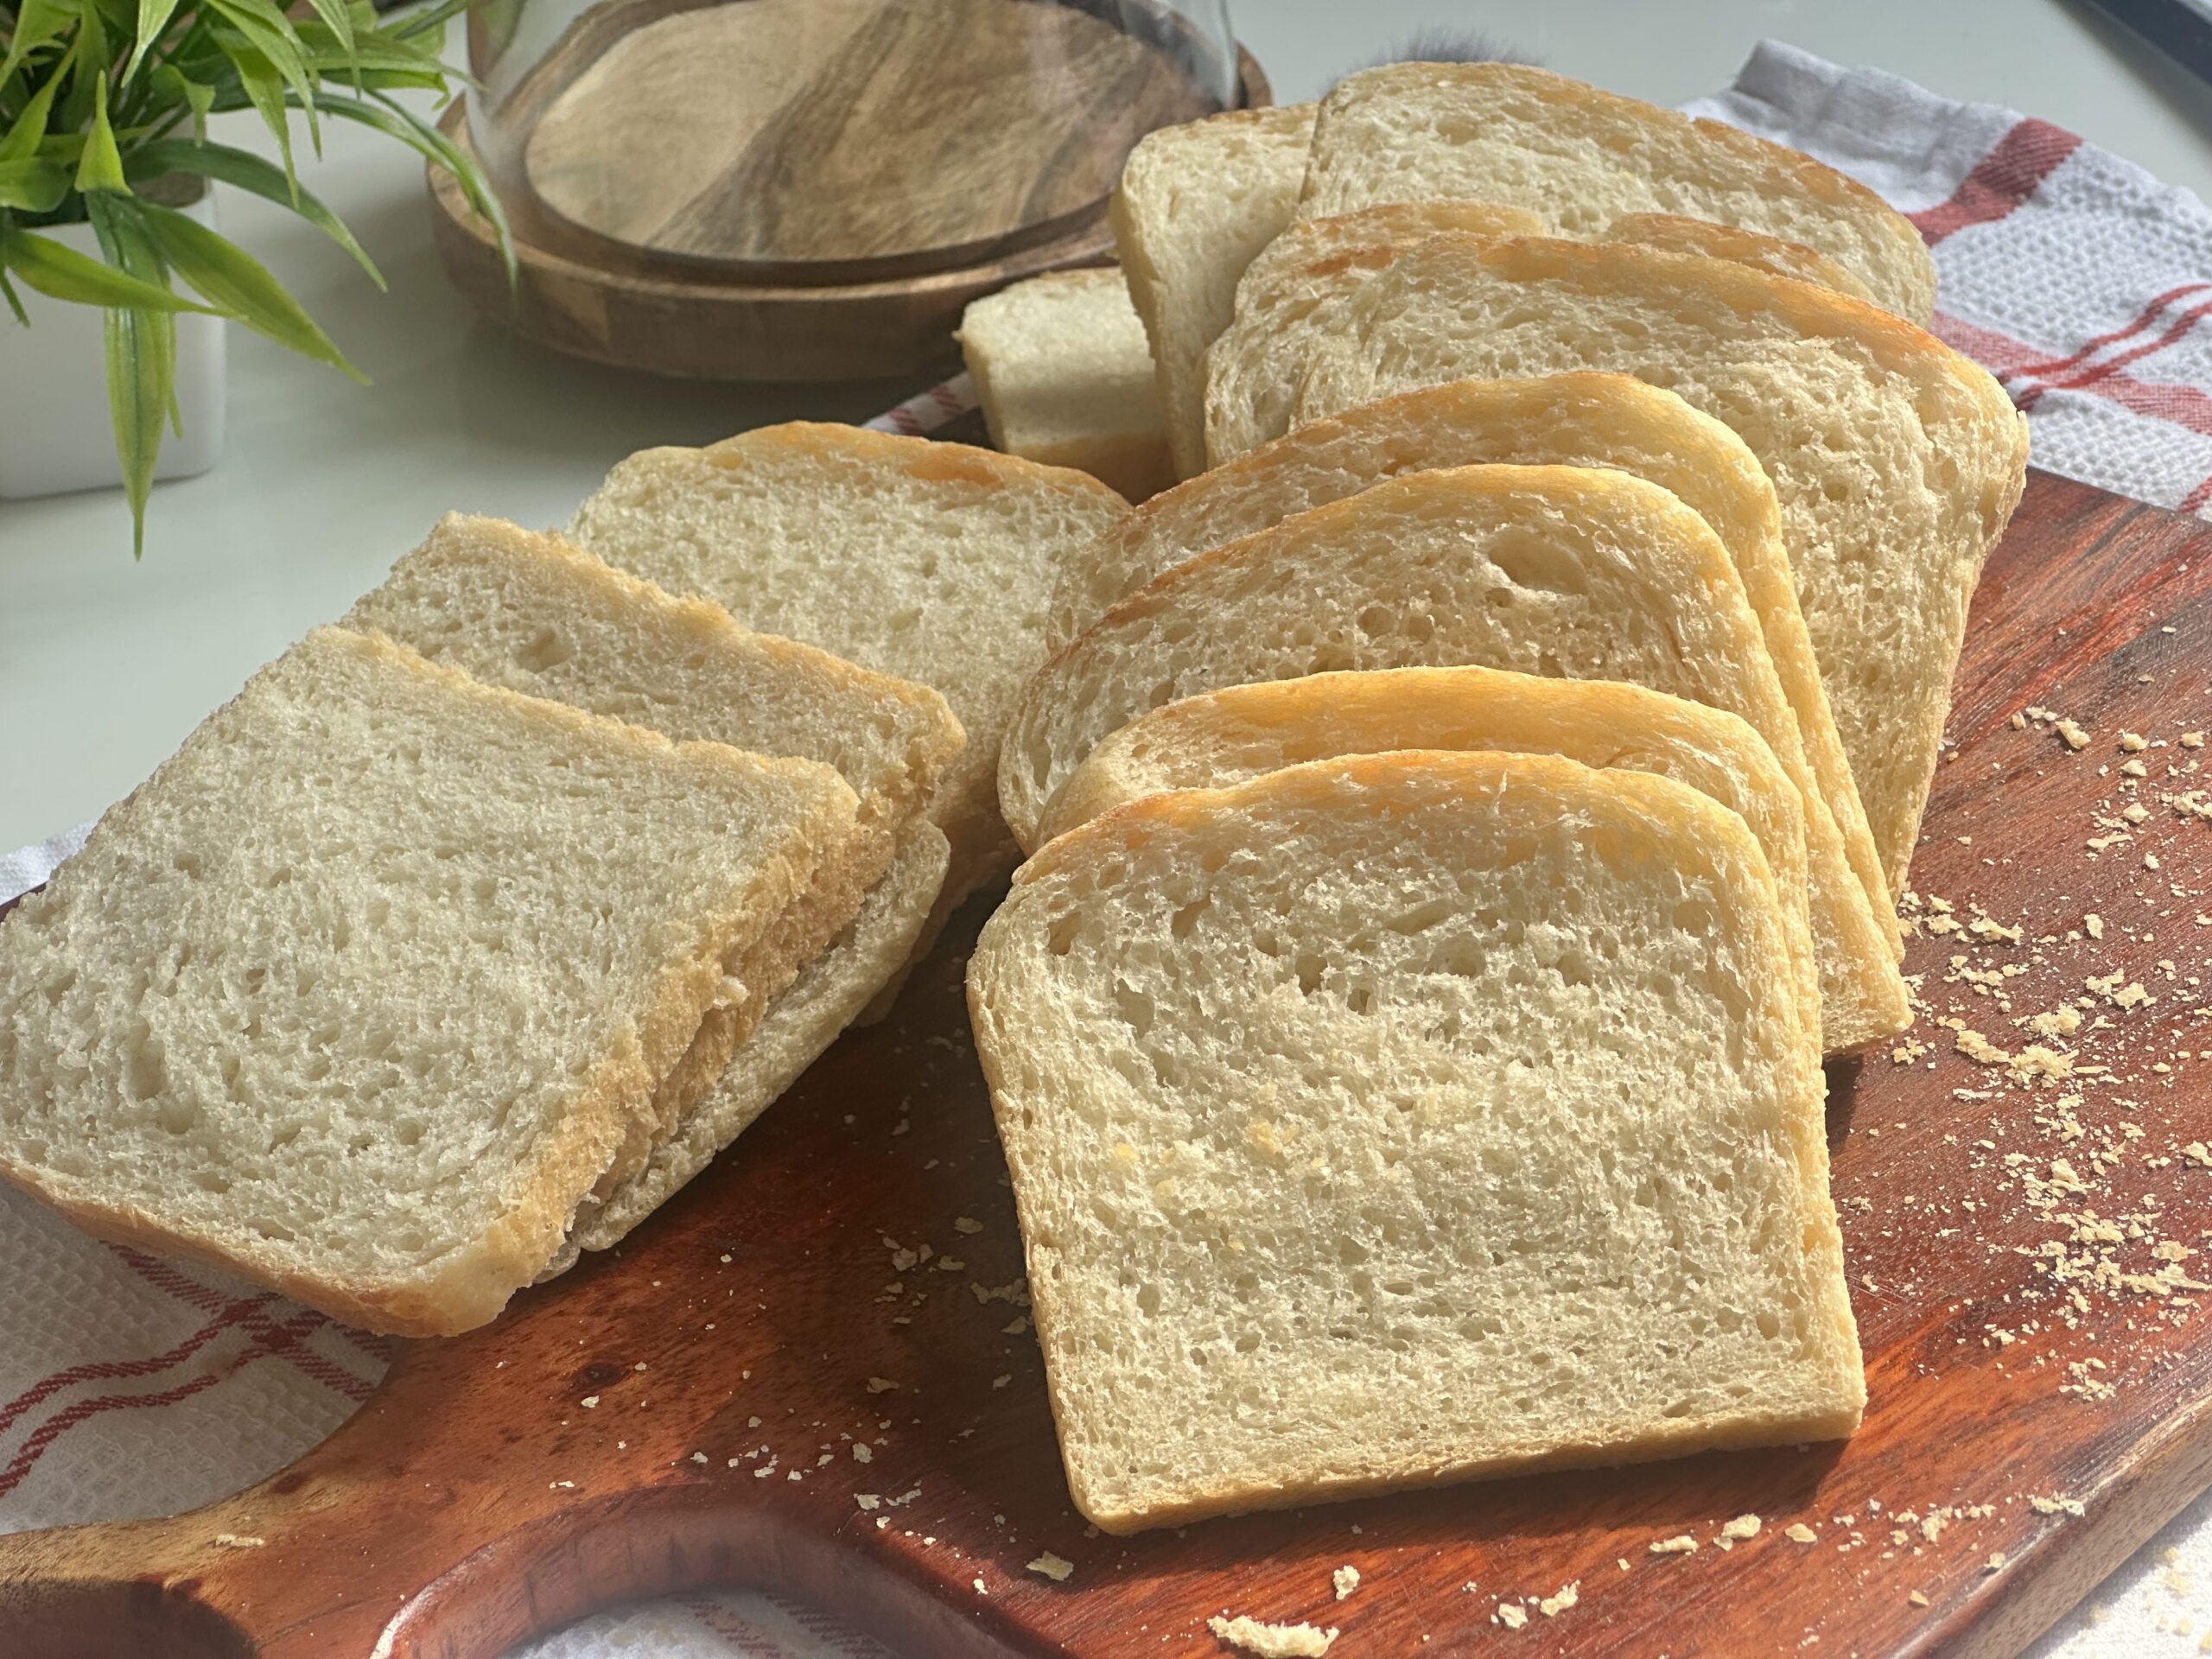
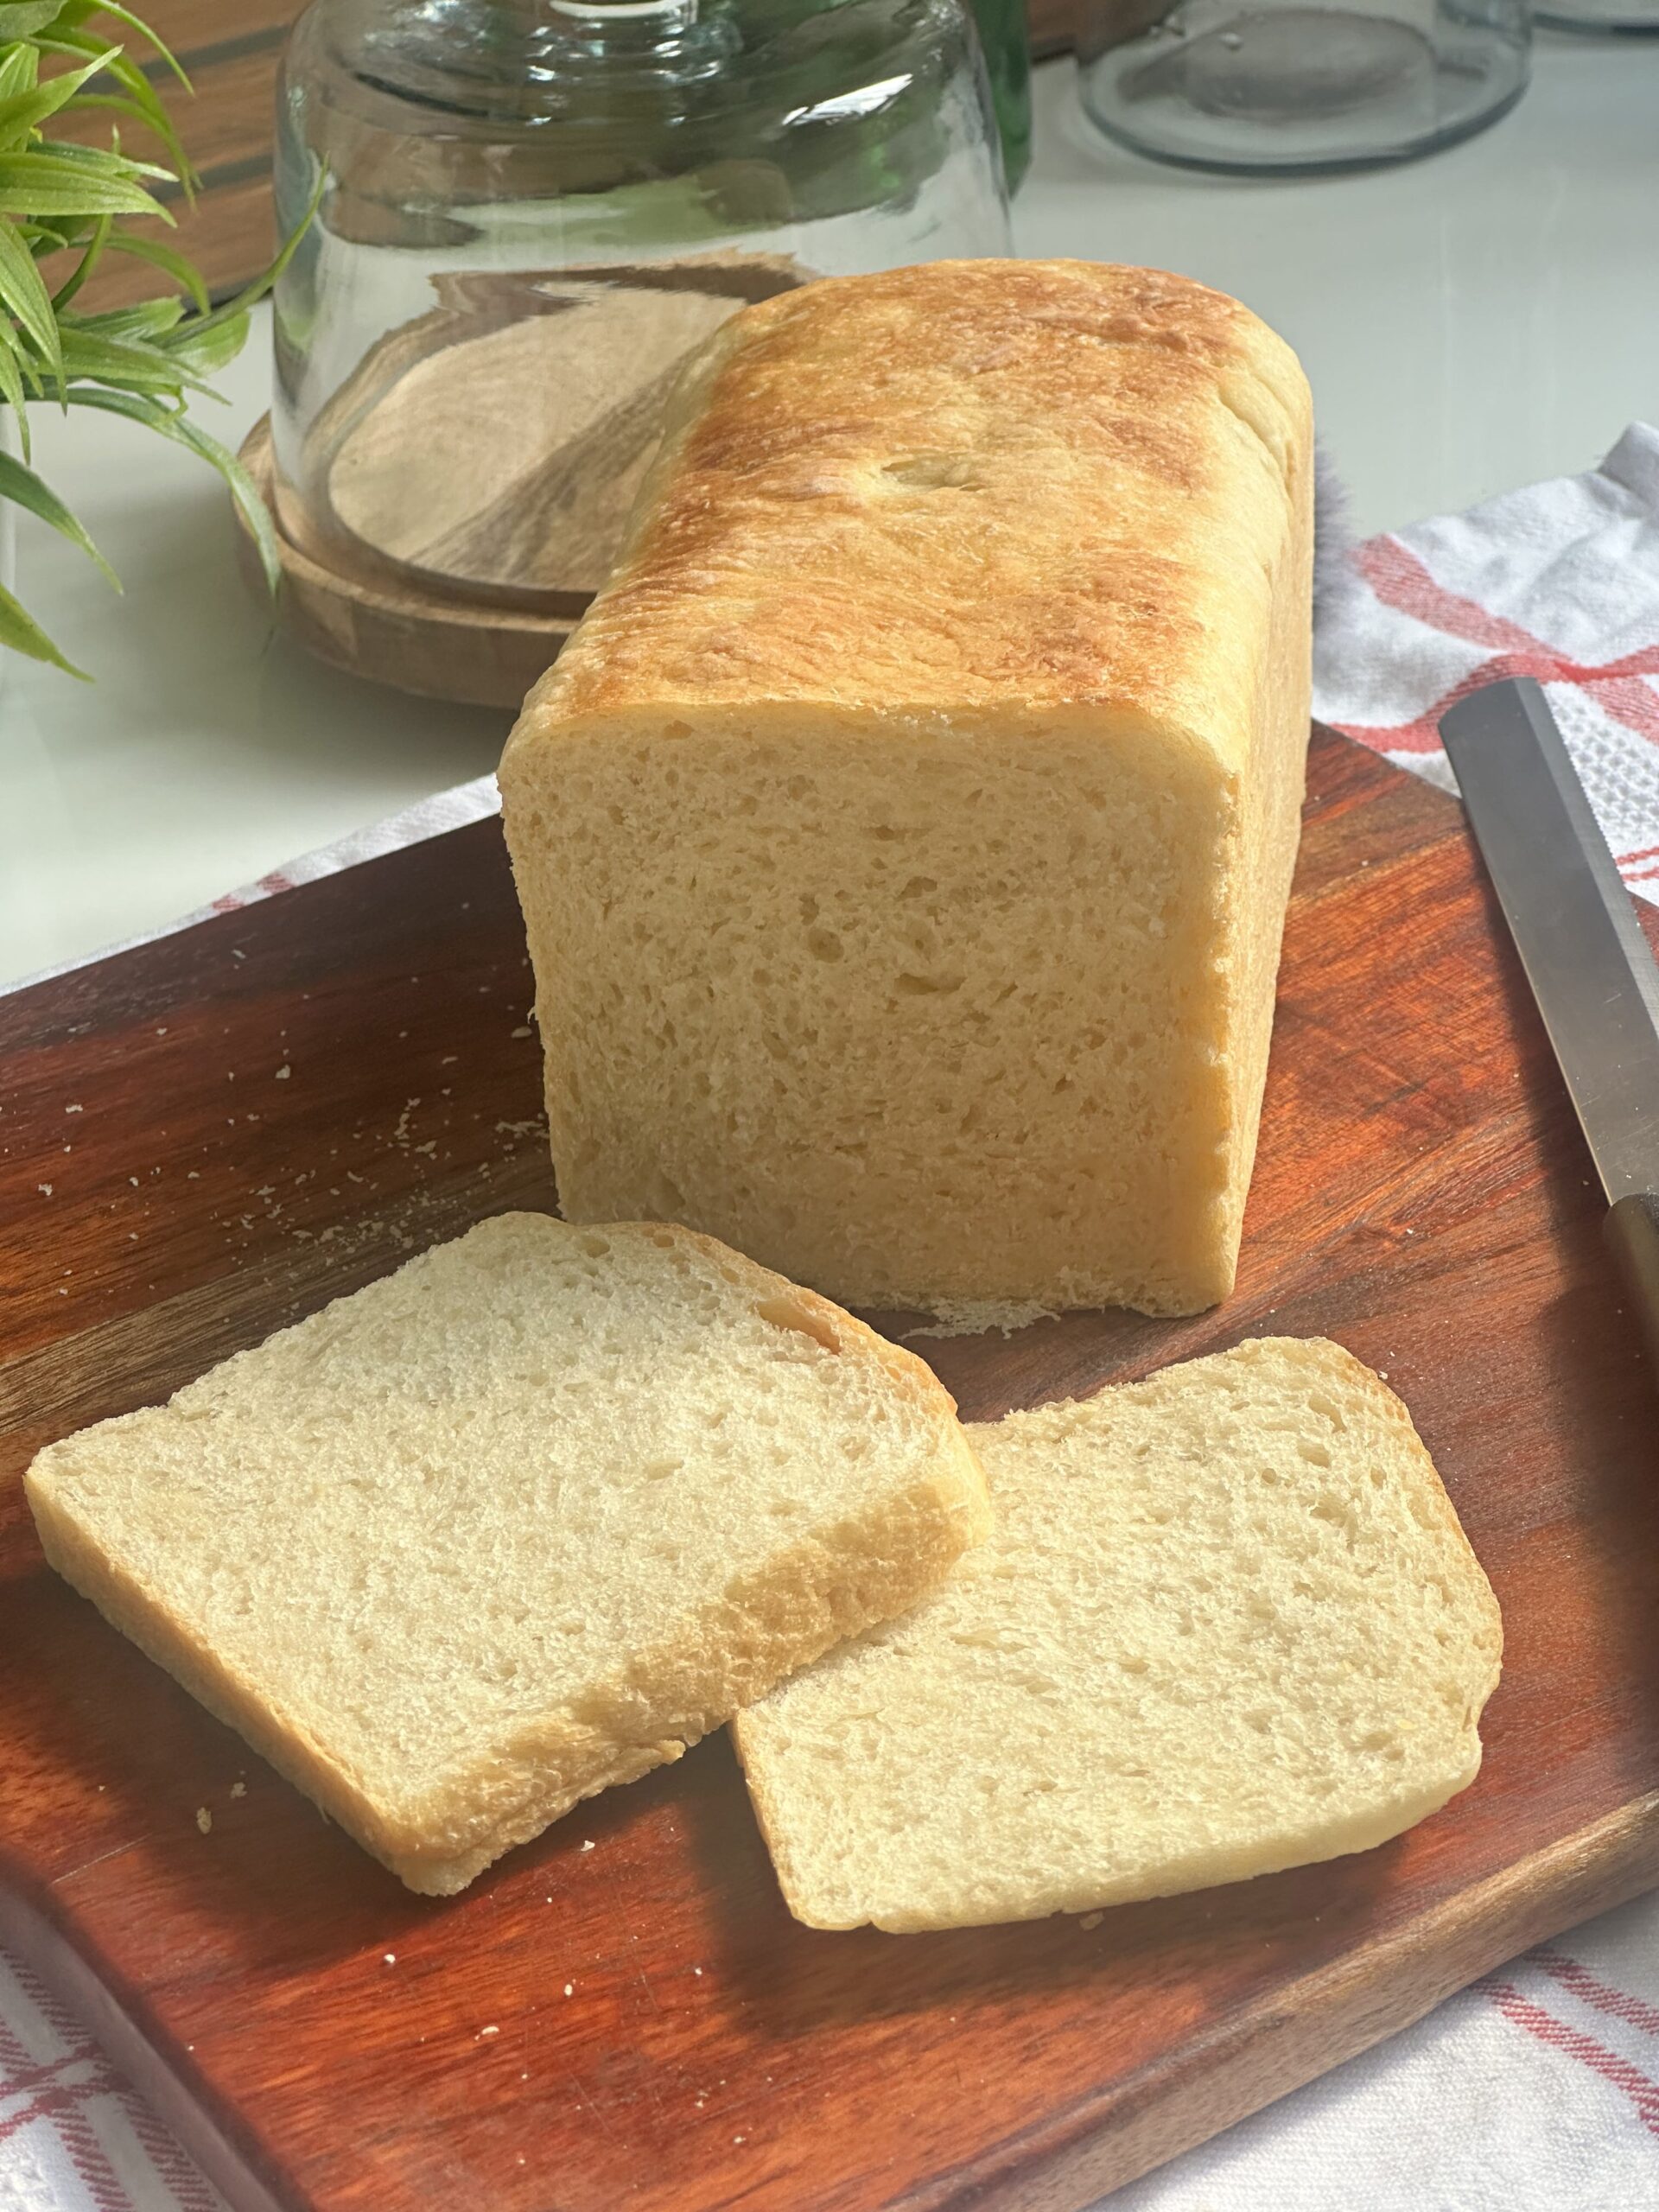
Remove the loaf from the pan immediately and let it cool completely on a wire rack before slicing. This helps maintain its structure and softness.
💡 Tips & Tricks
-
Use a spatula for mixing to avoid sticky hands.
-
Bread flour gives a better structure and softer crumb than all-purpose flour.
-
Warm, not hot liquids – hot milk/water will kill the yeast.
-
Don’t skip the overnight rest – this develops gluten naturally without kneading.
-
Butter vs oil? Butter gives your bread a richer flavor and aroma.
-
Cool completely before slicing – or the bread may become gummy.
📝 Notes
-
Yeast: I use instant yeast, which can be mixed directly with the dry ingredients.
-
Pan size: I use a 8.5 x 4.5 x 5 inch loaf pan, but anything close works.
-
Weather matters: In warmer climates (like Punjab!), the dough may rise faster, so keep an eye during the resting periods.
-
Optional lid: I use a loaf pan with a cover for a perfect rectangular shape, but this is purely optional.
-
Storing: Store in an airtight container for up to 3 days or slice and freeze for later use.
❤️ Why You’ll Love This Recipe
This bread is so soft, pillowy, and full of buttery aroma that you’ll keep coming back to it. It’s the kind of loaf that turns a simple toast into something special. And the best part? You didn’t knead a single bit. Just time, patience, and love.
So if you’ve ever been intimidated by bread making, this is your sign to try. Let the dough do the work – you just need to show up, bake, and enjoy that first warm slice with a pat of butter.
No-Knead White Bread Loaf (Overnight Version)
Ingredients
- 2 ¾ cups all-purpose flour (380 grams)
- 1/2 cup warm milk (105 grams)
- 3/4 cup warm water (165 grams)
- 1 teaspoon Instant yeast
- 1 tablespoon sugar
- 1 teaspoon salt
- 1 tablespoon butter
Instructions
- Warm milk and water to room temperature. Combine them together.
- Mix all the dry ingredients in a bowl. Whisk until everything is incorpoarted.
- Pour liquid into dry mix. Stir with spatula until combined.
- Spread softened butter over dough and fold gently.
- Cover with a cling sheet and refrigerate overnight.
- Next day: Take out of the fridge and rest at room temp for 30-40 minutes.
- Gently fold the dough once again, in the bowl itself.
- Cover and rest again for 30–45 min.
- Lightly flour surface, deflate and with the help of a rolling pin. Shape the dough into a loaf.
- Grease a 8.5 x 4.5 x 5 inch loaf pan. Shape and place dough inside.
- Let rise until it reaches the top (45–90 min), depending on how warm your kitchen is.
- Bake at 190°C for 35-40 minutes.
- Cool completely on wire rack before slicing.
Video