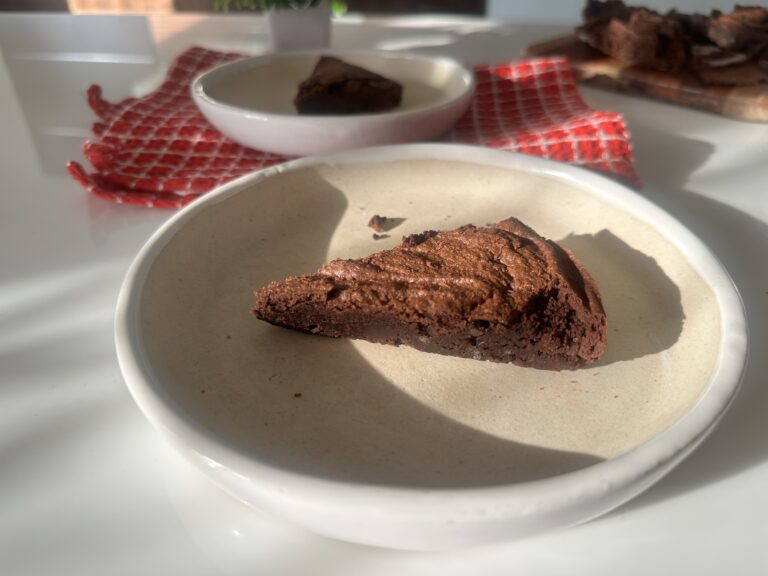
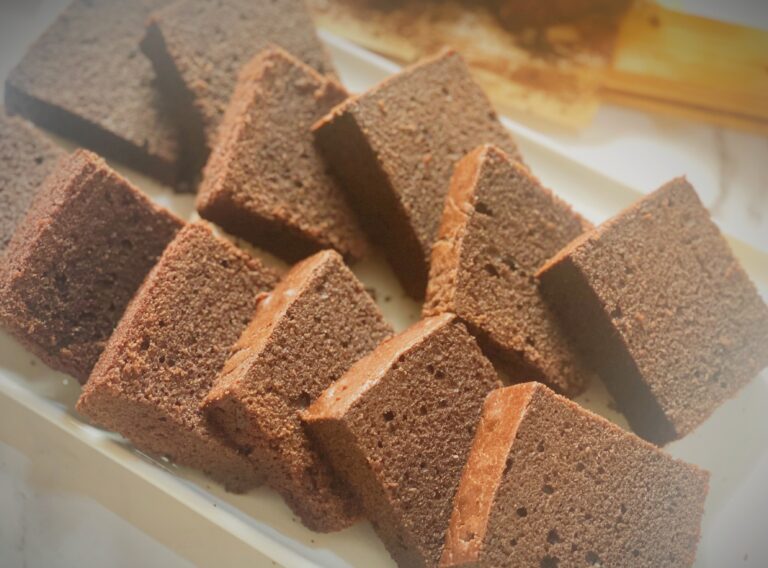
There’s something magical about the holiday season—it brings us together, fills our homes with warmth, and, of course, tempts us with the aroma of baked goodies. Pound cakes have always held a special place in my heart. Growing up, a simple pound cake was the highlight of our family tea-time gatherings. But this year, I wanted to give that timeless classic a holiday makeover, and what better way than with a pop of strawberry?
There’s something magical about Christmas baking. The kitchen fills with warmth, the scent of chocolate and butter wafts through the air, and suddenly, every worry melts away like marshmallows in hot cocoa. This year, I’m bringing you a recipe that combines the joy of childhood treats with the elegance of a festive dessert: Chocolate Rocky Road Cake.
Growing up, rocky road wasn’t just a snack—it was an adventure. Every bite felt like a treasure hunt, with hidden chunks of biscuits, gooey marshmallows, and the occasional surprise of nuts or dried fruits. For Bakemas 2024, I’ve taken this nostalgic favourite and elevated it into a showstopping cake that’s perfect for Christmas gatherings or cozy evenings by the fire.
Why This Cake is Perfect for Christmas
Christmas is all about indulgence, isn’t it? From feasting on rich desserts to unwrapping presents, it’s a season to savour every moment. This Chocolate Rocky Road Cake captures the spirit of the holidays with its layers of flavours and textures.
The soft, moist chocolate sponge feels like a warm hug on a chilly winter day. The rocky road topping, loaded with marshmallows, biscuits, and your choice of festive add-ins (think candied cherries or pistachios), is a nod to the season’s love for variety and abundance. And let’s not forget—it’s super easy to make, leaving you more time to sip on mulled wine or decorate your Christmas tree.
A Christmas Tradition Worth Starting
In my family, Christmas baking is as much about creating memories as it is about the treats themselves. I still remember my first attempt at rocky road as a child—it was a chaotic mess, with chocolate smudges everywhere and marshmallows mysteriously disappearing into my mouth. My mom pretended not to notice, and we ended up with the most imperfectly perfect rocky road bars that were devoured in minutes.
Fast-forward to today and Rocky Road is still a family favourite, but this cake takes it to the next level. It’s become a centrepiece for our Christmas Eve dessert table, and every year, my kids insist on adding their own “secret ingredient” to the Rocky Road layer.
Chocolate Rocky Road Cake
Ingredients
For the Cake
- 125 gram butter (melted)
- 100 ml vegetable oil
- 25 gram curd or yogurt
- 100 ml milk
- 2 tablespoons coffee granules dissolved ((cooled))
- 100 ml boiling water
- 2 eggs
- 225 grams sugar
- 200 grams all-purpose flour
- 1 & 1/2 teaspoon baking powder
- 50 grams cocoa powder
For the rocky road layer
- 150 grams biscuits ( (digestives or graham crackers))
- 100 grams butter (cubed)
- 200 grams dark chocolate (, chopped)
- 60` grams golden syrup
- 75 grams mini marshmallows
- Optional festive extras: candied cherries, pistachios, dried cranberries, salted popcorns, or anything of your choice
Instructions
1. Bake the Cake:
- Start by preheating your oven to 180°C and lining a 23cm cake tin with parchment paper.In a large mixing bowl, whisk together the melted butter, oil, yogurt, milk, coffee, and eggs. In a separate bowl, sift the dry ingredients—brown sugar, flour, cocoa powder, and baking powder. Slowly combine the wet and dry ingredients until you have a smooth, luscious batter.Pour it into your prepared tin and bake for 55-60 minutes. Pro tip: While it’s baking, blast your favorite Christmas playlist—it makes the process even merrier!
2. Create the Rocky Road Magic:
- While the cake cools, prepare the topping. Start by melting butter, chocolate, and golden syrup over low heat until glossy and smooth. Let it cool slightly (this helps avoid melting the marshmallows too much).In a large bowl, mix crushed biscuits, marshmallows, and your festive extras. Pour the slightly cooled chocolate mixture over the top and stir until everything is beautifully coated.
3. Assemble and Decorate:
- Spread the rocky road mixture evenly over the cooled cake. For extra flair, sprinkle some more marshmallows, candied cherries, or crushed nuts on top. Let it set at room temperature for two hours or pop it in the fridge for quicker results.
Video
The Joy of Sharing
One of the best things about this cake is how it brings people together. Whether you’re serving it at a holiday party, gifting it to a friend, or enjoying a slice with your family after decorating the Christmas tree, it’s a recipe that sparks joy.
This year, I’m planning to make two versions—one with classic rocky road toppings and another with a peppermint twist for the kids. What about you? How will you customize your rocky road topping?
Your Christmas Baking Companion
Bakemas 2024 is all about celebrating the joy of baking during the most wonderful time of the year. From simple recipes to elaborate showstoppers, I’ll be sharing treats that make your holiday season sweeter. So, grab your apron, whip up this Chocolate Rocky Road Cake, and let the festivities begin!
Don’t forget to share your creations with me on Instagram or YouTube—tag me @DeepaliOhri so I can see your festive bakes!
What are your favourite holiday baking memories? Let’s keep the conversation going in the comments below!
Happy Bakemas, and Merry Christmas! 🎄✨
Every year on December 9th, pastry lovers across the globe rejoice in the deliciousness of National Pastry Day. This day is dedicated to celebrating the artistry, history, and joy of one of the most beloved culinary creations – pastries! From flaky croissants to rich éclairs, pastries are the ultimate comfort food, delighting us with their perfect blend of buttery goodness and sweet or savoury flavours.
The History of National Pastry Day
While the origins of National Pastry Day are not officially documented, pastries themselves have a rich and flavorful history. The word “pastry” originates from the French term pâtisserie, encompassing a range of baked goods made with flour, water, and butter. Pastries trace their roots back to ancient civilizations. Egyptians made early forms of puff pastry, while Greeks and Romans refined the craft with their layered doughs, creating phyllo.
During the Middle Ages, pastry-making became an esteemed art form in Europe. With the introduction of sugar, a wide variety of sweet pastries emerged, revolutionizing the culinary world. Today, pastry-making is both a science and an art, with chefs around the world pushing the boundaries of creativity.
National Pastry Day is not just about indulging in treats; it’s also a day to honor the skill and dedication of bakers who craft these masterpieces.
Types of Pastries to Celebrate
Pastries come in an incredible variety, each with its own unique taste, texture, and story. Here’s a delicious lineup of pastry categories and popular examples:
1. Puff Pastry
Known for its flaky, layered texture, puff pastry is a classic favorite. Made by folding layers of butter into dough, this pastry is versatile and used in both sweet and savory recipes.
- Examples: Croissants, Palmiers, Vol-au-vents
2. Shortcrust Pastry
A crumbly and buttery pastry often used as a base for tarts and pies. It’s made by blending fat into flour, resulting in a tender crust.
- Examples: Fruit Tarts, Quiches, Lemon Meringue Pie
3. Choux Pastry
This light, airy dough is cooked before baking, creating a hollow pastry that can be filled with cream or custard. It’s a staple in French pâtisseries.
- Examples: Éclairs, Profiteroles, Cream Puffs
4. Filo Pastry (Phyllo)
Paper-thin layers of dough used to create crisp, multi-layered pastries. Filo is often brushed with butter or oil before baking for a golden, crunchy finish.
- Examples: Baklava, Spanakopita, Börek
5. Danish Pastry
This yeast-leavened dough is enriched with butter and sugar, resulting in a flaky, sweet pastry that’s often topped with fruit, custard, or icing.
- Examples: Cheese Danish, Cinnamon Swirls
6. Pâte Sucrée (Sweet Pastry)
A rich, sweetened dough that’s perfect for delicate desserts. It holds its shape well, making it ideal for intricate tart designs.
- Examples: Chocolate Tarts, Frangipane Tarts
7. Rough Puff Pastry
A simpler version of puff pastry, rough puff is quicker to make but still delivers layers of flaky goodness.
- Examples: Sausage Rolls, Apple Turnovers
8. Strudel Dough
A thin, elastic dough that’s stretched by hand to create a delicate wrap for fillings like apples or nuts.
- Examples: Apple Strudel, Cherry Strudel
How to Celebrate National Pastry Day
- Bake Your Favorite Pastry: Channel your inner baker and create your own flaky masterpiece. Whether it’s croissants or a classic apple pie, there’s nothing more satisfying than homemade pastries.
- Support Your Local Bakery: Visit a local pâtisserie or bakery and treat yourself to their finest offerings. Celebrate the skill and artistry of your local bakers!
- Host a Pastry Party: Gather friends and family for a pastry tasting. Create a spread of different types of pastries to sample and share.
- Learn the Art of Pastry: Enroll in a pastry-making workshop or watch online tutorials to master new techniques.
- Share the Love Online: Post pictures of your pastry creations or your favorite bakery treats on social media using #NationalPastryDay.
Did You Know? Fun Facts About Pastries
- The croissant wasn’t invented in France! Its origins trace back to Austria, where it was known as the kipferl.
- The world’s largest éclair, made in France in 2019, measured over 503 feet!
- Napoleon pastry, also known as mille-feuille, means “a thousand layers” in French.
- Puff pastry can have as many as 729 layers if folded properly!
Whether you’re a pastry pro or someone who simply enjoys indulging in sweet treats, National Pastry Day is the perfect excuse to savor the magic of these buttery, flaky delights. So, grab a pastry, pour yourself a cup of tea or coffee, and celebrate this delicious day with joy!
What’s your favorite pastry? Let me know in the comments below!
There’s something magical about a warm Apple Crisp fresh out of the oven. It’s a dessert that wraps you in comfort and nostalgia, perfect for cosy fall evenings or festive gatherings. Whether paired with vanilla ice cream or whipped cream, this recipe promises to be a crowd-pleaser.
Who doesn’t love a decadent chocolate mud cake? But what if you could take it up a notch by making it tall, rich, and fudgy? This cake is not just a dessert; it’s a statement piece that’s perfect for birthdays, anniversaries, or even a weekend treat to indulge your chocolate cravings.
In this blog, I’m sharing my foolproof recipe for a Tall Chocolate Mud Cake that is soft, moist, and loaded with chocolatey goodness. Whether you’re a seasoned baker or just starting out, this step-by-step guide will help you create a stunning cake that looks and tastes like it’s come straight from a bakery.
Transform Your Baking This Season with These Must-Try Ingredients
Fall and winter bring a magical shift to our kitchens, filling them with the scents of warm spices, rich flavours, and cosy indulgence. If you’re ready to elevate your bakes this season, it’s time to explore the trending ingredients that are captivating the world of desserts. From aromatic spices to innovative flours and beyond, these ingredients will infuse your treats with the perfect seasonal touch.
There’s something truly comforting about baking a cake from scratch, especially when it’s a rich, chocolatey treat like this Almond Flour Chocolate Cake. This recipe is a great way to enjoy a guilt-free dessert that’s both gluten-free and eggless. The combination of almond flour and coconut sugar gives it a slightly nutty, caramelized flavour, and the smooth chocolate ganache topping takes it to another level. This cake will hit the spot if you’re craving something indulgent yet wholesome.
Welcome back to my kitchen! Today, I’m excited to share a recipe that combines the richness of dark chocolate with the tartness of cherries—Dark Chocolate Cherry Cake. This indulgent treat is perfect for any occasion and is sure to impress your family and friends.
Why You’ll Love This Cake
This cake is a beautiful marriage of flavors. The dark chocolate provides a deep, rich base, while the cherries add a burst of freshness and a slight tartness. The whipped white chocolate ganache topping adds a light and airy contrast, making each bite a delightful experience. Plus, the cherry mixture not only enhances the cake’s flavor but also makes it visually stunning.
A Little Story from My Kitchen
This Dark Chocolate Cherry Cake holds a special place in my heart. I first made it for my son’s birthday, and it was an instant hit. The combination of dark chocolate and cherries reminded us of the traditional Black Forest cake, but with a modern twist. Every time I bake this cake, it brings back memories of that joyous celebration, filled with laughter and delicious food.
Fun Facts About Cherries
Did you know that cherries are not only delicious but also packed with nutrients? They are a great source of vitamins A and C, fiber, and antioxidants. Cherries have been linked to numerous health benefits, including reducing inflammation, improving sleep quality, and even aiding in muscle recovery. When in season, fresh cherries are a wonderful addition to desserts, salads, and even savoury dishes.
Chocolate Cherry Cake
Ingredients
For Cherry Sauce
- 650-700 grams of Fresh Cherries
- 1/3 cup sugar ((65 grams))
- 1 tablespoon cornstarch/cornflour
- 2 tablespoons of any liquor (vodka/gin/rum)
For Cake:
- 1 & 1/2 cup butter ((340 grams))
- 1 & 2/3 cups Caster sugar ( (350 grams))
- 1 & 1/2 cup cake flour ((180 grams))
- 3/4 teaspoon baking soda
- 1/2 teaspoon salt
- 1/2 cup cocoa powder ((50 grams))
- 1/2 cup hot water
- 1/2 cup yoghurt/ sour cream/curd/buttermilk
- 85 grams of semi-sweet or bitter-sweet chocolate
- 4 eggs
- 2 teaspoons vanilla extract
Instructions
Step 1: Make the Cherry Mixture
- Combine Ingredients: In a medium saucepan, combine 1.5 pounds of cherries, 1/3 cup of sugar, 1 tablespoon of cornstarch, and 2 tablespoons of any liquor (if using).
- Cook: Cook over medium-high heat, stirring occasionally. Bring the mixture to a boil to activate the cornstarch and thicken the sauce. This should take about 4 minutes.
- Cool: Once thickened, remove from heat and let it cool. This mixture will be used both in the cake batter and as a topping.
Step 2: Prepare the Cake Batter
- Preheat Oven: Preheat your oven to 350°F (175°C). Line a 9x13-inch baking pan with parchment paper, butter it, and dust with cocoa powder
- Mix Dry Ingredients: In a bowl, whisk together 1.5 cups of cake flour, 3/4 teaspoon of baking soda, and 1/2 teaspoon of kosher salt.
- Cream Butter and Sugar: In a large mixing bowl, beat 3 sticks of unsalted butter with 1 2/3 cups of sugar until light and fluffy. This should take about 3-5 minutes.
- Add Eggs: Add 4 eggs one at a time, beating well after each addition. Then, add 2 teaspoons of pure vanilla extract.
- Combine Mixtures: Gradually add the dry ingredients to the butter mixture in three parts, alternating with the chocolate mixture in two parts, beginning and ending with the dry ingredients. Mix until just combined.
- Fold in Cherry Mixture: Fold in 1.25 cups of the cooled cherry mixture into the batter until evenly distributed.
Step 3: Bake the Cake
- Transfer to Pan: Pour the batter into the prepared pan, smoothing the top with a spatula.
- Bake: Bake for about 45-50 minutes, or until a cake tester inserted into the center comes out clean or with a few moist crumbs.
- Cool: Let the cake cool in the pan for 10 minutes, then transfer to a wire rack to cool completely.
Step 4: Add the Toppings
- Whipped Cream or any other frosting of your choice: Once the cake is cool, spread a generous layer of whipped cream over the top. I used whipped white chocolate ganache.
- Cherry Topping: Spoon the remaining cherry mixture over the whipped cream, spreading it evenly.
- Serve and Enjoy!This Dark Chocolate Cherry Cake is best served fresh, with each slice offering a perfect blend of rich chocolate, tart cherries, and creamy whipped topping.
Video
Notes
Tips and Tricks for the Perfect Cake
- You can Use Frozen Cherries: If fresh cherries are not in season, frozen cherries work perfectly for this recipe. Just make sure to defrost them before cooking.
- Vodka Substitute: If you don't have vodka on hand, you can use Kirsch or simply omit the alcohol. Kirsch enhances the cherry flavor, but the cake will still be delicious without it.
- Room Temperature Ingredients: Ensure that your butter and eggs are at room temperature before you start. This helps in achieving a smooth and well-mixed batter.
- Whisking Cocoa Powder: When mixing the cocoa powder with hot water, make sure there are no lumps for a smooth, chocolatey paste.
Bread pudding has humble beginnings dating back to 13th century England, where it was known as “poor man’s pudding.” Originally, it was made from stale leftover bread moistened with water and sweetened with sugar and spices. Over the centuries, this simple dessert evolved into a rich, creamy treat that’s now found on the dessert menus of fine restaurants.
Today, bread pudding is made with a variety of breads like brioche, challah, croissant, and panettone, soaked in a luscious custard made from cream, eggs, sugar, and vanilla. It’s no longer a “poor man’s pudding” but a decadent dessert that everyone loves.
Fun Facts about Bread Pudding:
- Historical Roots: Bread pudding has been enjoyed for centuries and was originally made to avoid wasting stale bread.
- Versatile Dessert: It can be made with a variety of breads and customized with different fruits, nuts, and even chocolate.
- Comfort Food: Bread pudding is a popular comfort food in many cultures, enjoyed warm with a variety of sauces.
I hope this bread pudding recipe brings as much warmth and joy to your home as it does to mine. Happy baking, and don’t forget to share your creations with me on social media!
Taking Bread Pudding to the Next Level
Making bread pudding at home is a breeze, and the possibilities for customization are endless! Here’s a recipe to get you started, along with some tips and tricks to elevate your bread pudding game:
Homemade Bread Pudding Recipe with Decadent Vanilla Sauce
Ingredients
- 10 cups bread cubes, cut into bite-sized pieces ((Bread Choices: French, Brioche, Challah, Croissant, Italian, Panettone or whatever you have ))
- 1 cup raisins
For Custard:
- 4 eggs
- 1 cup sugar ((200 grams))
- 1 1/2 teaspoons vanilla extract
- 1/2 teaspoon cinnamon powder
- 4 tablespoons butter ((57 grams))
- 4 cups combination of Milk & Cream ((960 ml))
For the Vanilla Sauce (Optional):
- 1 cup milk ((240ml))
- 1 cup heavy cream ((240ml))
- ½ cup packed light brown sugar ((110g))
- 2 tablespoons butter
- 2 tablespoons cornstarch
- 1 tablespoon vanilla extract Salt (to taste, optional)
Instructions
- Preheat oven to 150 degrees C and place a rack in the center. Lightly grease with butter or spray a 9 x 13 x 2 inch (23 x 33 x 5 cm) heat-proof baking dish.
- Place the baking dish into a larger roasting pan that has enough room around its sides to fill with water.
- Place the bread cubes and raisins (if using) in the baking dish.
- In an electric mixer (or with a hand mixer), beat the eggs and sugar on high speed until thick and lemon colored (about 4-5 minutes). Beat in the vanilla extract and ground cinnamon. Then beat in the melted and cooled butter and combination of milk & cream.
- Carefully pour (or ladle) the prepared custard over the bread cubes until completely covered. Press down the bread cubes so they are covered with the custard.
- Prepare a water bath. (A water bath is used to provide temperature protection for the egg custard.) Carefully pour in enough hot water so that the water is halfway up the sides of the 9 x 13 inch baking pan. Bake for about 1 hour or until a toothpick inserted in the center comes out clean. Another way to judge whether the pudding is fully baked, is to gently press down on the center of the pudding. If any custard comes up to the top, the pudding needs to be baked a little longer.
- Remove the bread pudding from the water bath and cool slightly before serving.
- Can be served warm or cold with a dusting of confectioners' sugar and a dollop of softly whipped cream or vanilla ice cream.
For the Sauce
- Gather your ingredients and grab a medium saucepan. Combine the milk, cream, sugar, and butter. Turn your stovetop heat to medium.
- As the mixture heats, keep an eye on it and stir occasionally. We want the butter and sugar to melt completely, and the mixture to start steaming – a sign it's getting happy and ready for the next step.
- While the milk mixture works its magic, let's create our thickening agent. In a separate bowl, whisk together the cornstarch with ¼ cup of water. If you're feeling adventurous, swap the water for bourbon or rum for a boozy twist!
- Once the milk mixture is steaming, slowly whisk in the cornstarch mixture. Here comes the important part: keep stirring constantly! This ensures the sauce thickens evenly and smoothly. You'll know it's ready when the sauce reaches a nice, nappe consistency – that means when you spoon some sauce, it coats the back of the spoon without being runny.
- Remove the pan from the heat and stir in the vanilla extract. If you choose to add a touch of rum, now's the time!
- Pour some of this delightful sauce over your warm bread pudding, and don't forget to serve the rest on the side for extra drizzling fun!
Video
Notes
- Use Stale Bread: Dry, stale bread soaks up the custard best. If you don’t have stale bread, leave it out overnight or bake it at 250°F for 10 minutes.
- Soaking Time: Allow the bread to soak in the custard for 20-30 minutes before baking for a fluffier and creamier texture.
- Scaling the Recipe: This recipe can easily be scaled. For larger crowds, double the recipe and bake in a 9x13 inch pan, adding 5-10 minutes to the baking time.
- Freezing Option: Make a double batch and freeze one. After baking and cooling, wrap tightly in plastic wrap and foil. Freeze for up to 2 months.
- Mix-in Options: Customize with toasted pecans, coconut, raisins, or chocolate chips. Any fruit or nut will be delicious!
- Brandy Sauce Variation: Add brandy, rum, or bourbon to the sauce after it has thickened for a flavorful twist.
Granola: that delightful mix of crunchy oats, nuts, seeds, and sweetness that makes breakfast a joy. But did you know this breakfast staple has a surprisingly long history? In the 1800s, a health-conscious fella named John Kellogg developed granola as a way to promote a healthy lifestyle. Talk about starting a trend!